If you’re an avid Apple Music user, chances are you’ve encountered the frustrating issue of duplicate songs in your library. This issue can be caused by a variety of factors, from syncing issues to importing songs from different sources. Whatever the cause, duplicate songs can clutter your library and make it difficult to find the music you want to listen to.
Fortunately, there are several ways to tackle the problem of duplicate songs in Apple Music. In this blog, we’ll discuss some of the most effective methods for identifying and removing duplicate tracks from your library.
Part 1: Why Does Apple Music Have Duplicate Songs?
There could be several reasons why Apple Music might have duplicate songs in its library.
Firstly, it is possible that the duplicates are a result of different versions of the same song. For example, a song might have been released in different countries or on different albums, resulting in multiple versions of the same track. In some cases, these versions might have slightly different titles, album art, or even slight variations in the audio itself.
Secondly, it’s possible that the duplicate songs are the result of a glitch or error in Apple Music’s metadata or database. This could cause the system to mistakenly identify different songs as identical, resulting in duplicates being added to the library.
Lastly, users can accidentally add the same song multiple times to their personal music library, which can result in duplicate songs appearing in their playlists or on their devices. If you are experiencing an issue with duplicate songs in your Apple Music library, you can try removing the duplicates manually or contact Apple Music support for assistance.

Part 2: How to Find Duplicates in Apple Music
Deleting a song from your library will also remove it from any playlists that contain it. Additionally, be sure to make a backup of your library before deleting any files, just in case you accidentally delete a song you want to keep. To find and remove duplicate songs in your Apple Music library, you can follow these steps:
Method 1: Use Apple’s built-in duplicate finder
Apple Music has a built-in tool that can help you identify and remove duplicate songs from your library. Here’s how to use it:
- Open the Apple Music app on your device and go to your library.
- Click on the “Songs” tab to see all of the songs in your library.
- From the “View” menu, select “Show Duplicate Items.”
- Apple Music will then show you a list of all the duplicate songs in your library.
- Select the songs you want to remove, right-click and then click “Delete.”
Method 2: Use a third-party app
If the built-in tool doesn’t work for you, there are several third-party apps available that can help you find and remove duplicate songs. Some of the most popular options include Tune Sweeper, Duplicate Music Fixer, and Mac Cleaner.
To use these apps, simply download and install them on your device, open them, and follow the on-screen instructions to scan your library for duplicate tracks. Once the scan is complete, you’ll be able to select the duplicate songs you want to remove and delete them with a few clicks.
Method 3: Manually search for duplicates
If you prefer a more hands-on approach, you can manually search for duplicate songs in your library. Here’s how:
- Open the Apple Music app on your device and go to your library.
- Click on the “Songs” tab to see all of the songs in your library.
- Sort your songs by “Name” and “Time” to help identify duplicates.
- Scroll through your library and look for songs with identical names and lengths.
- If you find a duplicate, select it and then click “Delete” to remove it from your library.

Part 3: How to Decide Which Version to Delete
If you have multiple versions of the same song in your Apple Music library and you’re not sure which one to delete, here are some things to consider:
- Audio quality: If one version of the song has better sound quality than the other, you may want to keep the higher-quality version and delete the lower-quality one.
- Album or release date: If the different versions of the song come from different albums or release dates, you may want to keep the version that matches the album or date you prefer.
- Artist or composer: If you’re a big fan of the artist or composer and want to have a complete collection of their work, you may want to keep all versions of the song.
- Personal preference: Ultimately, the decision of which version to delete may come down to your personal preference. Listen to both versions and decide which one you like better or listen to more frequently.
Once you’ve decided which version to delete, you can follow the steps I provided in my previous answer to remove the duplicate from your library.
Part 4: Remove Duplicate Music from Mac with Mac Cleaner
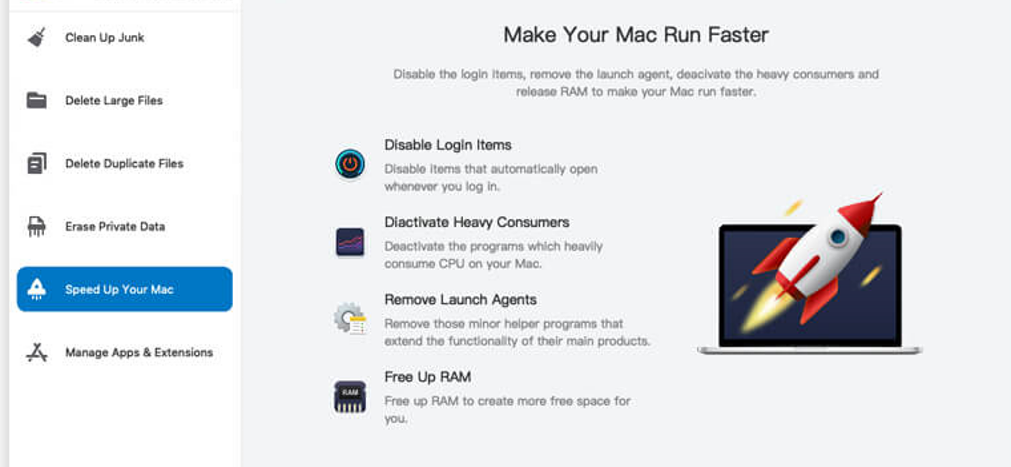
If you want to use Mac Cleaner, a modular software designed for deleting unnecessary files from your computer, including private data such as Finder traces like the Recents list, here are the instructions. Mac Cleaner is a third-party software that can help you remove duplicate music from your Mac. Here are the steps you can follow:
Step #1: Set Up Mac Cleaner on Your Computer
To set up Mac Cleaner on your computer, first, launch a web browser and navigate to the Mac Cleaner download site. Click on the “Download Now” button to save the DMG file, and then run the installer by opening the downloaded file. Follow the on-screen instructions to complete the installation process. Once the installation is finished, the software will launch automatically.

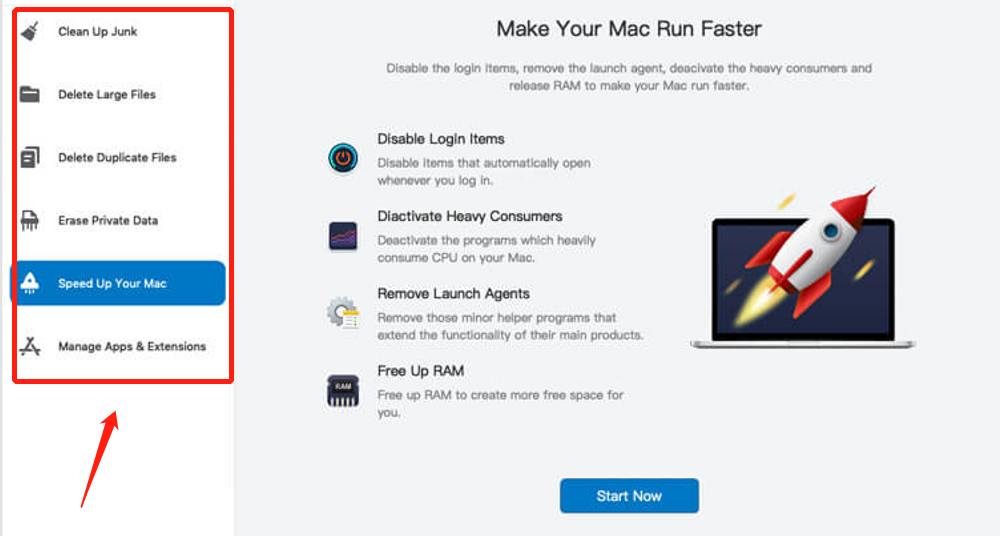
Step #2: Pick From Six Different Modules
On the left-hand side of the software’s interface, you will see six different options, each corresponding to a module that Mac Cleaner provides. These modules are (1) Clean Up Junk, (2) Delete Large Files, (3) Delete Duplicate Files, (4) Erase Private Data, (5) Speed Up Your Mac, and (6) Manage Apps & Extensions. Select the type of file you want to scan for duplicates. In this case, select “Music.”

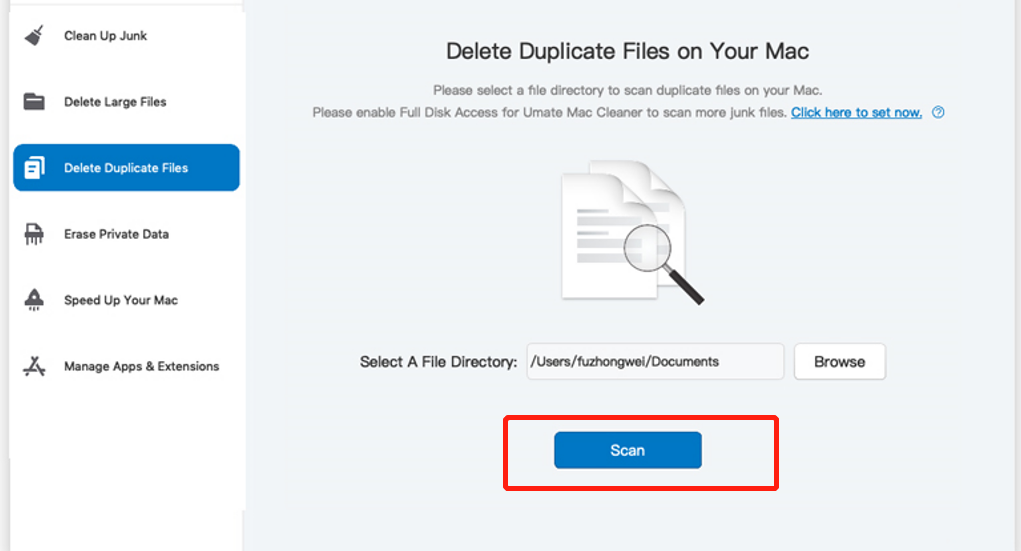
Step #3: Click Scan
When you select the module, you’ll see blocks of text in the center of the software explaining how the module works and its features, which you can read more about in the earlier section. Click the “Scan” button to start scanning your Mac for duplicate music files.

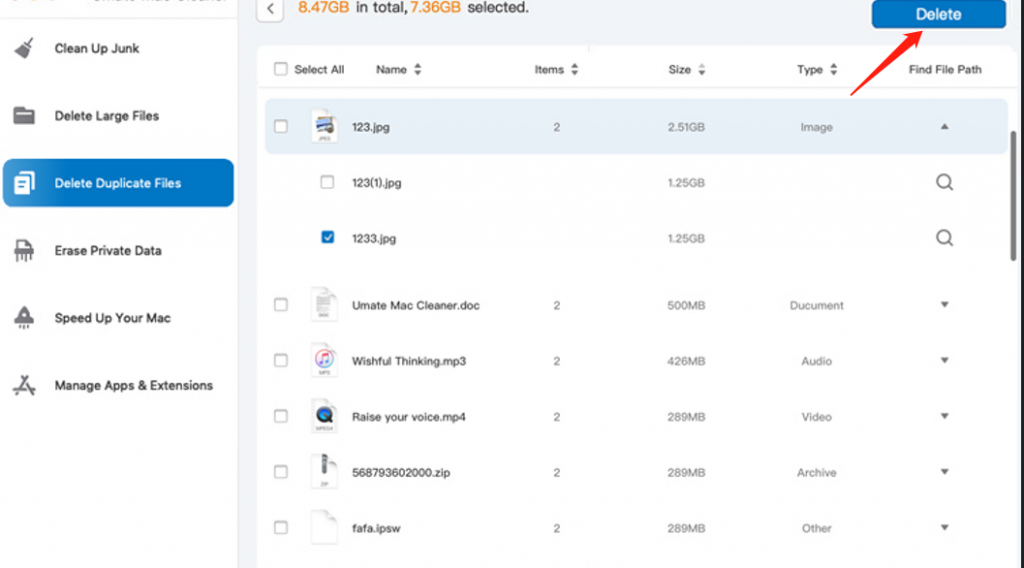
Step #4: Delete the File/s
Confirm that you want to delete the selected duplicates. Note that before deleting any files, it’s a good idea to make a backup of your music library to avoid accidentally deleting any files you want to keep. Additionally, be sure to review the list of duplicates carefully before deleting them to avoid accidentally removing any important files.

Final thoughts
Dealing with duplicate songs in Apple Music can be a frustrating experience, but it’s a problem that can be easily solved with a little bit of effort. Whether you choose to use Apple’s built-in tool, a third-party app, or a manual search, the key is to be diligent and persistent in your efforts. By following these tips, you can quickly clean up your music library and get back to enjoying your favorite tunes with ease. Say goodbye to cluttered music libraries with our guide on removing Apple Music duplicate songs. Streamline your listening experience today!
Latest Articles