

There are a ton of files that might be consuming space on your macOS computer. These include documents, videos, images, songs, and archives. Some of these file types are larger than others and it’s advisable to keep their numbers at the minimum. A single archive, for example, may consume up to 10GB of your disk space. However, among these files, perhaps the largest type is disk images. They have a size of over 10GB and have no limit to their file size. Some may even be as large as 100GB.
The good news is they aren’t always necessary, and in that case, it should be alright to delete them. Now, the question is, “Can I delete disk images on Mac?” To answer that question, you must first understand what disk images are and how they work.
Part 1: What Are Disk Images?
Disk images are files that contain the contents of the entirety of your storage drive. They have all the files and folders they had when the disk image was created. For example, if your storage drive has files and folders that makeup 100GB worth of storage space when you create a disk image of that drive, the disk image will have around the same file size.
It’s usually used for creating backups of a storage disk in case the drive encounters an error or suffers from data loss. That’s why you may find a single file with a size of over 10GB despite not being usable. These disk images are usually encrypted since the interface would typically ask you if you want to encrypt or password protect the file when you’re in the process of creating the disk image. It’s worth noting that disk images compress your files, so their size is usually smaller. So, a disk image for a 100GB storage drive might have a size of around 80 to 90GB, around 10 to 20% less than the size of the storage drive.

Part 2: Can I Delete Disk Images on Mac?
“Can I delete disk images on Mac?” The answer to that question may vary depending on the disk image. If it’s not password protected or encrypted, then yes, you can definitely delete the disk image without any issue. But keep in mind that when you do delete it, the system may permanently delete it rather than just moving it into your Trash. That’s because the Trash directory has a limited storage capacity, so when you delete a file with a relatively large size, the Trash won’t be able to accommodate the file.
However, if it’s protected, you may need to enter the password to remove the encryption. In short, it’ll depend on the state of the disk image. With that in mind, here’s how you can delete disk images on Mac.
Method #1: Move to Trash
The simplest method to delete disk images is to simply press the Delete key on your keyboard or drag it to the Trash bin. But this method will only work if the disk image is unprotected. Regardless, here’s what you need to do to delete disk images:
- Open the Finder app on your computer.
- At the left sidebar of the app, you’ll notice that there are different volumes. Your main drive and other volumes that might be plugged into your computer. One of these should be the disk image. Find the one you want to delete.
- Drag its icon and drop it into the Trash icon.
In addition to not working on protected disk images, this method also wouldn’t work if the disk image is hidden and cannot be found in the list of volumes. In that case, you may have to use the second method.

Method #2: Utilize Disk Utility
The second method involves using Disk Utility, a utility feature in macOS computers that allow you to manage disks and volumes on your computer. Coincidentally, it has a feature that can delete the disk image you want to delete. Furthermore, you don’t have to find the disk image yourself, since the Disk Utility app is able to detect disk images, so it’ll execute operations on it, such as deletion, without even knowing where the disk image is. Here’s what you need to do to pull this off:
- Open Finder on your computer.
- Click Applications from the left sidebar.
- Find and open the Utilities folder.
- Locate and double-click the Disk Utility icon.
- Once in the Disk Utility, find the name of the disk image from the left sidebar.
- Select that disk image.
- Click the Remove button which should be the minus icon (—).
- Select Remove to confirm your action when a popup window appears.

Method #3: Try Mac Cleaner
If you try to use the aforementioned methods, you may encounter an error message telling you that you cannot delete the disk images due to encryption. If it’s not because of encryption, it might be something else. Either way, there are limits to what you can do with traditional methods alone. That’s why for this method, you won’t be relying on the built-in features of your macOS computer. Rather, you’ll use third-party software that should be able to get rid of the disk images once and for all.
Mac Cleaner is a cleaning app that can help delete unnecessary files from your computer. It can delete all sorts of files, such as duplicates, virus-infested files, and most importantly, disk images. Below are the steps to use the software:
Step #1: Download, Install, and Open Mac Cleaner
If you want to delete disk images using the software, you obviously need to get the software first. To do so, click this link. It should take you to the Mac Cleaner download site where you’ll find a Download Now button. Click that button to download a DMG file. Once it’s complete, open the DMG file to run the installer. Follow the onscreen instructions from that point onwards. The software should open automatically once the installation is complete.

Step #2: Select Clean up Junk
On the left side of the interface, you’ll find a sidebar consisting of six items. These items correspond to the six modules the software currently has. These include (1) Clean Up Junk, (2) Delete Large Files, (3) Delete Duplicate Files, (4) Erase Private Data, (5) Speed Up Your Mac, and (6) Manage Apps & Extensions. Since your goal is to simply delete the disk images on your macOS computer, you’ll only need the help of Clean Up Junk. It’s the module that allows you to delete junk files, including system cache, app cache, and most importantly, unused disk images. Select the module by clicking on it from the left sidebar.
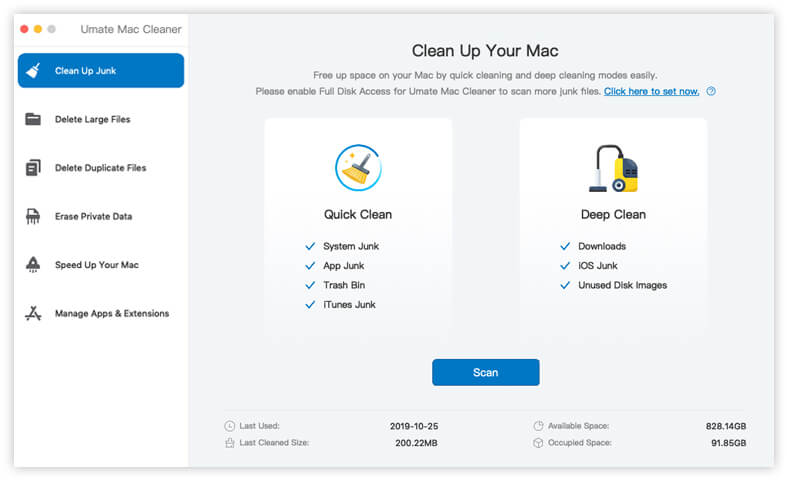
Step #3: Click the Scan Button
Upon selecting the module, the software will split into two parts. The left side says Quick Clean while the right side says Deep Clean. Quick Clean allows you to scan and delete the following file categories: System Junk, App Junk, Trash Bin, and iTunes Junk. Meanwhile, Deep Clean scans for those in addition to the following: Downloads, iOS Junk, and Unused Disk Images. You must select Deep Clean since it’s the option that can scan for Unused Disk Images. Click Scan once you select the option.
Step #4: Choose a File Category and File/s
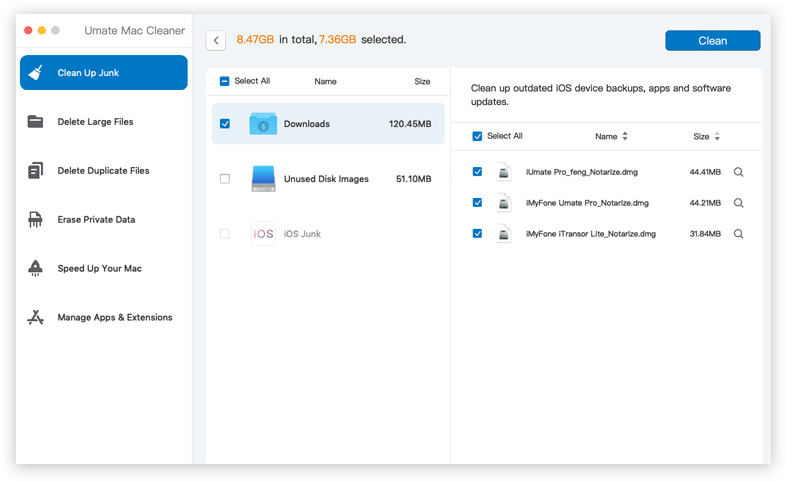
The scan may take a few minutes to complete. Once it’s done, you’ll be taken to the next page where you’ll find a list of items on the left side of the interface. These items are the file categories, such as System Junk, Downloads, Trash Bin, and Unused Disk Images, to name a few. Select Unused Disk Images since that’s your target. Upon selecting a category, a new list will appear on the right side of the interface. That’s where you’ll find the files that belong to the selected category. Select the disk images you want to delete by clicking on their corresponding checkboxes. You can also click Select All if you want to include all items.

Step #5: Delete the File/s
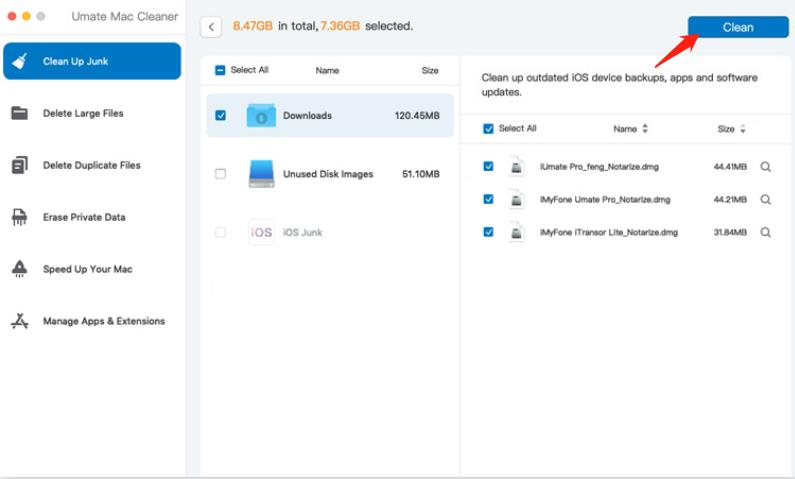
To finalize the process, you must click the blue button at the upper right corner of the window which should say Clean. That should initiate the deletion process which should take at most a few minutes, so you may have to wait for a while.
As you can see, you don’t have to find the disk images yourself to delete them. Rather, you can automatically find them using Mac Cleaner. Furthermore, if they’re encrypted or password-protected, you don’t have to disable the encryption or password protection. You can delete them as is as long as you have this tool. That’s why this is the easiest method to use.
Takeaways
Disk images are files that contain a copy of your storage drive. If the storage disk it’s based on has a lot of files, then it should have a relatively large size, ranging from 10GB to 100GB, or more. Due to its size, experts suggest deleting the disk images you no longer need. Though finding the disk image is relatively easy, the hard part is bypassing the encryption that it might have. While there are several methods to approach this, they either take too long or have a relatively low success chance. For that reason, it’s best to just use a cleaning app like Mac Cleaner to do the job. It takes no time and is easy to follow.
Latest Articles