

Every so often, you’ll encounter issues with your Mac. Perhaps it’s not performing as well as it did when you’ve only recently purchased it. Maybe there are all kinds of errors popping up on the screen. Either way, this is a sign that your Mac needs a cleanup. Basically, a cleanup is when you get rid of unnecessary files on the computer’s storage disks. Doing so will improve its performance since storage space often affects performance. It should also get rid of errors that are caused by a lack of storage.
However, as one might imagine, there are several ways to clean a Mac computer. For instance, you can do it manually, or you can use a tool to automate the process. Naturally, each method has its corresponding advantages and disadvantages.
Furthermore, there are methods that aren’t suitable in certain scenarios. For that reason, it’s crucial that you have at least a couple of options to clean your Mac at your disposal. But this begs the question, “Can I Clean My Mac Free”?

Can I Clean My Mac Free?
If you look up ways to “clean my Mac free,” you may notice that some, if not most, require you to use a specialized software which typically requires payment. However, that’s not to say you can’t clean your Mac for free. There are ways to clean your Mac computer for free, though there are paid options, too. And while there are countless ways to approach this, for our purposes, we’ll only discuss six of these methods and a bonus on top of that. Let’s start with the first method.
Method #1: Clear Your Mac’s Cache
The cache is essentially any file that your computer automatically generates whenever you perform specific tasks. For instance, when you open your browser and visit a site, the computer creates files so that the next time you visit the site, it loads faster. Basically, the cache consists of files that allow your computer to operate more quickly, though they’re not really necessary. In other words, there shouldn’t be any issue deleting the cache files for the purpose of cleaning your Mac.
However, keep in mind that there are different types of cache in a computer. There is a browser cache, app cache, and system cache. In this section, we’ll only be discussing the steps to clear your Mac’s system cache. Here’s what you need to do:
- On your Mac computer, open a session of the Finder app.
- From the menu bar at the top of the window, click Go.
- Select Go to Folder… from the resulting dropdown menu.
Note: Alternatively, you can simply press Shift + Command + G as a shortcut to this action.
- A popup menu will appear. Simply type in the following text into the text field: ~/Library/Caches/
- Click the Go button.
- The system will then take you to the directory you typed in. In this case, you should now be in the folder where your system cache is located. Find and open the Cache folder in this directory.
- On the Cache folder, find the files you think you no longer need, and simply delete them.
With this, you can very easily clear your system cache, and it should free up a considerable amount of space on your computer since the system cache consumes a lot of storage space.

Method #2: Empty Your Trash
The Trash is where everything you delete on your Mac goes to. It gives you a second chance to recover files in case you accidentally delete an important file, or if you decided you actually need a file you thought you didn’t need. Since the “deleted” file is still technically present on your computer, it naturally takes up some storage space. That’s why it’s crucial to empty the Trash regularly to ensure useless junk files don’t hog disk space. Here’s how you can empty the Trash on Mac:
- On your Mac, click the Trash icon from the Dock.
- From the menu bar, click Empty all of the Trash to delete all files. Make sure you recover any files you think would still be useful so you don’t permanently delete them.
Alternatively, you can also simply right-click the Trash icon from the Dock and select Empty Trash, though that would mean you won’t see its contents and whether there are files you want to keep.

Method #3: Remove Unnecessary Download Files
Aside from the Trash, there is yet another directory that often contains a lot of unnecessary files, and that is the Download folder. Unlike the Trash, the contents of the Download folder aren’t files you intentionally deleted. But the reason why it almost always contains unnecessary files is that people tend to download a lot of useless stuff and forget to delete them. If you’re just like any other Mac user, then chances are there are a couple of useless files lurking in your Download folder as well. Of course, there’s no better time to remove or delete them than now. Here’s what you need to do to purge your Download folder:
- Open the Finder app on your Mac.
- From the left sidebar, select Downloads. This should take you to the Download folder.
- Once on the Download folder, simply look for files you no longer need, select them, and press Delete.
Since downloaded files are typically relatively large, this method should free up a considerable amount of storage space on your computer. Furthermore, it allows you to basically clean the mess that is your Download folder, making it easier to organize the files that will go there in the future.

Method #4: Wipe Your Language Files
You might remember from the first time you set up a specific application that the system asked you what language you want the app to use. Naturally, if you chose English, the settings and other texts in the application’s interface will change to English.
Similarly, if you chose a different language, the texts will translate into that language instantaneously. Even now, if you change the language on an app’s settings, it can translate all the texts in its interface into the language you picked. The reason why it can change languages instantaneously is that your computer actually already has the language files hidden somewhere in the application’s storage. Therefore, if you switch languages, the app simply fetches those files and uses them.
Interestingly, you can access these files and delete them, that is if you don’t have any plans to switch the app’s interface language anytime soon. Since the language files are relatively large, deleting them should be an excellent way to clean your Mac for free, and it often doesn’t result in any errors. With that in mind, here’s how you can wipe the language files of a specific app:
- Open the Finder app.
- From the left sidebar, select Applications. This should take you to the Applications folder.
- Right-click the app in which you want to wipe the language files.
- Select Show Package Contents from the resulting dropdown menu. This will take you to a new directory.
- Look for the Resources folder in the new directory.
- The language files typically have the .lproj file extension. Simply delete the files that have this extension, and save for the language you actually use for that app. The en.lproj file, for example, should correspond to English, so make sure you don’t delete that if you’re using the English language for the app.
It might not be the first solution that comes to mind when you think of cleaning your Mac for free, but it’s definitely an excellent way to go about it. It’s simple, easy, and considering how there are countless language files for each app, it would certainly have a massive impact on your Mac computer’s performance if you were to delete all of them.

Clean Your Mac With Mac Cleaner [RECOMMENDED]
Being able to free up space on your Mac computer for free is definitely convenient. You can do it whenever you feel the need to without repercussions since it’s free. It also allows you to schedule cleanups more flexibly. Be that as it may, it’s still worth considering alternatives that require payment. After all, as much as you’d like to stick with the free methods, they typically take a long time to finish. Meanwhile, if you choose to invest in Mac cleaning tools, you can achieve the same result in a shorter amount of time. One particular tool that can meet your specific needs, and more, is Mac Cleaner.
Mac Cleaner is a modular software with several modules. Using the software, with just a few clicks, you can delete an entire directory full of unnecessary files. If you want to use it to clean your Mac, here are the steps you need to follow:
Step #1: Download, Install, and Set Up Mac Cleaner
Before anything else, you must first download the Mac Cleaner on your software via its official website. Then, use the downloaded file to install the software on your computer. And finally, open the software to start the actual cleaning process.
Step #2: Select from Six Different Modules
On the left side of the software, you’ll find a sidebar with six different options. These correspond to the six modules that Mac Cleaner offers. Seeing as how our goal is to clean your Mac, we’ll only be using the first four modules, since the last two typically don’t have much to do with cleaning. Here’s a look at what each of these four modules does:
- Clean Up Junk scans your computer for unnecessary files, also known as junk files. The files may vary in terms of file type, but they should include App Junk, System Junk, Trash Bin Junk, iTunes Junk, iOS Junk, and many more.
- Delete Large Files examines your computer for files with sizes over 50MB. It’s the perfect module for freeing up space on your Mac. Moreover, the module only detects unnecessary files, so you won’t be deleting vital data.
- Delete Duplicate Files inspects your Mac for any file that has more than one copy in the entire computer. Unlike the previous modules, this one doesn’t care if the file is important, so make sure you check whether the file is important or not before deleting it. Otherwise, you might accidentally delete a file copy you intentionally created.
- Erase Private Data looks for files that the software considers private data. That might seem ambiguous, but it typically includes mail attachments, browser history, chat data, photo junk, and the likes.
Simply select a module out of these four by clicking on it from the left sidebar.
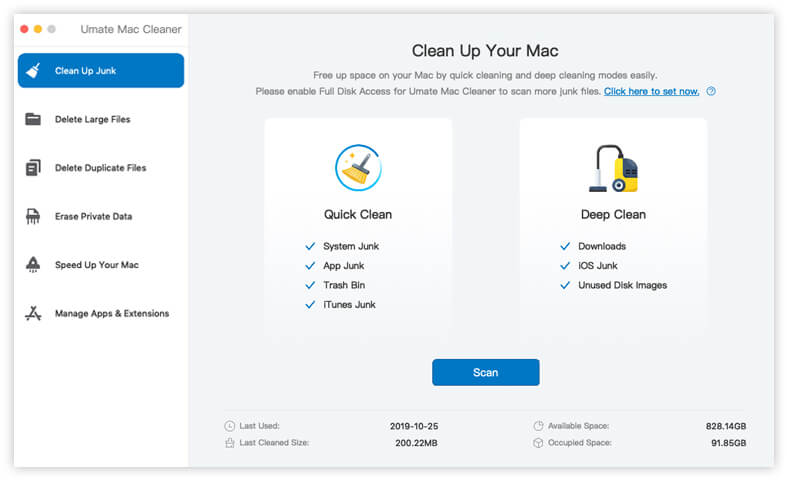
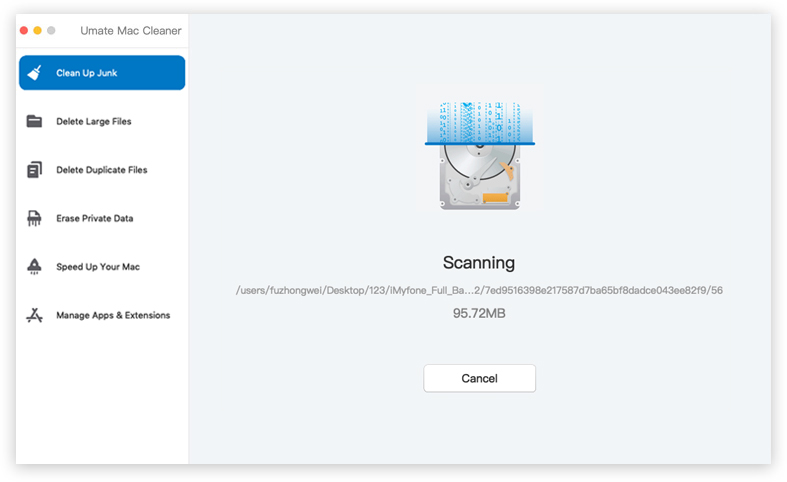
Step #3: Scan Computer for Files
Once you select a module, the software will display information on that particular module, such as what kind of files it scans and such. You can read it if you like, though it’s optional, but once you do, click the Scan button at the bottom of the software.
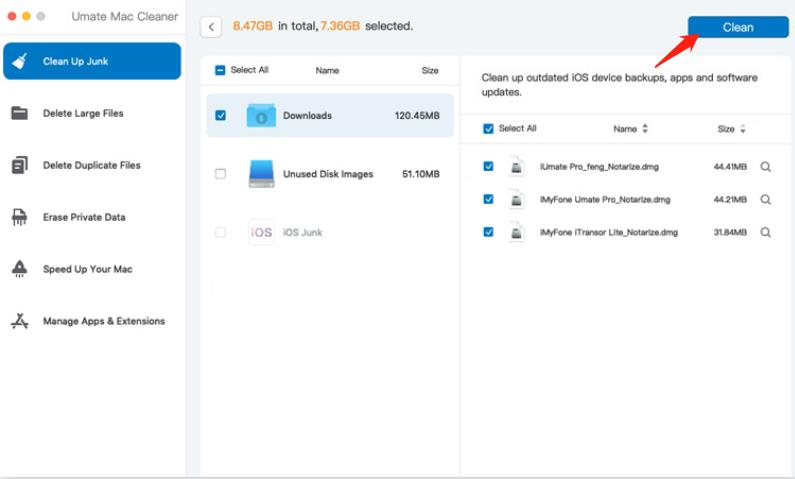
Step #4: Select a File/s
After the scan is finished, the software will move to the next screen, which should contain a list of items. These are the different categories or folders that contain the files you can delete. Simply select a directory. After doing so, you’ll find another list of items on the right side of the interface. These are the files you can delete. Simply select the ones you want to delete by clicking on their corresponding checkboxes. You can click the box for Select All to include all items.
Step #5: Delete the Files
Once you’ve selected all the files you wish to delete, click the blue button at the top-right corner of the window. The button should say Clean, Erase, or Delete, depending on the module. Regardless, this should finalize the cleaning process.
Unlike the methods we’ve discussed earlier, using Mac Cleaner to clean your Mac only takes a click of a few buttons to complete. Therefore, it’s much easier to simply use the software than to perform the aforementioned methods.
Conclusion
If you wish to prolong the lifespan of your computer, one of the best ways to do so is by performing regular cleanups. This also allows you to maintain its performance and keep it at its peak. Fortunately, there is a ton of ways to clean up your Mac computer without paying a dime, though some are a bit difficult to perform. Nevertheless, with this guide, cleaning your Mac should be a piece of cake, especially now that you have several methods at your disposal. You can also choose the paid option, which involves Mac Cleaner, which, admittedly, is a much easier and more convenient approach.
Latest Articles