Whenever you perform an operation on your Mac computer, the operating system creates a bunch of files to execute the task. Though some of these files are important, most of them are just files that were temporarily useful. Once the operating system executes the command, those files lose their value, and these are what experts call system junk files. Since they quite literally bring no value to your computer, experts advise users to regularly clean system junk files. While the process itself is easy, the problem is that during the process, you may end up deleting important system files, which can be disastrous.
With that in mind, this article will teach you how to clean system junk files safely in four different methods. That way, you don’t accidentally cause data loss on your computer. But first, is it even advisable to delete system files on your Mac?
Should You Clean System Junk Files?
System junk files are exactly as the name suggests, junk. Therefore, there shouldn’t be any issue deleting them as they no longer hold value in the computer. However, it’s worth noting that in Mac, there’s no feature that allows you to make a distinction between a regular system file and a system junk file. For that reason, you cannot delete files indiscriminately as there’s a good chance some important files will be caught in the crossfire. With that said, if you wish to clean system junk files, you need to focus on only two directories that should consist mostly of unnecessary files, and that’s what this guide will focus on.
These two directories are the temp folder where temp files are located, and the system cache folder where the cache files are located. Deleting the entirety of both folders won’t do much harm to your computer, but it’s not advisable as it may reset the preferences or settings that you’ve already set on your computer. Let’s start with how you can delete temp files.

Method #1: Delete Temp Files With Terminal
The folder that contains temp files is normally encrypted and hidden. You cannot find it like you would a normal folder, as you have to unhide it first. To do so, you’ll need the help of Terminal, the Apple counterpart of Windows PC’s Command Prompt.
It allows you to execute various commands, particularly the command to unhide a folder. Here’s what you need to do:
- On your computer, click the Launchpad icon on your computer. The icon should either be a gray rocket or a square with nine squares inside. It depends on the macOS version of your computer.
Note: The Launchpad is the program that allows you to open apps, including Terminal.
- On Launchpad, find and click the Terminal app which should have a black box icon.
- On Terminal, type in the following command: chflags nohidden /Users/username/TMP. Remember to replace the username part with the actual Apple ID or username you use on your macOS computer.
- Press Enter or Return on your keyboard.
Now, the temp folder should be unhidden and can be found again. To find and open it, here’s what you need to do:
- Go back to the Terminal app.
- Type in a different command: $TMPDIR or Open /tmp if the first one doesn’t work.
- Press Enter or Return.
- Finder should now open a folder containing the temp files. Simply find the ones you want to delete and drag and drop them into the Trash icon on your Dock. Then, open Trash and delete them there again to permanently delete them.

Method #2: Delete Temp Files Via Finder
There are instances where the temp folder isn’t hidden nor is it encrypted. In those cases, you can use a different method which mainly utilizes Finder—the file management app for macOS computers. More specifically, you’ll use its feature that allows you to go to a specific folder if you enter the correct file path. Without further ado, here’s how to clean system junk files with Finder:
- Open Finder on your computer.
- Click Go from the top bar.
- Select Go to Folder… from the options.
- A popup window should appear. There, copy and paste the following text: /Users/username/TMP. Again, remember to replace the “username” part with the Apple ID or username you use on that computer.
- Finder will take you to the temp folder. Find and delete the temp files you want to delete.
That’s pretty much how you can clean system junk files if you’re targeting specifically temp files. Now let’s proceed to how you can delete system cache files, the other category of junk files that you can delete.

Method #3: Delete System Cache Files Using Finder
Unlike the temp folder, the system cache is not likely to have any encryption or protection of any sort. Therefore, using Finder should suffice as you don’t have to unhide it using Terminal. Here’s how you can delete system cache files using Finder:
- Open Finder.
- Click Go.
- Select Go to Folder.
- Copy and paste the following text into the text bar: /System/Cache.
- Finder will take you to the system cache folder. Find and delete the cache files you want to erase.
- If you want to erase app cache files, you can also type in /Library/Cache instead. It may not necessarily be system junk files, but they also consume space needlessly, like system cache and temp files.
Unfortunately, there are cases where the default directory is changed. In those cases, these traditional methods may not work, and you’ll need to use a more specialized solution. That’s when you’ll need to use third-party cleaning apps.
Method #4: Clean System Junk Files Using Mac Cleaner
As you may have already realized by now, the tricky thing about system junk files is that they’re everywhere. You can find a system junk file in pretty much every folder on your system drive. And just when you’ve deleted them all, another one pops up out of nowhere. In other words, if you were to clean system junk files every day, it’ll most likely take a few hours of your time each time. That’s why rather than using traditional methods, it’s still best to use a cleaning app like Mac Cleaner.
Mac Cleaner is a cleaning software that allows you to delete all kinds of unnecessary files, including large files, private data, duplicate files, and most importantly, junk files. If you want to use the software, here’s what you need to do:
Step #1: Launch Mac Cleaner on Your Computer/Laptop
On your computer, open a browser and visit the Mac Cleaner download page. On that page, click the Download Now button. It’ll download a DMG file, which should be the installer. Once the download is complete, open the DMG file to run the installer then follow the onscreen instructions. You’ll see the software automatically open once it’s complete.

Step #2: Choose Clean Up Junk
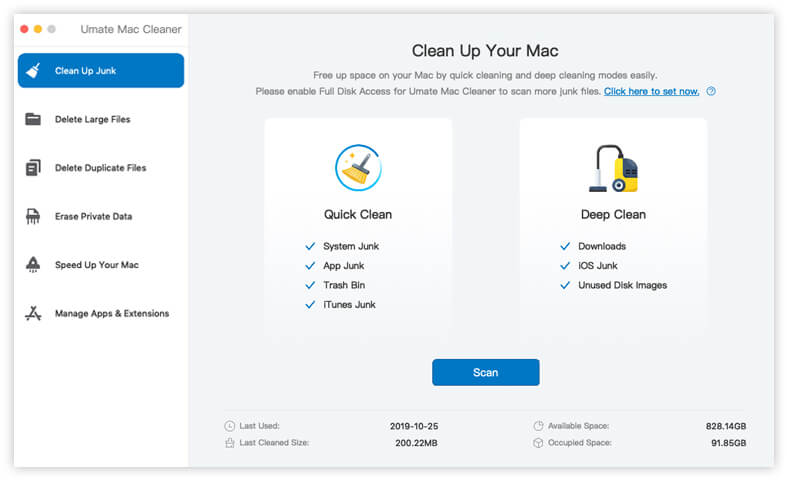
The mac Cleaner software consists of six modules, namely (1) Clean Up Junk, (2) Delete Large Files, (3) Delete Duplicate Files, (4) Erase Private Data, (5) Speed Up Your Mac, and (6) Manage Apps & Extensions. You can find them on the left sidebar of the software. Since your main goal is to clean system junk files, you must pick the Clean Up Junk module which allows you to delete junk files from your computer, including system junk. To select the module, you simply have to click it from the left sidebar of the interface.

Step #3: Click the Scan Button
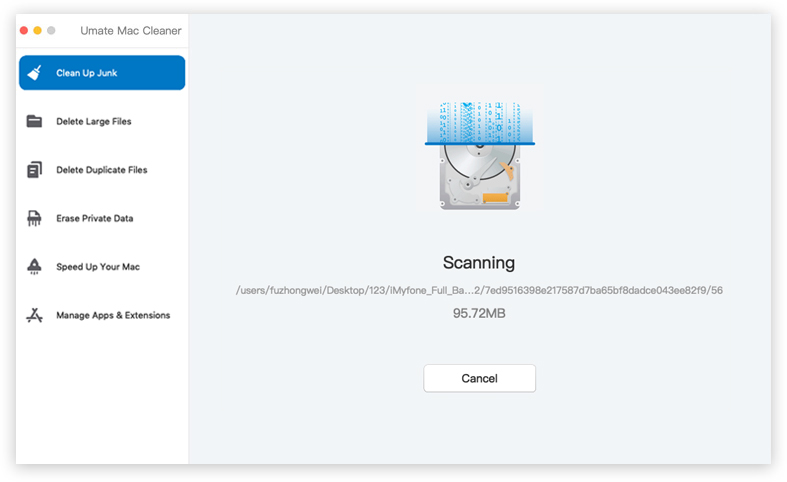
Upon selecting the module, the software’s interface will change to show two sides. One side says Quick Clean, while the other says Deep Clean. Quick Clean scans the computer for System Junk, App Junk, Trash Bin, and iTunes Junk, as shown in the interface. Deep Clean scans those in addition to Downloads, iOS Junk, and Unused Disk Images. Simply choose between these two and click the Scan button underneath the options once you’re done selecting.

Step #4: Select a File Category and File/s
On the left side of the interface, you’ll find a list consisting of items like System Junk, Downloads, Trash Bin, Unused Disk Images, etc. These are the file categories that the software was able to scan. Simply select System Junk from this list since your goal is to clean system junk files. Once you select a category, another list will appear on the right side of the software which should consist of actual files. From there, select the files you want to delete by clicking on their corresponding checkboxes. You may also click the checkbox for Select All if you wish to delete all the items in the list.
Step #5: Clean the File/s
On the upper-right corner of the interface, you’ll find a button that says Clean. Click this button to finalize the cleaning process. Keep in mind that it’ll take a few seconds or minutes to completely delete the files, so you may have to wait.
It might be a bit confusing at first, but compared to the traditional method of deleting system junk files, this is a lot easier and faster. You can also rest assured that the software will scan every nook and cranny of your computer, so there should be no system junk files left behind.

Going Forward
System junk files can be pretty tricky to find and delete. They’re pretty much everywhere, and it’s difficult to pinpoint exactly what is junk and what is not. That’s why if you plan to clean system junk files from your computer, you should at least have a basic understanding of them so you can avoid potential issues like data loss. That’s exactly what this guide is all about, and while you now know how to approach this activity, you must still remain vigilant since deleting an important system file can quite literally break your computer.
Latest Articles