Here’s a quick guide to clear Origin cache.
Steam is the most popular video game storefront software on the internet, not just because of its plethora of games, but also because of its functionalities. One such feature that you’ll find in Steam is the ability to clear the download cache in just a few clicks. That’s one of the many features that set it apart from other video game distributors. Now, the question is, does Origin, a direct competitor of Steam, have such a feature or anything similar? Find out as you read through this article.
Part 1: Does Origin Have A Built-In Clear Cache Function?
Unfortunately, unlike Steam, Origin doesn’t have such a function. For that reason, to clear Origin cache, you must do it manually. This involves finding the location of the cache and moving it to the Trash or Recycle Bin yourself. Granted, it’s a bit harder than when you do it with Steam cache, but at least it’s possible. However, there’s actually a way to clear Origin cache with a built-in feature, though it doesn’t always work and it’s from a different app. We’ll get into that later. For now, let’s take a look at what happens if you clear Origin cache manually, and whether it will lead to issues with your computer.
Part 2: What Happens If You Clear Origin Cache?
Though the Origin platform doesn’t have a fancy feature that allows you to clear its cache, that doesn’t mean doing it using a different method will cause issues. If you clear Origin cache yourself, nothing wrong should happen to your computer.
On the contrary, you can actually solve various problems when you clear the cache. For example, you can clear corrupted data that might be causing errors on the platform. It should also help if you cannot download certain apps as it deletes existing download files. With that said, let’s take a look at how you can clear Origin cache manually.
Part 3: How to Clear Origin Cache Using Finder
Just like most apps, Origin has a folder somewhere on your storage drive. This folder is where you can find the files associated with it, including its cache. Your main goal is to find this folder, locate the specific directory that contains the cache files, then delete its contents. That’s how you clear Origin cache. Below are the steps you must follow to pull this off:
- On your computer, open Finder.
Note: Finder is the file management app for Mac computers.
- Click Go from the top menu bar.
- Select Go to Folder… from the resulting dropdown menu.
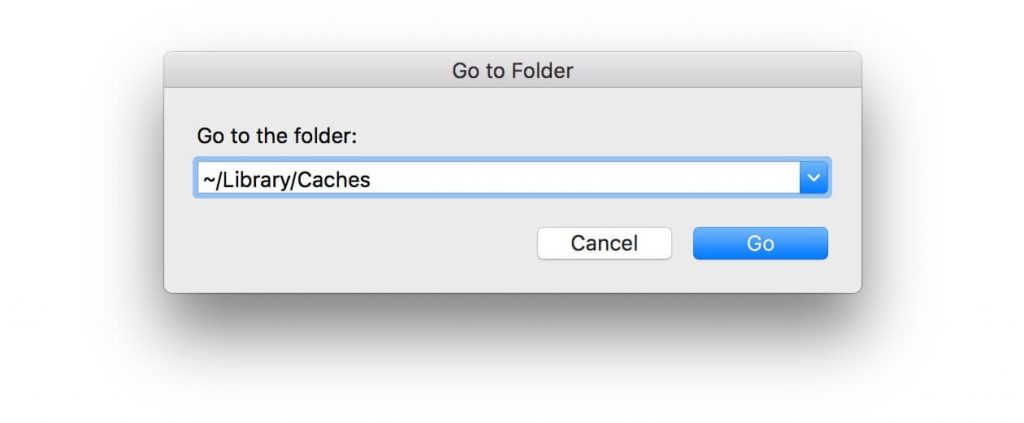
- Type in /Library/Application on the popup menu. This will take you to the Application folder.
- Find and open the Origin folder.
- On the Origin folder, find a folder named DownloadCache.
- Right-click the folder and select Move to Bin.
This will get rid of the Origin app’s download cache, solving issues related to it. Make sure you delete the DownloadCache from the Trash as well so it doesn’t take up storage space on your computer.
Part 4: How to Clear Origin Cache With EA Desktop
Although we mentioned earlier that Origin doesn’t have a built-in function that can clear its cache, there’s actually an app that can do that. That app is EA Desktop, a gaming platform from EA, just like Origin, but much more recent. It’s currently in open beta, but it can function really well. It has similar features to Steam, including the clear cache feature. And though it cannot clear Origin cache, if you’re using it, then it’d be best to stick with EA Desktop when downloading games since you can clear its cache rather easily, unlike with Origin. Here’s how you can clear its cache:
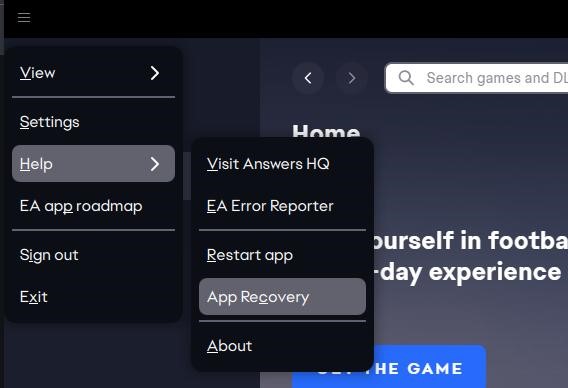
- Open the EA Desktop app.
- Click the three dashes icon at the top-left corner of the window.
- Select Help from the resulting dropdown menu.
- Choose App Recovery.
- A popup menu should appear. Click the CLEAR CACHE button.
Part 5: BONUS: Clear Origin Cache Files With Mac Cleaner
Typically, the main purpose of learning how to clear Origin cache is to free up space for more important files. After all, the cache often consumes several GBs worth of storage space. However, one must keep in mind that apart from the Origin cache, there are many other files that you can delete to free up storage space on your computer. These include system cache, junk files, and more. But of course, this would require a different approach, and that’s where Mac Cleaner comes into play.
Mac Cleaner is a software that can scan your computer for useless files and delete them accordingly. It’s perhaps the best way to free up space on your computer. If you want to use the software, here are the steps you need to follow:
Step #1: Download, Install, and Set Up Mac Cleaner
First off, you need to open a browser and head to the Mac Cleaner download page. There, you’ll find a Download Now button. Click that button to download the DMG file. Once the download is complete, extract its contents and use it to install the software on the computer. You may need a DMG opener or at least a ZIP tool to do this. Follow the onscreen instructions if you’re unsure where to start. The software should then automatically open after installation.
Step #2: Choose a Module
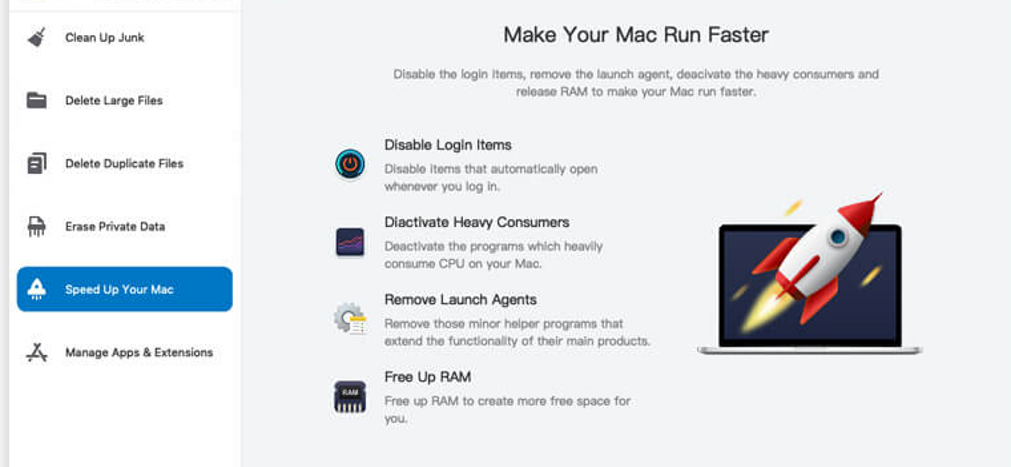
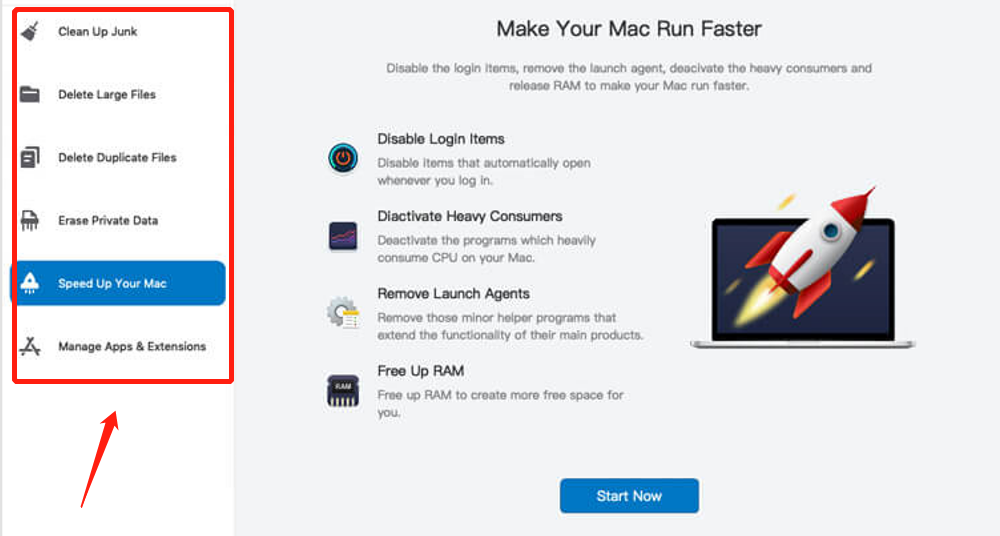
The Mac Cleaner software has a total of six different modules, namely (1) Clean Up Junk, (2) Delete Large Files, (3) Delete Duplicate Files, (4) Erase Private Data, (5) Speed Up Your Mac, and (6) Manage Apps & Extensions. Each of these has its respective features, but for our purposes, we’ll only be using the first three modules as they’re the most effective when it comes to deleting unnecessary files and freeing up space. Here’s what each of these modules does:
- Clean Up Junk inspects your computer for junk files, also known as temporary files. These are files that were once useful to your computer but have already served their purpose. These include System Junk, App Junk, and the likes.
- Delete Large Files scours your computer for any file that exceeds the file size of 50MB. It’s an excellent way to free up storage space on your computer since it can delete large, unnecessary files from your computer.
- Delete Duplicate Files looks at a specific folder and checks each file if they have a duplicate or copy somewhere on the computer. It then lists the files that do and their corresponding copies and allows you to delete them.
In most cases, the Origin cache may be included in the Delete Large Files or Clean Up Junk module, but even if it isn’t, it should still be able to help you clear your storage drives. To select a module, simply click on it from the left sidebar.
Step #3: Click the Scan Button
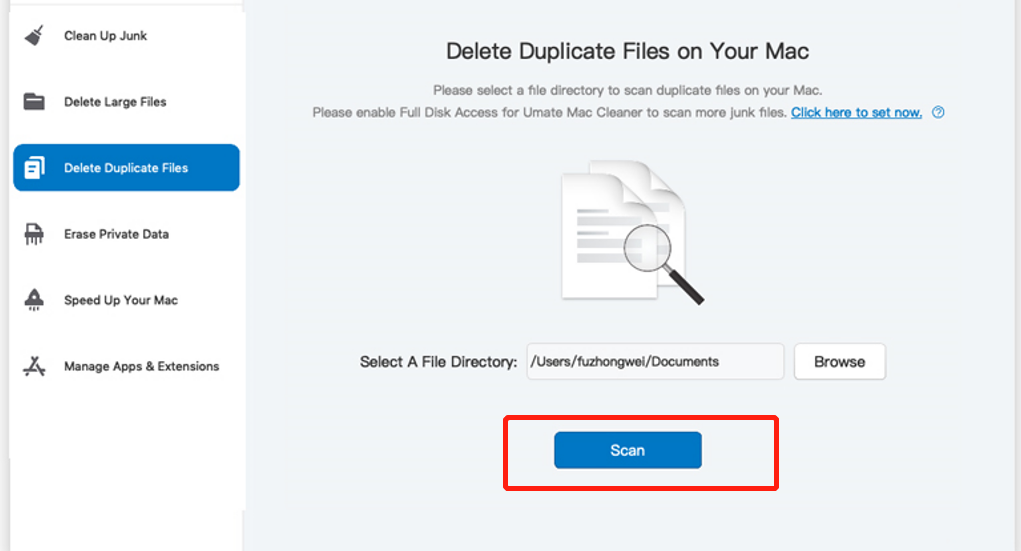
After you select a module, the software will display information about it. You can read the info if you wish to learn more about the module. But once you’ve read it, click the Scan button in the center area. But for the Clean Up Junk module, you’ll have to select between Quick Clean and Deep Clean first. These two options will scan for different types of files. The software should have info about this. And for the Delete Duplicate Files module, you need to select a directory first by clicking the Browse button and selecting a folder. This button can be found in the Select a File Directory field.
Step #4: Choose an Item/File
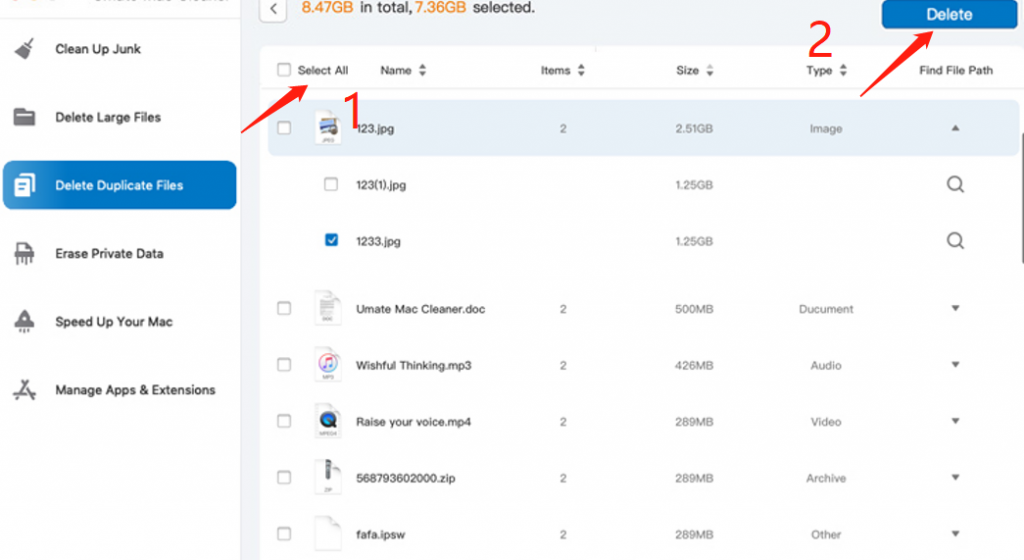
The scan should take a while, but once it’s done, you’ll get a list of items. These are the files you can delete from your computer. Simply select the files you wish to delete by clicking on their corresponding checkboxes. You can also click Select All to include all of the items. But for Clean Up Junk, before you can get a list of files, you must first select a file category from the left side of the interface. These may include System Junk, Trash Bin, etc. Once you select a file category, the list will show up on the right side of the interface, from which you should select the files you wish to delete.
Step #5: Delete the Files
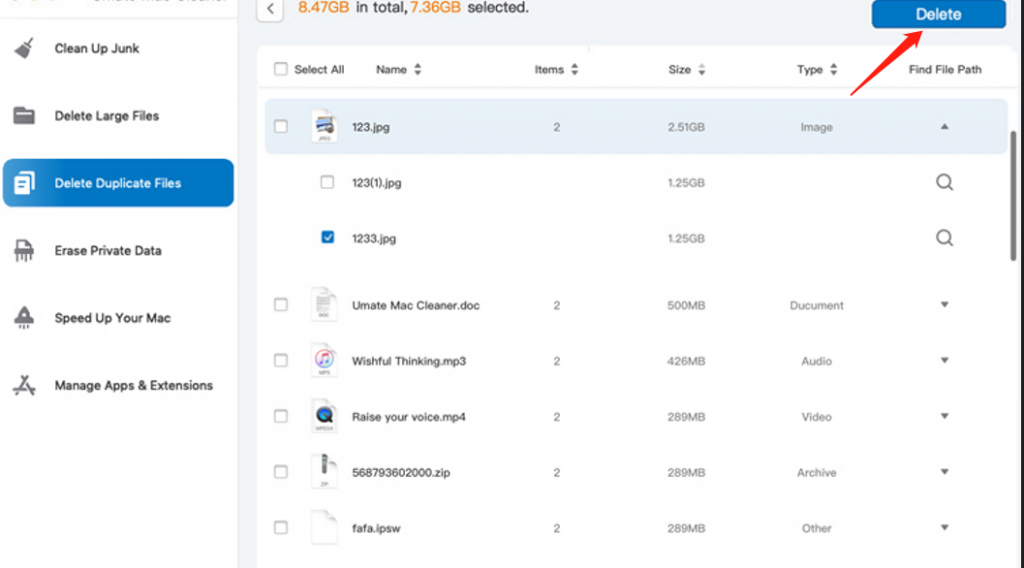
Upon selecting the files you wish to delete, click the blue button at the top-right corner of the page which should say either Clean or Delete. This will finalize the process and delete the files you’ve selected, freeing up space on your computer.
When you take a look at the scan results, you’ll find that there are more useless files on your computer than you initially thought. It’s not just the Origin cache, either. Hence, having tools like this that can scan for and delete unnecessary files is quite handy, even if they require payment.
Going Forward
With this guide, it should be apparent that Origin is indeed a bit lacking in terms of functionality when compared to Steam—its direct competitor. After all, Origin doesn’t have a button that allows you to clear its cache. Meanwhile, Steam has a button specifically designed for that purpose. But as always, one feature isn’t enough to judge a platform. While it may not be easy to clear Origin cache, it’s still possible, though a bit more difficult compared to clearing the Steam cache. Of course, this is just one method of going about it. Others may know of different methods that can accomplish the same goal in an easier manner.
Latest Articles