If you are a Mac user, chances are you have a vast photo library with numerous duplicate photos that can make it challenging to find and manage your pictures. Fortunately, you can delete duplicate photos from your Mac Photo Library in a few simple steps. In this article, we’ll guide you through the process of deleting duplicate photos from your Mac Photo Library.
Part 1: Delete Duplicate Photos from Mac Photo Library
It’s not uncommon for us to accumulate duplicate photos that take up precious space on our devices, making it difficult to organize and find the photos we actually want. If you’re a Mac user, there are a few ways to delete duplicate photos and free up space on your device.

Method 1: Using the Photos App
The Photos app on your Mac provides a built-in feature that allows you to find and delete duplicate photos quickly. Here’s how to use it:
- Open the Photos app on your Mac.
- Select the “Photos” tab from the top menu.
- Click “View” from the top menu and choose “Show Duplicate Items.”
- The app will automatically scan your library and display all the duplicate photos it has found.
- Review the duplicates and select the ones you want to delete.
- Once you have selected all the duplicate photos, click “File” in the top menu, then “Show Recently Deleted.”
- Select the duplicates you want to remove permanently and click “Delete.”
Method 2: Manually Search for Duplicates
If you prefer to do things manually, you can search for and delete duplicate photos yourself. Here’s how:
- Open the Finder app on your Mac.
- Navigate to the folder where you store your photos.
- Use the search bar in Finder to search for “jpeg” or “png”, depending on the file type of your photos.
- This will display all the photos in the folder with those file types. Sort the photos by date modified to group together photos taken at the same time.
- Look through the photos and delete any duplicates manually.

Part 2: How to Manually Find and Delete Duplicate Photos on Mac with Finder
Finding and deleting duplicate photos on Mac with Finder can be a tedious task, but it is doable. Here are the steps you can follow:
- Open Finder and go to the folder where your photos are located.
- Click on “File” in the menu bar at the top of the screen, then click on “New Smart Folder.”
- In the Smart Folder window that appears, click on the “+” button in the top-right corner of the window.
- In the first dropdown menu that appears, select “Kind” and then select “Image” in the second dropdown menu.
- Click on the “+” button again and select “Name” in the first dropdown menu and “Matches” in the second dropdown menu.
- In the text box next to “matches,” type in “.jpg” (without the quotes) or whatever file extension your photos have.
- Now you should see a list of all the photos in that folder. To find duplicates, click on “File” in the menu bar and then click on “Show Duplicate Items.”
- You should now see a list of duplicate photos. You can go through each one and decide which ones to keep and which ones to delete.
- To delete a duplicate photo, simply drag it to the Trash in the Dock or right-click on it and select “Move to Trash.”
- Once you have deleted all the duplicates, you can empty the Trash to permanently delete them.
Note that this method may not catch all duplicates, especially if they have different file names or are located in different folders. For a more comprehensive solution, you may want to consider using a third-party app designed specifically for finding and deleting duplicate photos.
Part 3: Delete Duplicate Photos on Mac with Mac Cleaner
Mac Cleaner is a cleaning app designed to remove unnecessary files from your computer. It can detect backups and assist with deleting them, but it requires proficiency with the software. Mac Cleaner is a third-party app that can help you find and remove duplicate photos on your Mac. Here are the steps to do so:
Step #1: Download, Install, and Set Up Mac Cleaner
To begin, launch Mac Cleaner on your computer or laptop by following these steps. First, you’ll need to install the software, which you can do by visiting this link. Once you’re on the Mac Cleaner download site, click the “Download Now” button to download a DMG file, which is the installer file for macOS computers. After the download is complete, open the DMG file to start the installation process and follow the on-screen instructions. Once the installation is complete, the software will open automatically.

Step #2: Pick from Six Modules
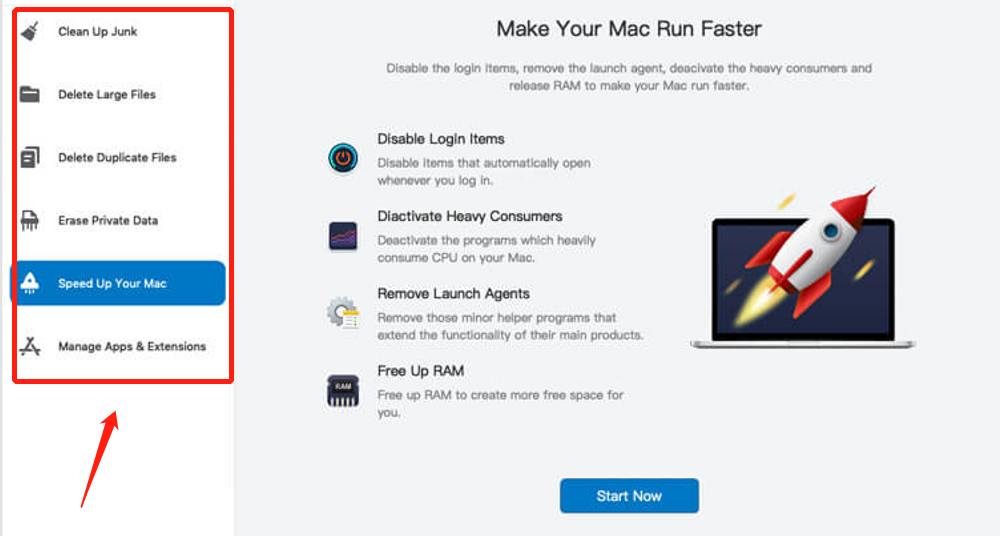
In Mac Cleaner, there are six distinct modules, each with its own set of functions. Let’s take a look at each module:
- Clean Up Junk scans the computer for unwanted files such as system cache, app cache, and Trash files.
- Delete Large Files searches macOS storage for files that are at least 50MB in size.
- Delete Duplicate Files scans a folder for duplicates of any files on your computer.
- Erase Private Data identifies files that may contain private data, such as email attachments, chat data, Face cache, etc.
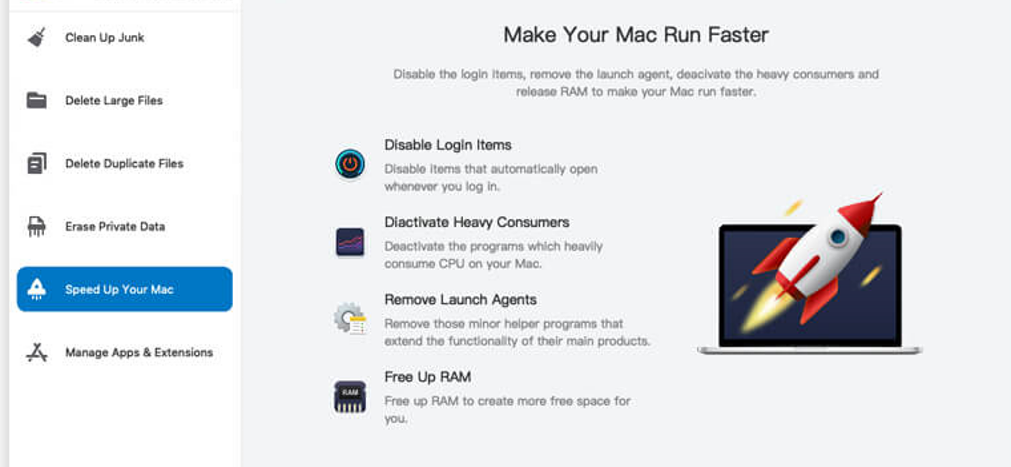
- Speed Up Your Mac enables you to disable certain applications and processes that might be causing your system to slow down.
- Manage Apps & Extensions helps to uninstall unused applications and remove unnecessary browser extensions.
You must choose one of these six options. Once you have decided which module to use, click on it from the left side of the app.

Step #3: Click Scan/Start Now/View Items
After selecting a module in Mac Cleaner, the interface will change to reflect its features. Since each module has different features, the interface will vary from module to module. Here’s what to do next for each of the six modules:
- Clean Up Junk: The software has two sections: Quick Clean and Deep Clean. Quick Clean enables you to scan for System Junk, App Junk, Trash Bin, and iTunes Junk. Deep Clean scans for these file types as well as Downloads, iOS Junk, and Unused Disk Images. Select one of these scan methods and click the Scan button when you’ve finished selecting.
- Delete Large Files: Click the Scan button located at the bottom of the interface.
- Delete Duplicate Files: In the center of the interface is the Select a File Directory field, with the Browse button located to the left. Click the Browse button and navigate to the directory you want to scan for duplicate files when a pop-up window appears. Once you’ve specified the directory or folder you want to scan, click the Scan button at the bottom of the interface.
- Erase Private Data: Select the module and click the Scan button promptly.
- Speed Up Your Mac: You may click the Start Now button as soon as you’ve chosen the module.
- Manage Apps & Extensions: The interface has two sections: Uninstall Applications and Remove Extensions. They perform precisely what their names suggest. Click the View Items button under the option you want to use.

Step #4: Select Item/s
Once the scan is complete or when you click Start Now, you’ll be presented with a list of items that corresponds to the module you selected. Here’s what you need to do to select items for each module:
- Clean Up Junk: Choose a file category from the list on the left sidebar (e.g., System Junk, Downloads, Trash Bin, Unused Disk Images, etc.). Then, select a file from the items listed on the right. You can choose all items by clicking Select All.
- Delete Large Files: Select an item (e.g., file, folder, disk image, archives, etc.) from the list.
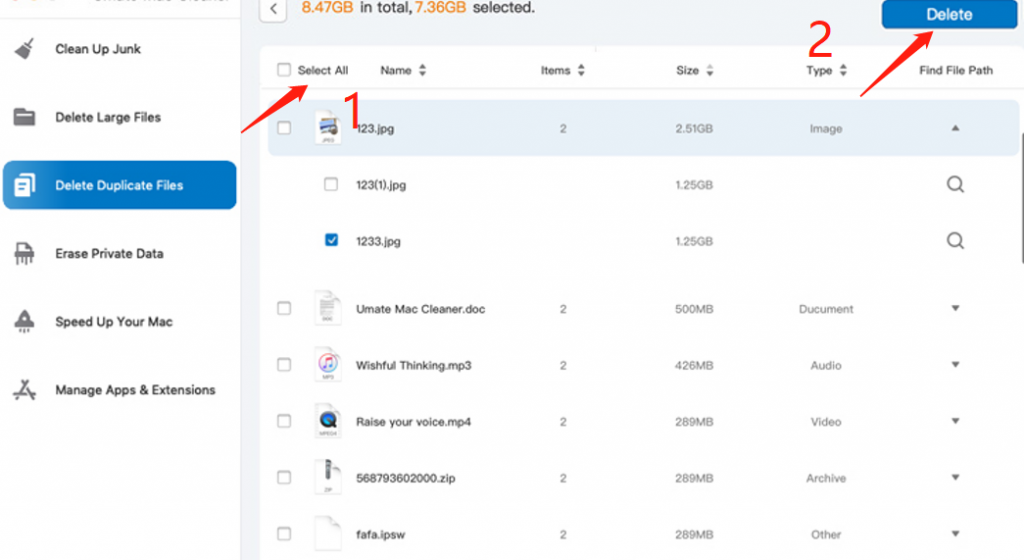
- Delete Duplicate Files: Select an item (e.g., image, document, audio, video, etc.) from the list.
- Erase Private Data: Select a category from the list on the left sidebar (e.g., Online Traces, Usage Traces, Chat Data, Photo Junk, and Mail Attachment). Then, select the private data you want to delete from the list on the right side of the interface. You can select all items by clicking Select All.
- Speed Up Your Mac: Choose a category from the list on the left sidebar (e.g., Disable Login Items, Deactivate Heavy Consumers, Remove Launch Agents, and Free Up RAM). Then, select the items from the list on the right side of the interface. You can select all items by clicking Select All.
- Manage Apps & Extensions: If you chose the Uninstall Application option, select an application from the list. If you chose the Remove Extensions option, select a browser to see a list of extensions installed on that specific browser. Then, select the extensions you wish to remove by clicking on their checkboxes. You can also click Select All to include all items.

Step #5: Click the Blue Button
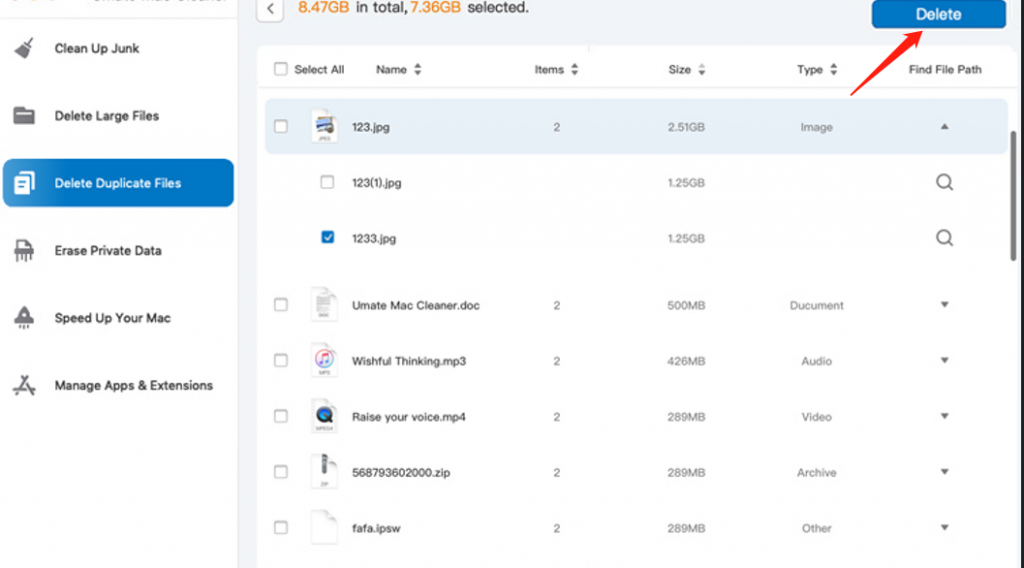
After completing steps 1 to 4, simply click the blue button located in the top-right corner of the window. The button label will vary depending on the module you selected, such as Clean, Delete, Erase, Deactivate, Uninstall, or Remove. This will carry out the action on the files, apps, or programs you selected in Step 4.

Conclusion
Removing duplicate photos from your Mac Photo Library can help free up valuable storage space and make it easier to organize and manage your pictures. Don’t let duplicate photos take up valuable space on your Mac. With our software, you can easily delete duplicates and keep your photo library tidy.
Latest Articles