Dropbox is a file hosting app with several file management features. You can either use it as your personal cloud storage or file synchronization software. If you use it as cloud storage, you can save a lot of space on your macOS computer by storing your files in the cloud instead of your hard drive or SSD. In exchange, whenever you want to get your files, you must download them first, which can become annoying rather quickly. File synchronization has the exact opposite issue.
Part 1: What Is Dropbox File Synchronization?
File synchronization is the other feature of Dropbox. It’s when every file inside the Dropbox storage is copied into the device with the file sync feature turned on. For example, let’s assume you enable synchronization on your macOS computer. In that case, when you upload a file to your Dropbox account via your smartphone, the Dropbox app on your computer will automatically create a copy of that file and store it in the Dropbox directory as soon as you connect to the internet.
That’s why you may not notice immediately the issue with Dropbox taking up space on Mac. It happens automatically, and unless you disable the sync feature, it’ll continue to happen. That’s why we say synchronization is the opposite of cloud storage.

Part 2: How Can You Solve Dropbox Taking up Space on Mac?
The most obvious solution to this problem would be to simply disable the sync feature and delete all the synced files. That basically means you have to switch to the cloud storage aspect of Dropbox. If that’s not something you want to do because the file sync feature has become your favorite feature, then you have another way to solve the issue, and that is to free up disk space.
Part 3: Free up Disk Space on Your Computer
The other method to solve the problem is to free up disk space on your computer. By doing so, you’ll be able to save enough space so your computer won’t suffer due to the large size of the Dropbox directory. Of course, it’s not a proper solution to Dropbox taking up space on Mac. After all, it would still take up space. You’re simply fixing any issues that it may cause.
So, how do you free up disk space on your computer? There are several ways to go about it. Here are some examples:
- Ctrl-click the Trash icon from the Dock and click Empty Trash
- Delete unnecessary files from the Downloads folder
- Clear your system and app cache by deleting files in ~Library/Caches/
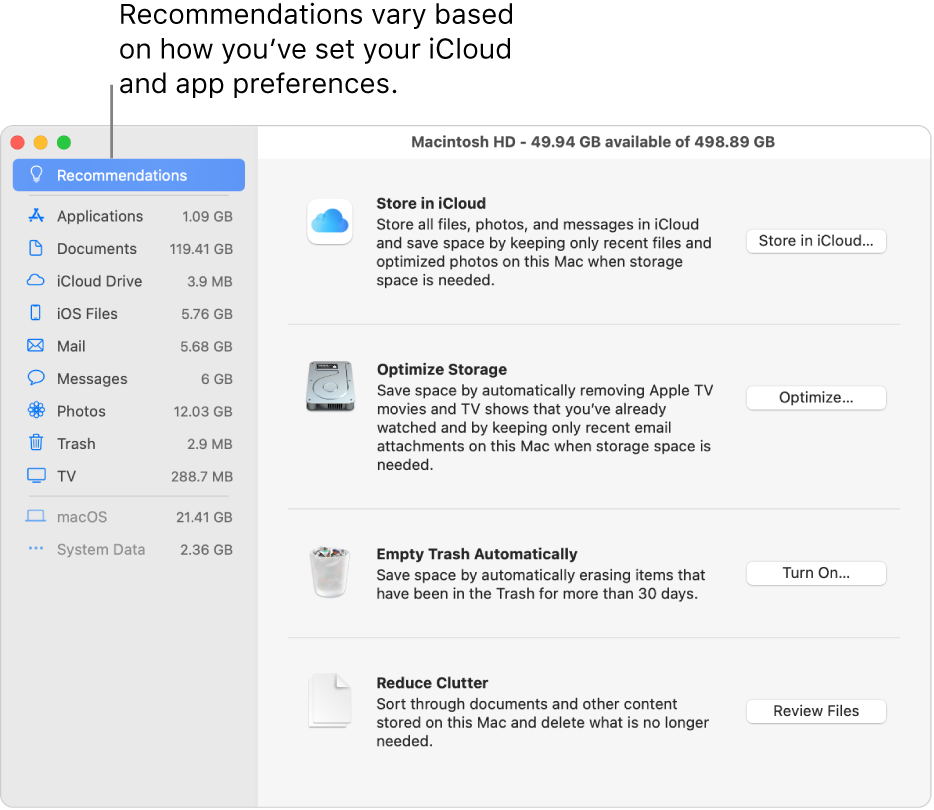
- Use the Reduce Clutter feature in the Storage Management utility app
- Look for files that you no longer need in the main hard drive
- Delete unused disk images using the Disk Utility app
What you use as your main method will ultimately depend on what you find to be the most efficient. Ideally, you’d want a method that doesn’t take too long to accomplish and can actually free up a considerable amount of space.

Part 4: Recommended Method: Use Mac Cleaner
Though you can indeed use the aforementioned methods to free up space on your computer and solve the issue concerning Dropbox taking up space on Mac, it can be a bit time-consuming. Each method takes several minutes, and if you were to do this regularly, it may take up hours of your time daily. That’s simply too inefficient, but then again, if you want to keep using the app, you have no choice but to clean up your computer. The good news is there are tools to make this task a lot easier.
Mac Cleaner is one such tool, and it’s designed to help rid your computer of unnecessary files. These may include junk files, duplicate files, and large files. It also has other features, but we’ll mostly discuss how you can delete useless files.
Here’s how you can use the software:
Step #1: Launch Mac Cleaner On Your Computer
To start with the process, you must first get the software on your computer. To do so, you need to click this link. It should take you to the Mac Cleaner download site where you’ll find a Download Now button. Click that button to download a DMG file. Once the download is complete, open the DMG file to run the installer. Follow the onscreen instructions onwards.
Note: The software will open automatically once the installation is complete.

Step #2: Choose a Cleaner Module
On the left side of the interface, you’ll find six different options. These correspond to the different modules Mac Cleaner currently offers. These include (1) Clean Up Junk, (2) Delete Large Files, (3) Delete Duplicate Files, (4) Erase Private Data, (5) Speed Up Your Mac, and (6) Manage Apps & Extensions. For your purposes, you’ll only need the first three modules which allow you to delete files from your computer. They should help free up space on your drives. Here’s what each module does:
- Clean Up Junk can detect and delete junk files, such as system cache, app cache, iTunes junk, Trash files, and unnecessary Downloads files. It’s a convenient way to free up disk space since it only targets unnecessary files.
- Delete Large Files looks for and deletes files with a size that’s larger than 50MB. Similar to the Clean Up Junk module, it only targets unnecessary files, which is why you won’t see all the large files in the list of scanned files.
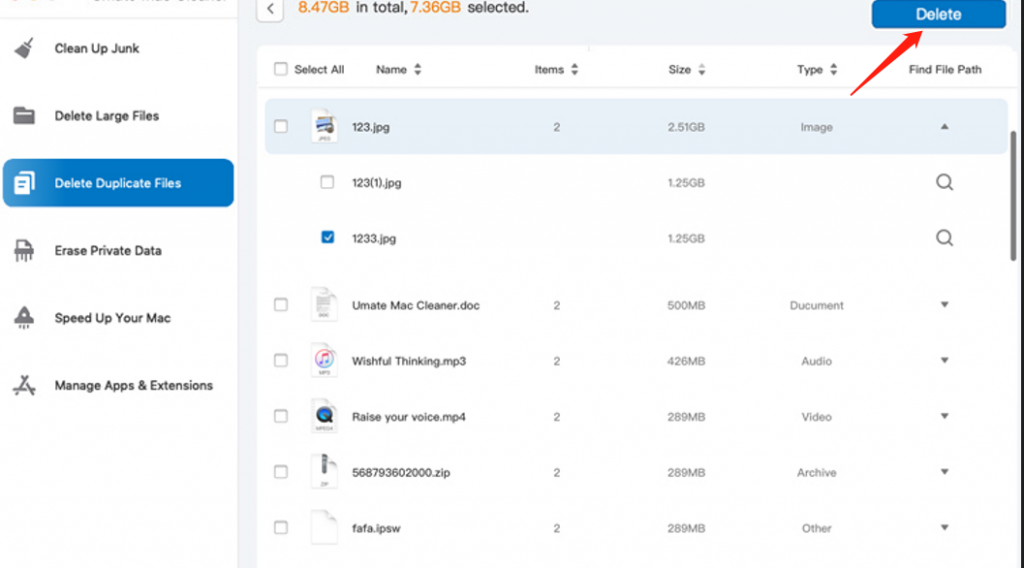
- Delete Duplicate Files scans a directory or folder that you must in the interface and looks for files that have more than one copy, also known as duplicates. It then shows you a list of these duplicates and allows you to delete them.
To select your chosen module, simply click on the option from the left side of the window.

Step #3: Scan Your Mac for Files
The third step is all about scanning your computer for the appropriate files. The way to do it will differ from one module to another. With that in mind, here’s what you need to do to scan for files for each of the three cleaning modules:
- Clean-Up Junk: The software will split into two sides. One side says Quick Clean while the other says Deep Clean. Quick Cleanscans the computer for System Junk, App Junk, Trash Bin, and iTunes Junk, whereas Deep Clean scans all those file categories in addition to three more: Downloads, iOS Junk, and Unused Disk Images. You must choose between these two options. We suggest choosing Deep Clean for a more accurate scan. Then, click the Scan button.
- Delete Large Files: Click the Scan button.
- Delete Duplicate Files: At the center of the interface, you’ll find a field that says Select a File Directory. To its left is a button that says Browse. Click that button. When a popup window appears, use it to navigate to the folder you want to scan for duplicates. Click Open to select a folder, then click the Scan button once you’ve specified a directory.

Step #4: Select a File/s
It may take a few seconds or minutes for the scanning process to complete. Once it’s done, you’ll be taken to the next page where you’ll find a list of items. The fourth step is simply to select the files you want to delete or erase. In the case of the Delete Large Files and Delete Duplicate Files modules, you just have to select a file or files from the list by clicking their corresponding checkboxes. You can also tick the Select All checkbox if you want to delete all the items in the list.
However, for the Clean Up Junk module, you must first select a category from the list on the left, which should consist of System Junk, Downloads, Trash Bin, Unused Disk Images, and more. Upon selecting a module, a new list will appear on the right side of the interface consisting of actual files. Simply select files the same way you would with the other modules.

Step #5: Delete the File/s
To finalize the process, you need to click the blue button that’s located in the upper right corner of the window. The button should say either Clean or Delete depending on the module you’re currently using. Wait for a few minutes for it to complete.
It would take forever if you use the traditional methods to solve the issue concerning Dropbox taking up space on Mac. But with Mac Cleaner, it’ll take a few minutes at most. Furthermore, since you now have this guide, you should be able to do it rather easily.

Final Words
Keep in mind that Dropbox taking up space on Mac isn’t just an issue with the app. It’s a problem with the entirety of your storage drive, hence why this article involves methods that are mainly about freeing up space on your disk. But that’s not to say the Dropbox app doesn’t contribute to this issue as well. There are times when Dropbox is also partially at fault, such as when it cannot properly organize your files and end up creating extra copies when they aren’t needed. For that reason, you must also check not only your storage drives but also the Dropbox app itself to ensure it’s not the one causing issues.
Latest Articles