

As you use your Mac over time, you may accumulate a lot of files that take up valuable disk space. Some of these files may be large and can quickly eat up your storage capacity. Finding and deleting large files on your Mac can help free up space, improve performance, and prevent system crashes. In this article, we’ll show you how to find and delete large files on Mac.
Part 1. Open the Finder application on your Mac.
- Click on the folder or directory where you want to search for files.
- Click on the “File” menu in the top menu bar, and select “Find” (or press Command + F).
- In the search bar, type in the search criteria for the file size you want to find. For example, you could type “size:>10MB” to find all files that are larger than 10 megabytes.
- Press enter to start the search. The Finder will display all the files that match your search criteria.
- If you want to refine your search, click on the “+” button in the top right corner of the search window to add additional search criteria, such as file type or date modified.
Part 2. How to Attach the Column Size to Display the Category in Finder
To attach the column size to display the category in Finder on a Mac, you can follow these steps:
- Open Finder by clicking on its icon in the Dock or by selecting it from the Applications folder.
- In the Finder window, click on the View menu at the top of the screen.
- Select “Show View Options” or press “Command + J” on your keyboard to bring up the View Options window.
- In the View Options window, check the box next to “Show columns for Kind”.
- Next, click on the “Sort By” drop-down menu and select “Kind” from the list of options.
- Finally, adjust the column size to display the category by clicking and dragging the column divider to the right or left.
- Once you’ve completed these steps, you should be able to see the category (i.e., the file type) displayed in the Kind column, along with the size of each file in the Size column. This can be helpful for organizing and sorting your files more effectively.

Part 3. How to Check File Size on the Get Info Panel
To check the file size on the Get Info panel on a Mac, you can follow these steps:
- Select the file or folder you want to check the size of by clicking on it once in Finder.
- Press the “Command + I“ keys on your keyboard, or right-click on the file and select “Get Info” from the context menu. This will bring up the Get Info panel for the selected file.
- In the Get Info panel, you’ll see a section labeled “General.” Within this section, you’ll find the file size listed next to “Size.”
- If the file is a folder, you’ll see a “Size on disk” value instead of “Size.” This value represents the actual amount of space the folder takes up on your hard drive.
- You can also see the file size in other units of measurement by clicking on the dropdown arrow next to “Size” or “Size on disk” and selecting a different unit (e.g., KB, MB, GB).
- Once you’ve completed these steps, you’ll be able to quickly and easily check the size of any file or folder using the Get Info panel on your Mac.
Part 4. How to Filter Files from any Finder Window By Size
To filter files from any Finder window by size on a Mac, you can follow these steps:
- Open a Finder window by clicking on its icon in the Dock or by selecting it from the Applications folder.
- Navigate to the folder that you want to filter files by size.
- In the Finder window, click on the “File” menu and select “Find” or press “Command + F” on your keyboard. This will bring up the Finder search bar at the top of the window.
- Click on the “+” button in the upper right corner of the search bar to add a new search criterion.
- From the first dropdown menu, select “Size.” This will display a second dropdown menu where you can select a size filter.
- Choose a filter from the second dropdown menu (e.g., “less than” or “greater than”), and enter a size value in the text box next to it.
- You can also add additional search criteria, such as file type or date modified, by clicking on the “+” button again and selecting another criterion.
- Once you’ve set your search criteria, click on the “Search” button in the upper right corner of the search bar to perform the search.
- The Finder window will display a list of all the files in the selected folder that meet your size criteria.
By following these steps, you can quickly filter files in any Finder window by size, making it easier to find specific files that meet your size requirements.

Part 5. How to Find Large Files on Mac
To find large files on Mac, you can follow these steps:
- Open a Finder window by clicking on its icon in the Dock or by selecting it from the Applications folder.
- From the menu bar, select “File” and then select “New Smart Folder” or press “Command + Option + N” on your keyboard.
- In the top right corner of the window, click on the “+” button to add a search criterion.
- From the first dropdown menu, select “File Size.”
- From the second dropdown menu, select “is greater than.”
- In the text box next to the second dropdown menu, enter the file size you want to search for (e.g. “500 MB” or “1 GB”).
- You can add additional search criteria, such as file type or date modified, by clicking on the “+” button and selecting another criterion.
- Once you’ve set your search criteria, click on the “Save” button to save the smart folder.
The smart folder will display all the files on your Mac that meet your size criteria, sorted by size.
Alternatively, you can also use the built-in “Storage Management” tool on your Mac to find large files. Here’s how:
- Click on the Apple menu in the top left corner of the screen and select “About This Mac.”
- In the About This Mac window, click on the “Storage” tab.
- Click on the “Manage” button to open the Storage Management tool.
- The tool will display a breakdown of your Mac’s storage usage, including a list of large files and folders sorted by size.
- You can click on any item in the list to see more information about it, such as its location and last accessed date.
By following these steps, you can easily find large files on your Mac and manage your storage space more efficiently.
Part 6. Locate Large Files Using Built-in Feature of Mac
You can locate large files on your Mac using the built-in feature called “Storage Management”. Here’s how:
- Click on the Apple menu in the top left corner of your screen.
- Select “About This Mac” from the drop-down menu.
- Click on the “Storage” tab.
- Click on the “Manage” button. This will open the Storage Management window.
- The Storage Management window will display a breakdown of your Mac’s storage usage, including a list of file categories such as Applications, Documents, Photos, and more.
- Click on any category to see more details about the files taking up space within that category.
- In each category, you can sort files by size, last accessed date, or other criteria by clicking on the column headers.
- To view files in a category, select the category and click on the “Open” button. This will open the folder containing the files in the Finder.
From there, you can decide whether to delete or move any large files you no longer need. Using the Storage Management feature, you can easily identify and manage large files on your Mac, helping to free up valuable storage space.
Part 7. How to Find Large Files on Mac in Finder?
To find large files on Mac using Finder, you can use the following steps:
- Open a Finder window by clicking on its icon in the Dock or by selecting it from the Applications folder.
- In the search bar at the top right corner of the Finder window, enter the following search query:
- size: >[file size]
- Replace [file size] with the minimum size of the files you want to search for. For example, if you want to find files larger than 1 GB, you can enter:
- size: >1 GB
- Press Enter or Return on your keyboard to perform the search. This will display a list of all the files on your Mac that meet your size criteria, sorted by size.
- You can also add additional search criteria, such as file type or date modified, to refine your search. Click on the “+” button on the right side of the search bar to add more criteria.
- Once you’ve set your search criteria, you can save the search by clicking on the “Save” button on the top right corner of the Finder window. This will create a smart folder that will display all the large files on your Mac based on your search criteria.
- To view the location of a file, right-click on it and select “Show in Finder” from the context menu. This will open a new Finder window showing the location of the file. From there, you can decide whether to delete or move any large files you no longer need.
By following these steps, you can easily find large files on your Mac using Finder and manage your storage space more efficiently.
Part 8. How to Find Large Hidden Files on Mac via Terminal
To find large hidden files on Mac via Terminal, you can use the find command with the -size and -name options. Here are the steps:
- Open Terminal by clicking on its icon in the Applications > Utility folder or by using the Spotlight search (press Command + Spacebar and type “Terminal”).
- In the Terminal window, type the following command and press Enter:
- sudo find / -name “.*” -size +[file size] -print
- Replace [file size] with the minimum size of the files you want to search for. For example, if you want to find hidden files larger than 1 GB, you can enter:
- sudo find / -name “.*” -size +1G -print
- This will prompt you to enter your administrator password. Type your password and press Enter.
- The find command will search the entire file system for hidden files that match your search criteria, which may take some time depending on the size of your hard drive and the number of files it contains.
- Once the search is complete, the Terminal will display a list of all the hidden files that meet your size criteria, including their file path and size.
- You can then decide whether to delete or move any large hidden files you no longer need.
Note that the sudo command is used to give the find command administrative privileges, allowing it to search all directories, including those that are normally restricted. Be careful when using this command, as deleting or modifying system files can cause serious problems with your Mac.

Bonus: Find Large Files using Mac Cleaner
Manually finding and removing data on your computer to free up space on your hard disk, especially when it’s urgently required to transfer new files or when your Mac disk is overflowing, can be a challenging task. Fortunately, there is software available that can simplify the process of finding large files on your Mac and deleting them.
One such tool is the Mac Cleaner, which is considered one of the best Mac toolkits available. In addition to cleaning up trash from your computer, it can efficiently and quickly sort through files and free up valuable storage space. By utilizing the “Large & Old Files” feature of Mac Cleaner, you can easily identify large and outdated files that are taking up disk space and delete them, freeing up enough space on your Mac device. You can access this tool from the reference provided.
Step #1: Download, Install, and Open Mac Cleaner
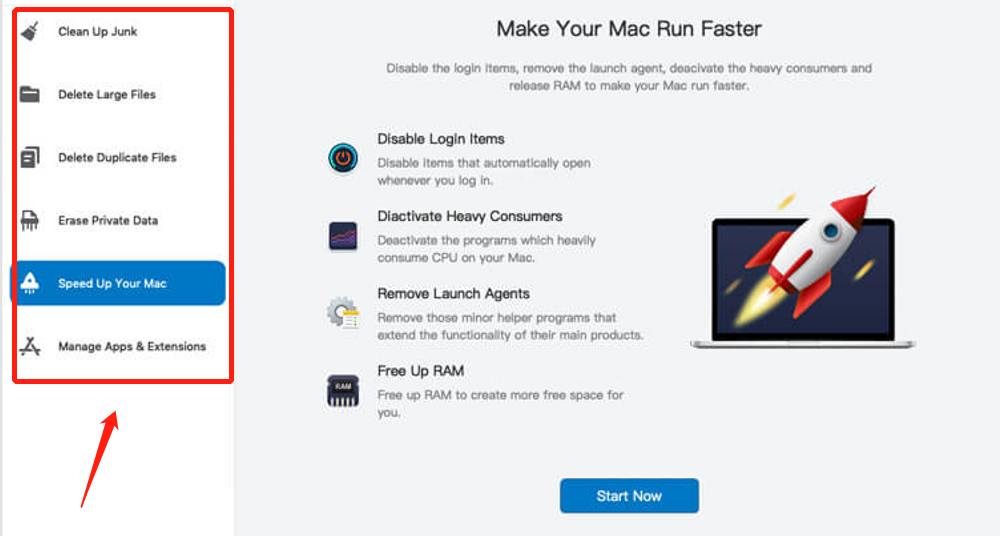
To start, you need to download the Mac Cleaner software from their website, install it on your computer, and then open it. Once opened, you will see six different modules listed on the left sidebar of the interface.

Step #2: Select from Six (6) Different Modules
After launching Mac Cleaner, you will see six different modules listed on the left-hand side of the interface. Each module serves a unique purpose in helping to delete files from your Mac. Here’s a breakdown of what each module does:
- Clean Up Junk: searches for and eliminates unnecessary files from your storage, such as system junk, app junk, and trash bin items.
- Delete Large Files: identifies and remove files larger than 50MB to free up space on your Mac.
- Delete Duplicate Files: detects and removes duplicate files, regardless of their importance, which may include files you intended to keep.
- Erase Private Data: looks for files that could be considered sensitive, such as email attachments, login history, and online traces.
- Speed Up Your Mac: offers four functions to optimize your Mac’s performance.
- Manage Apps & Extensions: can uninstall applications and remove extensions from your computer.
To select a module, simply click on it from the left-hand sidebar. Since your goal is to delete files from your Mac, we recommend choosing one of the first four modules. You can also try them all out to see which works best for you. Keep in mind that the last two modules are primarily for improving your Mac’s performance, which may not be your focus at the moment.
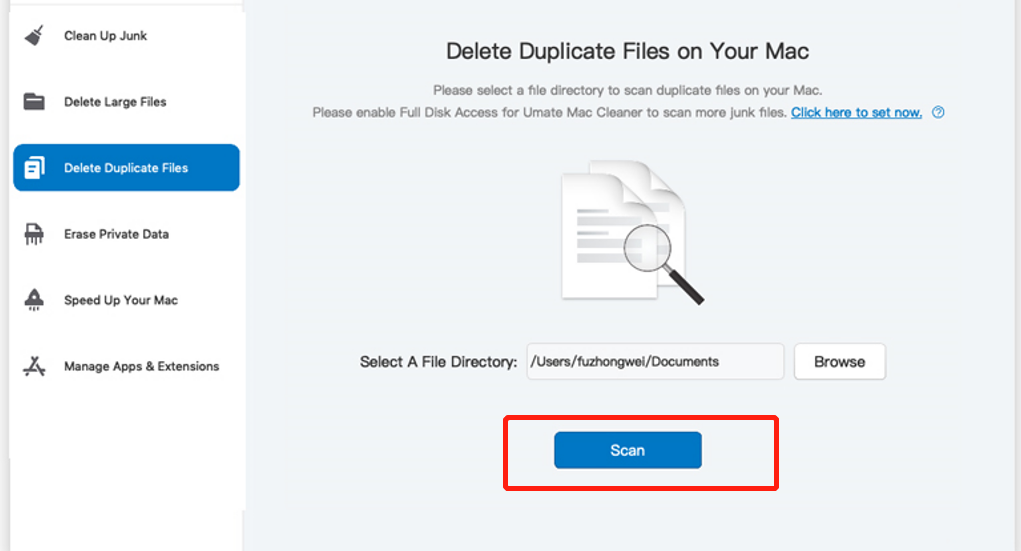
Step #3: Scan Your Computer for Files
Once you’ve chosen a module, the interface will display information about its functionalities. It’s recommended to read through this information to understand its features better. Then, click on the Scan button located at the center of the interface to initiate the scan.
Step #4: Select the Items
After the scan is complete, the software will display the scanned files on the left sidebar of the interface. These are the files that can be deleted from your computer. You can select the files you wish to delete by clicking on their respective checkboxes. Alternatively, you can select all files by clicking the Select All checkbox.
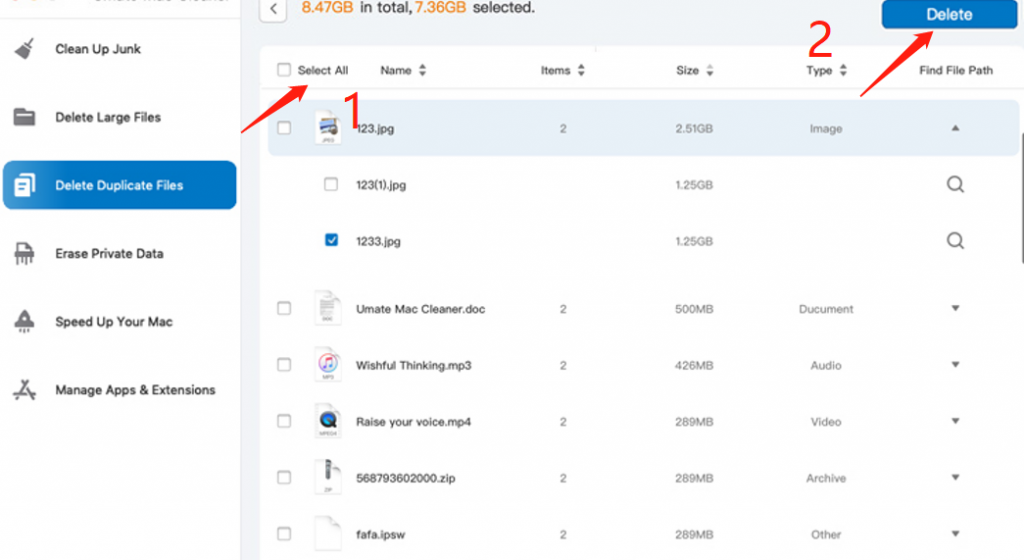
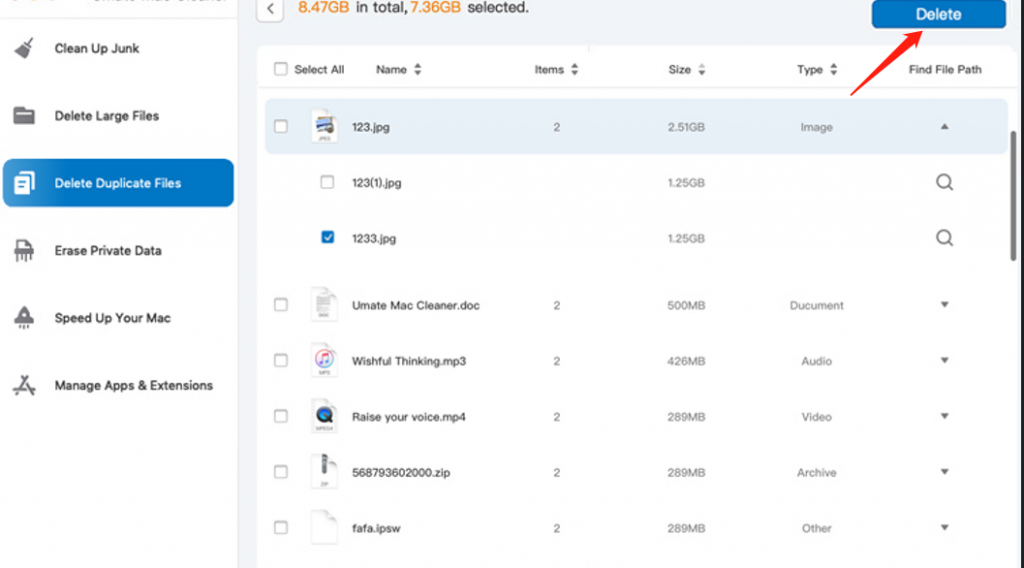
Step #5: Delete the Files
Once you’ve confirmed that you’ve selected all the files you want to delete, click on the button located at the top-right corner of the screen. The button will read Clean, Erase, or Delete depending on the module you chose. Clicking this button will finalize the file deletion process.
As you can see, using the right software can make it easy to delete files on your Mac. You won’t have to navigate through different parts of your computer, unlike traditional methods. However, not all software has the same functionalities. That’s why it’s recommended to stick with Mac Cleaner if you have no better option.
Conclusion
There are several basic methods to find large files on a Mac and remove unnecessary data. You can use the Finder, the built-in Storage feature, or the Terminal app to locate the largest files on your Mac.
While these manual methods are simple and quick, there are other options available if you want to find large files more efficiently or free up storage space by automatically removing duplicates, old and large files, and cache data. Mac Cleaner is a powerful tool that can perform these tasks automatically, making it an excellent choice for anyone who wants to quickly and easily manage their Mac’s storage.
Whether you prefer to use the Finder search function, the Terminal, or third-party apps, there are many ways to accomplish this task. By regularly cleaning up your disk space, you can ensure that your Mac continues to run smoothly and efficiently.
Latest Articles