It’s not uncommon to all of sudden find out that your macOS computer storage is already full. After all, it’s not like macOS has a feature that warns you when your storage is about to run out. This can sometimes be incredibly frustrating and inconvenient.
One scenario where this can be particularly disastrous is when you’re downloading a large file. Normally, the large file will be downloaded without issue. However, if your hard drive suddenly gets full during the download, it may stop automatically and there’s a chance this interruption would lead to the abortion of the download. If that’s the case, you would have wasted your time waiting for the download only for it to start over. As such, it’s a good idea to have a hard drive space analyzer.

Part 1: What is a Hard Drive Space Analyzer?
As the name implies, a hard drive space analyzer allows you to analyze your hard drive storage space. Most of the apps that belong to this category will show you a graph or any visual representation of some sort of how your storage is distributed.
For instance, it may show you how much space videos take, the collective size of all your documents, and the like.
Certain hard drive space analyzers also have the functionality to optimize your storage pace, though they’re typically on the higher end and can be considered cleaner software. These analyzers are quite handy if you want to manage your storage.
There are a bunch of hard drive space analyzers on the market, but there are only a few that are worth mentioning.
Part 2: MOST BEAUTIFUL VISUALS: DaisyDisk
DaisyDisk has the most beautiful visuals we’ve seen. It represents your storage in a sunburst chart, and the size of each bar corresponds to the actual size of that category. If documents take up most space on your computer, for example, then the Documents bar would take a huge chunk of the sunburst diagram.

Another interesting part about DaisyDisk is that it updates in real-time. So, if you have DaisyDisk open, for example, when you delete a file, the chart will change immediately to reflect the deleted file. Since it doesn’t put much strain on your computer, it’s common practice to have DaisyDisk open at all times.
DaisyDisk is particularly popular among IT professionals, which goes to show how handy it is.
Part 3: ACCURATE SEARCHES: Disk Drill
We chose Disk Drill as our second best hard drive space analyzer mainly because of its accurate searches. Files that other analyzers cannot detect can be scanned by Disk Drill. That means you can more accurately analyze your hard drive.
It also categorized your files in different ways.

You can see on the left sidebar that there are several options. It categorizes each option differently. It can categorize them by their file type, as you can see in the top, it says Pictures, Video, Audio, etc. It can also categorize the options according to file size, as it says Large, Medium, and Small. Finally, it can categorize each file according to the date modified.
Part 4: CLEANER/ANALYZER: OmniDiskSweeper
OmniDiskSweeper, despite not being as popular as the other two, made it to this list simply because in addition to being an analyzer, it can also delete files that you’ve analyzed. Hence, it can serve as a cleaner/analyzer. Its cleaning functionality is nothing to scoff at either. It’s quite efficient, and it can analyze files and delete them accordingly quite quickly.

Part 5: BONUS: Mac Cleaner
Though an analyzer should be plenty of help to ensure you always have sufficient space on your computer, it likely won’t be enough since you have to delete the files as well. That’s why it’s common practice to not only have an analyzer, but also a cleaner to delete the analyzed files. If you’re not fond of OmniDiskSweeper, then you should instead use Mac Cleaner—a cleaning software designed to delete unnecessary files on your computer. If you’re interested, here’s how you can use it:
Step #1: Download, Install, And Launch Mac Cleaner
The process starts with getting the software, and to do that, you must click this link. It should take you to the software’s download page where you’ll find a button that says Download Now. Click it to download a DMG file that corresponds to the software’s installer. Once it’s downloaded, open it promptly to start the installation. There will be instructions on the installer, so simply follow them from that point. The Mac Cleaner software will open automatically once the installation is done.

Step #2: Select a Cleaner Module
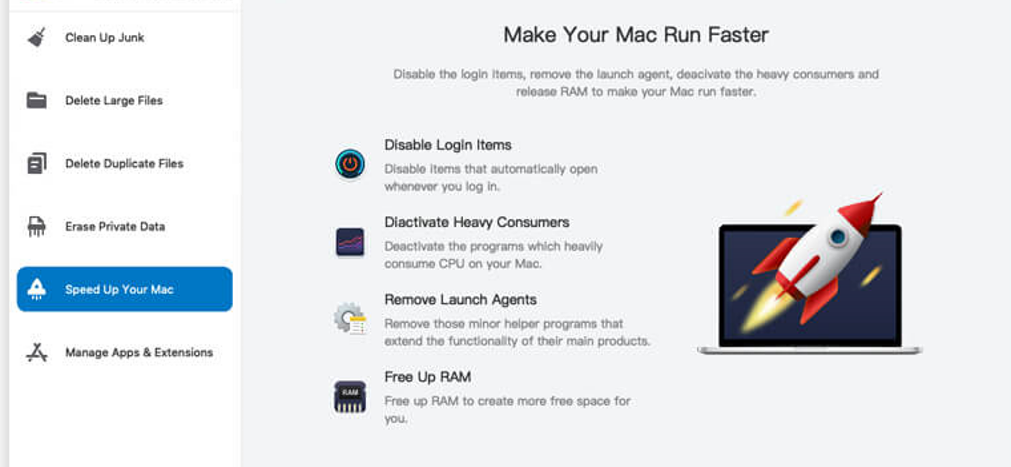
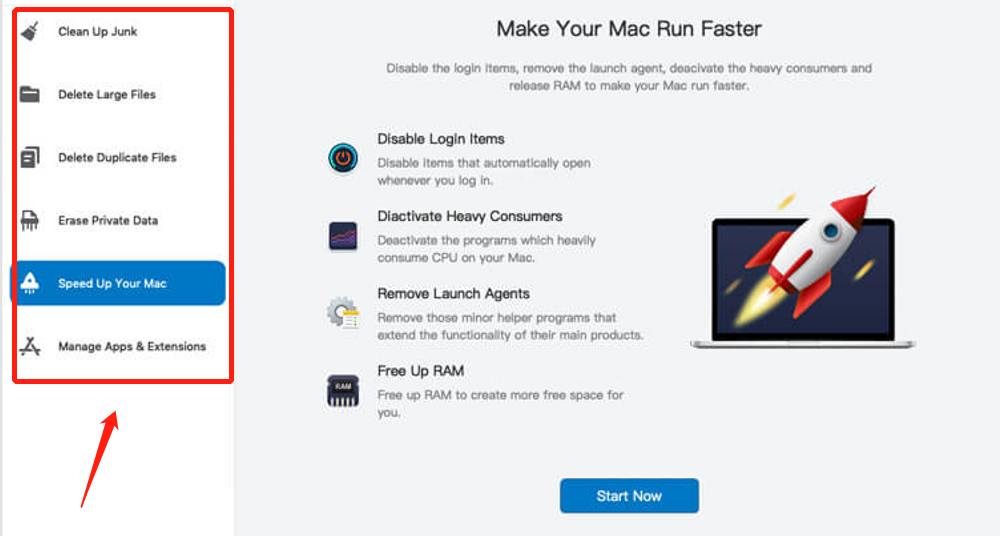
On the left side of the interface, you’ll find six different options. These correspond to the modules the software has to offer. Each module has different functionalities and can be used for various purposes. Therefore, you must choose the module that would be the handiest for your particular goal. The six modules in Mac Cleaner include:
- Clean Up Junk
- Delete Large Files
- Delete Duplicate Files
- Erase Private Data
- Speed Up Your Mac
- Manage Apps & Extensions
Clicking the module from the left hand side of the interface should do the trick. Since you’re using Mac Cleaner to optimize your hard drive, you should select either one of the four cleaner modules. The cleaner modules include Clean Up Junk, Delete Large Files, Delete Duplicate Files, and Erase Private Data. These modules allow you to delete unnecessary files.

Step #3: Click Scan
For this next step, you need to scan your computer for files, programs, or whatever it is you want to get rid of. The exact way to approach this will depend on the module you chose in step #2. So, it might be best to look at the steps for all six modules:
- Clean Up Junk: Upon selecting Clean Up Junk, you’ll find two options on your screen:
One option is Quick Clean while the other is Deep Clean. These are the two scanning methods that the module offers. Quick Clean is the ideal option if you want to quickly get this over with and you want to delete any file you can delete.
If you’re looking for a specific file type, Deep Clean is more suitable since it provides more accurate search results. You can choose whatever you want or need. Afterward, click the Scan button at the bottom of the interface.
- Delete Large Files: Click the Scan button.
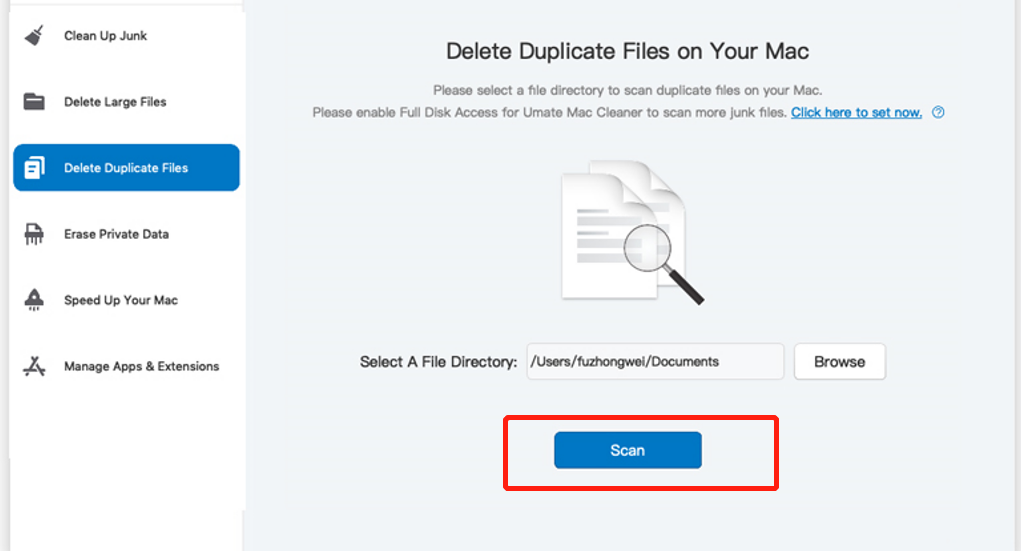
- Delete Duplicate Files: The fourth step is to click the Browse button on the interface. You can find it on the left side of the Select a File Directory field. When a popup window appears, go to the directory or folder you want to scan for duplicate files. Once you’re there, click the Scan button below the Select a File Directory field.
- Erase Private Data: Click the Scan button.
Step #4: Choose Item/s
For the fourth step, you need to select which files, programs, or apps you want to get rid of. The items you’ll find will vary in file type according to the module you chose, so it might be best to look at the selection process for each module:
- Clean Up Junk: On the next page, you’ll find a list on the left side of the interface.
That list will consist of file categories that the module was able to scan. These include items like System Junk, Downloads, Trash Bin, and Unused Disk Images, among many things. Your goal this time is to select files to delete, but before that, you must select a category first, only then will the list of actual files appear from the right side.
Once the files appear, select the files you want to delete by clicking on their corresponding checkboxes. You can also click the Select All checkbox if you want to delete all files.
- Delete Large Files: Select the item (e.g., file, folder, disk image, archives, etc.) you want to delete from the list.
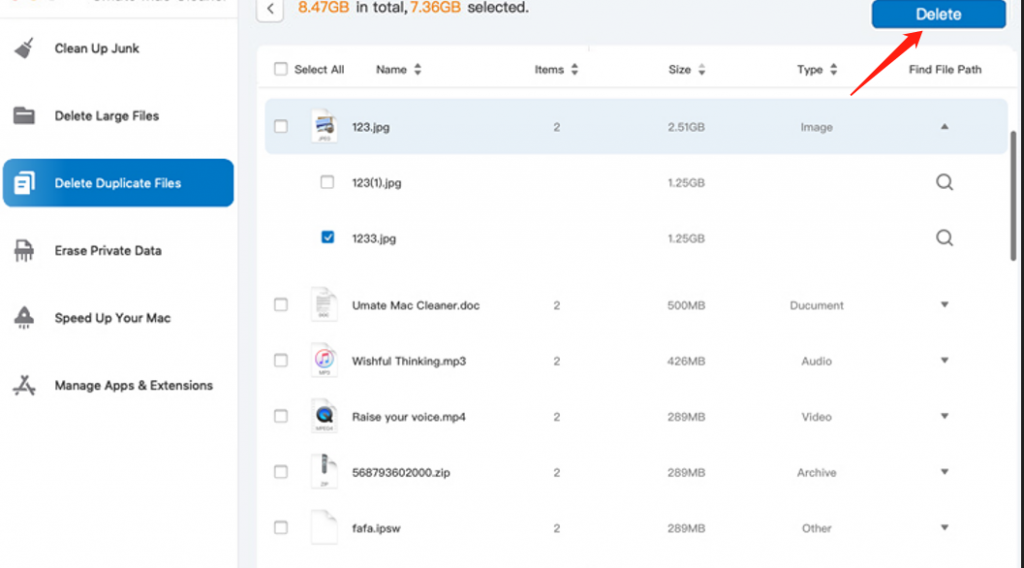
- Delete Duplicate Files: Select the items (e.g., image, document, audio, video, etc.) you want to delete from the list.
- Erase Private Data: On the next page, you’ll find a list on the left side of the interface.
That list will consist of file categories that the module was able to scan. The list should only always include five items, namely (1) Online Traces, (2) Usage Traces, (3) Chat Data, (4) Photo Junk, and (5) Mail Attachment.
Your goal this time is to select files to delete, but before that, you must select a category first, only then will the list of actual files appear from the right side of the software. Once the files appear, select the files you want to delete by clicking on their corresponding checkboxes. You can also click the Select All checkbox if you want to delete all files.

Step #5: Click the Blue Button
To finalize the process, you must click the blue button at the top-right corner of the window. It should say Clean, Delete, or Erase. It does exactly what it says. It may take a few minutes to complete the operation, so have to wait a while.

Closing Thoughts
It doesn’t take an expert to analyze one’s hard drive manually. But it takes too much time and effort that there’s really no point in doing so. That’s why it’s a good idea to have a hard drive space analyzer. But then again, not all analyzers are worth getting. With this guide, however, you did not have at least three analyzers that you can consider.
Latest Articles