

One useful fact to keep in mind is that the Home folder on a Mac does not go by the name ‘Home’ but rather takes on the name of the user account. This folder, which resides in the User directory, contains all the files and folders that you would expect to find in a typical user folder, including any files from guest users.
To access your home folder on Mac more conveniently, consider adding it to the Finder menu. This will allow you to easily navigate between folders, such as Documents and Downloads, and quickly return to your Home folder. Don’t struggle with hidden folders on your Mac! Learn how to access your Home folder on Mac and make it permanently visible with our easy guide.
Part 1: What is Home Folder on Mac
The Home Folder on a Mac is a directory where a user’s personal files and folders are stored. When you log in to your Mac, you are taken to your Home Folder by default. Your Home Folder contains your personal files, such as your documents, music, photos, and other files.
Your Home Folder is named after your user account name, and it is located in the /Users/ directory on your Mac. Within your Home Folder, you will find several subfolders, including Documents, Downloads, Movies, Music, and Pictures, which are designed to help you organize your personal files.

Part 2: How to Find the Home Folder on Mac
You can find your Home folder on a Mac by following these steps:
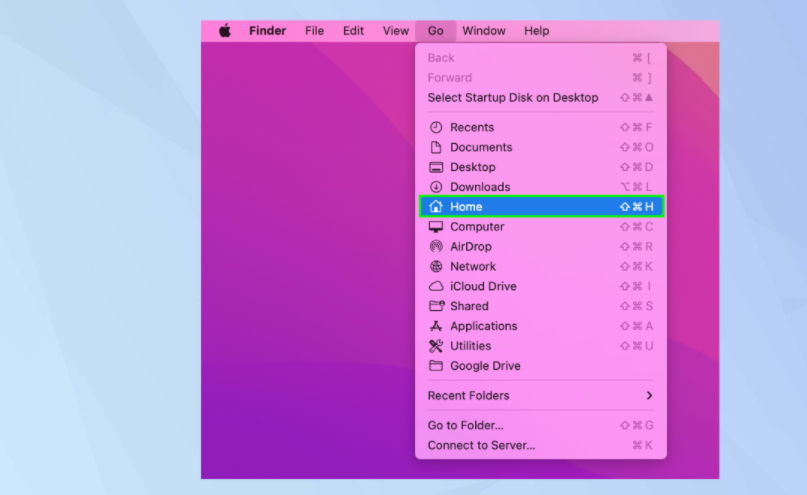
Click on the Finder icon in the Dock, which is typically located on the left side of the screen. In the Finder menu bar, click on “Go” and select “Home” from the drop-down menu. Alternatively, you can use the keyboard shortcut “Shift + Command + H” to quickly access your Home folder. Your Home folder will open, displaying all the files and folders that belong to your user account. You can also access your Home folder by opening a new Finder window and clicking on your username in the left sidebar under “Favorites” or “Devices“.
Your Home folder is typically named after your username and is located in the /Users/ directory. Within your Home folder, you will find several subfolders such as Documents, Downloads, Music, Pictures, and more, which are used to organize your personal files.
Part 3: How to Rename Your Home Folder?
Renaming your Home folder on a Mac requires some technical knowledge and should only be done if you know what you are doing. Here are the general steps to rename your Home folder:
- Log in to your Mac as an administrator.
- Create a new administrator account. This will be a temporary account that you will use to rename your Home folder.
- Log out of your current account and log in to the new administrator account.
- Open the Finder and navigate to the /Users/ directory.
- Rename the Home folder that you want to change to a new name.
- Click on the Apple menu and select System Preferences.
- Click on Users & Groups.
- Click on the lock icon and enter the administrator password to make changes.
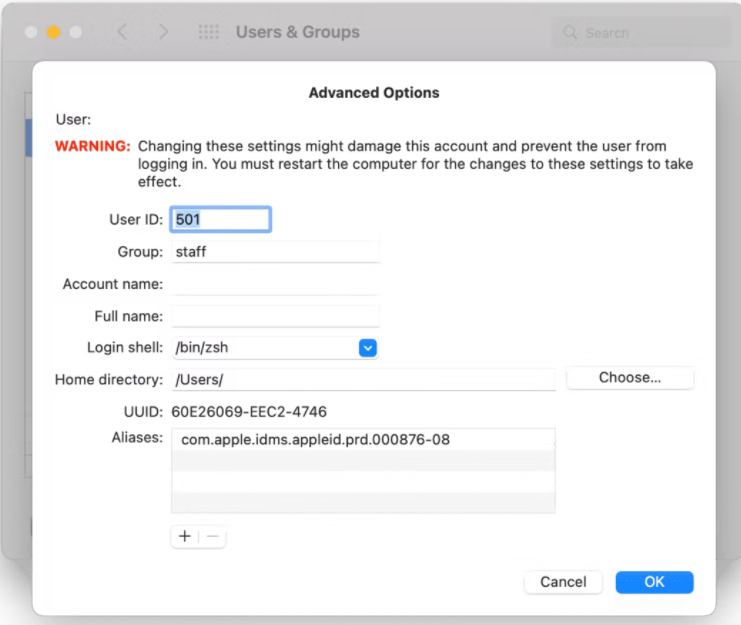
- Control-click on the user whose Home folder you just renamed and select Advanced Options.
- In the Home Directory field, enter the new name of the Home folder.
- Click OK and close System Preferences.
- Log out of the temporary administrator account and log back into your original account.
- Check that your new Home folder name is working properly.
It is important to note that renaming your Home folder can cause issues with some applications and services that rely on the previous Home folder name. Therefore, it is recommended that you create a backup of your important files and data before proceeding with this process.
Part 4: How to Manage the items in your Finder sidebar
The Finder sidebar on a Mac is a useful feature that allows you to quickly access frequently used files and folders, as well as network locations, tags, and more. Here’s how you can manage the items in your Finder sidebar:
- Open a Finder window by clicking on the Finder icon in the Dock.
- Click on the “Finder” menu in the top-left corner of the screen.
- Select “Preferences” from the drop-down menu.
- Click on the “Sidebar” tab in the Preferences window.
- To remove an item from the sidebar, simply uncheck the box next to its name.
- To add an item to the sidebar, check the box next to its name. You can choose from several options, such as Favorites, iCloud Drive, AirDrop, and more.
- You can also customize the order of items in the sidebar by dragging and dropping them to the desired location.
- If you want to change the icon size of the sidebar items, you can use the slider at the bottom of the Sidebar preferences pane.
- Once you have made your desired changes, close the Preferences window.
It’s worth noting that the changes you make to the sidebar preferences apply to all Finder windows. If you have multiple user accounts on your Mac, each account can have its own sidebar preferences.
Part 5: How to Access the Home Folder Easily
If you need to access your Home folder on Mac, Mac Cleaner offers a convenient solution to quickly locate it. With the ability to create a storage map, Mac Cleaner enables you to effortlessly view all the files and folders stored on your Mac in just a few clicks, including your Home folder. If you are experiencing issues with your Mac, such as slower performance or overheating, it may be helpful to access your Home folder to perform a quick checkup and tidy up.
To ensure the optimal health of your Mac, consider using Mac Cleaner, an app that offers dozens of tools to clean up gigabytes of space, speed up your Mac, and scan for malware and viruses. By taking advantage of Mac Cleaner, you can easily and effectively optimize the performance of your Mac, including your Home folder. Give it a try!
Step #1: Download, Install, and Set Up Mac Cleaner
To begin, you’ll need to obtain and configure Mac Cleaner on your laptop. Start by visiting the official website of Mac Cleaner through the provided link, where you’ll find a Download Now button. Click on the button to initiate the download of a DMG file. Once the download is finished, launch the file, and the installer should begin. Follow the onscreen instructions from that point forward. When the installation is completed, the software should automatically launch.

Step #2: Select from Six Modules
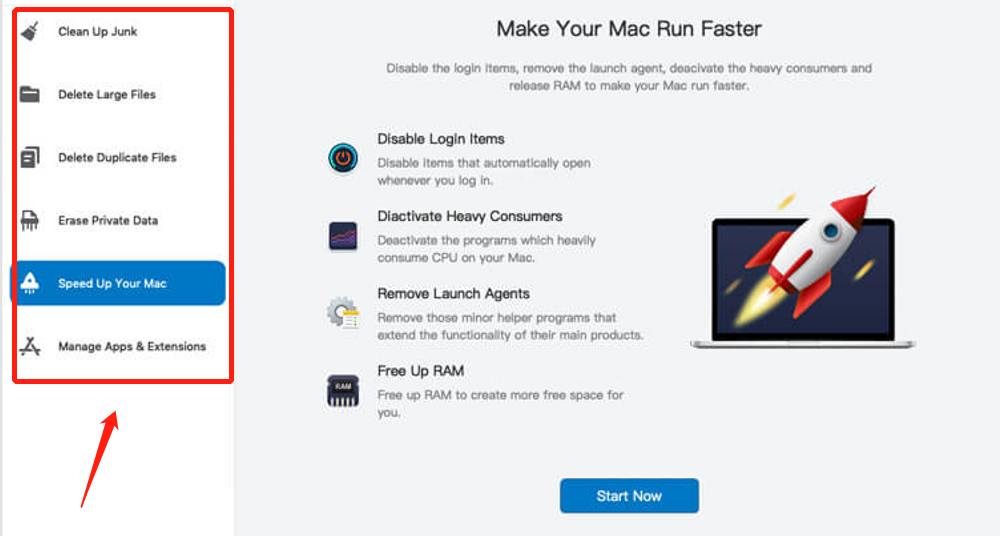
On the interface’s left side, you’ll see six distinct options that correspond to Mac Cleaner’s modules. Each module serves a unique purpose, such as eliminating junk files or uninstalling apps, and all but one relate to the startup disk. Here is an overview of the modules and their functions:
- Clean Up Junk: This module removes cache files from the system and applications, which are typically located on the startup disk. It can also identify files in the Downloads and Trash Bin folders within the startup disk.
- Delete Large Files: This module aids in locating backups on your laptop that should be inside the startup disk.
- Delete Duplicate Files: This module detects files with multiple copies on your laptop, including system and app files that duplicate themselves automatically. It is also useful for cleaning up the startup disk.
- Erase Private Data: This module scans for and deletes files containing private data, such as email attachments, photo junk, usage traces, and chat data, all of which are located on the startup disk.
- Manage Apps & Extensions: This module allows you to uninstall applications and remove browser extensions.
- With the exception of “Speed Up Your Mac,” these modules can help clean up your laptop. To choose a module, click on it on the left side of the interface.
Step #3: Click Scan/View Items
After selecting a module, the software will display information about its features. Your next step is to scan your laptop for the relevant items, such as files or applications. The step-by-step process varies for each module. Here’s what you need to do for each of the five cleanup modules:
- Clean-Up Junk: The interface has two sides: Quick Clean and Deep Clean. Quick Clean detects System Junk, App Junk, Trash Bin, and iTunes Junk. Deep Clean scans those file types plus three additional ones: Downloads, iOS Junk, and Unused Disk Images. Choose between these options and click the Scan button to proceed.
- Delete Large Files: Click the Scan button.
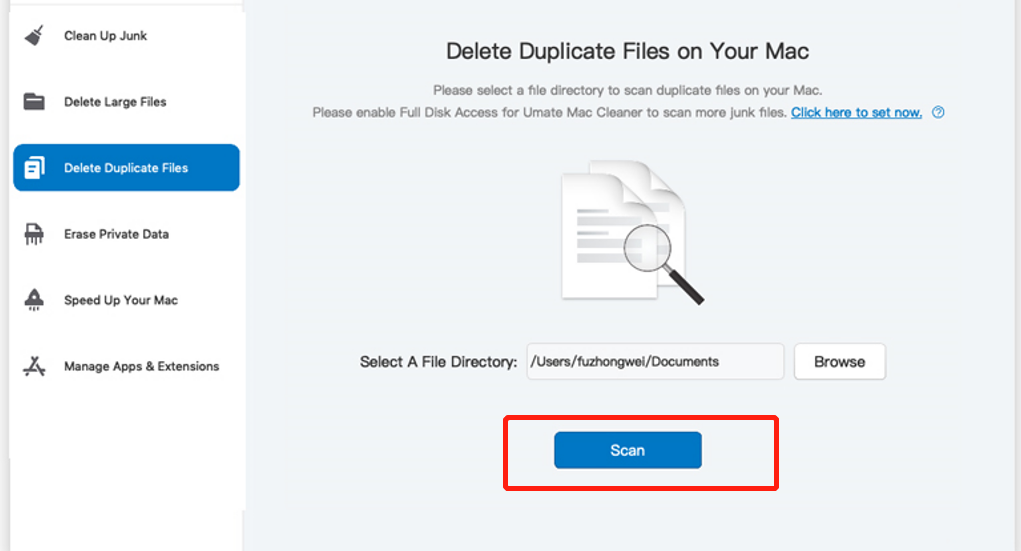
- Delete Duplicate Files: In the center, you’ll see the Select File Directory field, with the Browse button to its left. Click Browse, navigate to the folder you want to scan and click the Scan button after specifying the folder.
- Erase Private Data: Click the Scan button.
- Manage Apps & Extensions: This module has two sides: Uninstall Applications and Remove Extensions. Click the View Items button beneath your chosen option.
Step #4: Select Item/s
In this fourth step, you will select the items that you want to operate on, depending on the module you have chosen in the previous step. The process for each module will vary, so here’s what you need to do for each one:
- Clean-Up Junk: On the left side of the interface, there is a list of file categories, such as System Junk, Downloads, Trash Bin, and Unused Disk Images. Select a category by clicking on it, and a list of actual files will appear on the right side. Click on the checkboxes next to the files you want to delete, or click “Select All” to delete all items.
- Delete Large Files: Select items, such as files, folders, disk images, archives, and so on, from the list.
- Delete Duplicate Files: Select items, such as images, documents, audio, videos, and so on, from the list.
- Erase Private Data: The steps are similar to the Clean-Up Junk module. However, the list on the left will only consist of five items: Online Traces, Usage Traces, Chat Data, Photo Junk, and Mail Attachment.
- Manage Apps & Extensions: If you chose Uninstall Application, you don’t need to do anything until step 5. If you selected Remove Extensions, choose a browser from the list on the left, and then proceed to step 5.
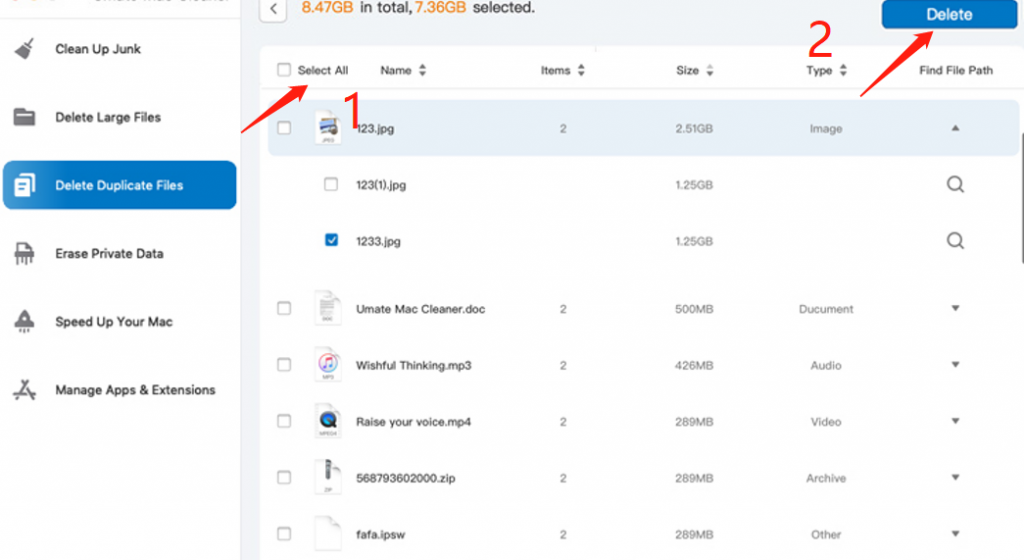
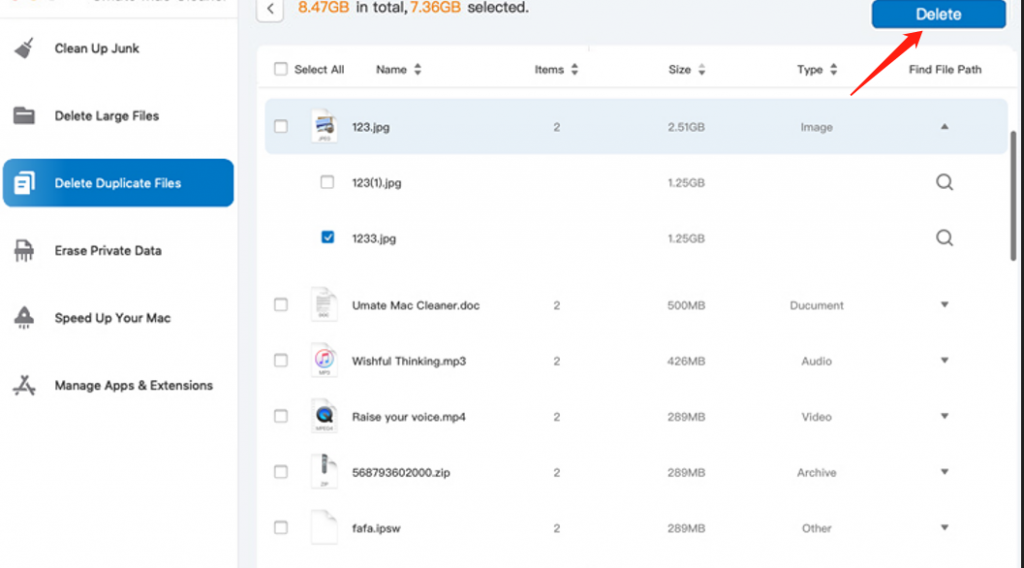
Step #5: Click the Blue Button
Step 5 involves clicking the blue button located at the top-right corner of the window, regardless of which module you have chosen. The button will be labeled Clean, Delete, Erase, Uninstall, or Remove, depending on the module.
This will finalize the process and allow you to quickly free up several GBs of space on your startup disk. Mac Cleaner offers additional modules, such as Speed Up Your Mac, which can help improve your operating system’s performance, but we will cover that in a separate guide.
Parting Words
If you’re experiencing issues with your Mac, such as slow performance, overheating, or a general sense that something’s not right, accessing the Home folder can help you diagnose the problem.
By using the app Mac Cleaner, which provides easy access to the Home folder, you can review the health of your Mac, give it a thorough clean, and use its dozens of tools to clean up gigabytes of space, speed up your operating system, and scan for malware and viruses. Give it a try and get your Mac running like new again!
Latest Articles