

MacBook laptops have an average storage capacity of 258GB. Though it may seem large enough for all your storage needs, it’s actually often not enough, at least most of the time. That’s why you’ll often find MacBook users wondering how to clean MacBook storage, and you’re probably one of these users. This matter becomes even more urgent once you realize that you cannot just plug in an external storage drive to your laptop to extend its storage capacity, unlike macOS laptops.
The good news is apart from using an external disk, there are many other ways to extend the maximum disk space of a MacBook laptop, though it requires a lot of time and effort. With that said, here are six ways on how to clean MacBook storage.

Method #1: Empty Trash
The Trash is where all the files you deleted for the past 30 days or one month go. Unless you pressed the combination of keys to permanently delete a file, every file you delete will go here. And though they’re not usable and cannot be opened until you recover them, they still take up disk space on your laptop. Since there’s likely going to be a bunch of files inside your Trash, an excellent way to clean MacBook storage is to empty the Trash, and here’s how you can do that:
- Find the Trash icon on your Dock. It should look like a trash bin.
- Click the icon while holding the Ctrl key on your keyboard.
- Select Empty Trash.
Alternatively, you can click the Trash icon to open, then find the files you want to delete. Next, you must select them and press Delete on your keyboard. It won’t empty the Trash, but it’s a good idea to delete files individually in case you accidentally deleted an important file in the past.

Method #2: Uninstall Unused Apps
Just like files, there are apps that are simply not as useful as they used to be. Since these apps take up precious disk space, it would be for the best if you were to uninstall them once and for all. Here’s how you can uninstall apps on your MacBook:
- Click the Launchpad icon from the Dock. The icon is either a rocket or a square with nine smaller squares inside.
- Once Launchpad opens, find the apps you want to uninstall.
- Hold the Option key on your keyboard until the apps start jiggling.
- An X icon should appear at the corner of each app. Click that icon to uninstall the app.
- Select Delete when a popup window appears to confirm your decision.

Method #3: Clear System Cache
Whenever you do something on your laptop, the system automatically generates files. Though these files are useful for the task in question, they become obsolete immediately after. Since the system doesn’t delete these files automatically, they can pile up to take up a considerable amount of space. Hence, it’s best to clear the system cache regularly, and here’s how you can do it:
- Open Finder on your laptop.
- Click Go from the top menu bar.
- Select Go to Folder… from the dropdown menu.
- A popup window will appear. On the text bar, type in the following: ~/Library/Caches
- In the Caches folder, find the ones you think you no longer need.
- Drag them to the Trash to delete them.
Make sure you empty the Trash after this so the deleted cache files don’t take up space on your laptop.

Method #4: Utilize Mac Cleaner
Considering how the average MacBook has a storage of 258GB, chances are you have tens of thousands of files you can delete if you’re having storage problems on the laptop. Though it’s easy to assume that you can get rid of these files overnight, it’s actually not that easy, as you may have realized in the previous sections. Not only do you have to find the files themselves, but you also need to nitpick which can be removed since some of them might be important. For that reason, it may take you hours if not the whole day to get rid of just 10GB worth of disk space. If you don’t want the cleanup to take forever, try Mac Cleaner.
Mac Cleaner is a cleaning app that can get rid of all kinds of files, from junk to duplicate files. It also has extra features, like Speed Up Your Mac or Erase Private Data, but for the purposes of this guide, we’ll focus on its cleaning modules.
Below are the steps on how to clean MacBook storage using the app:
Step #1: Start Mac Cleaner on Your Laptop
You need to get the software on your laptop before anything else. To do that, you must go to this link. The browser will redirect you to the download page of Mac Cleaner where you must click the button that says Download Now. Wait for a few minutes for the file to complete, and once that’s done, open it. That should start the installation process, and all you have to do is follow the onscreen instructions afterward. The software opens automatically once the installation is finished.
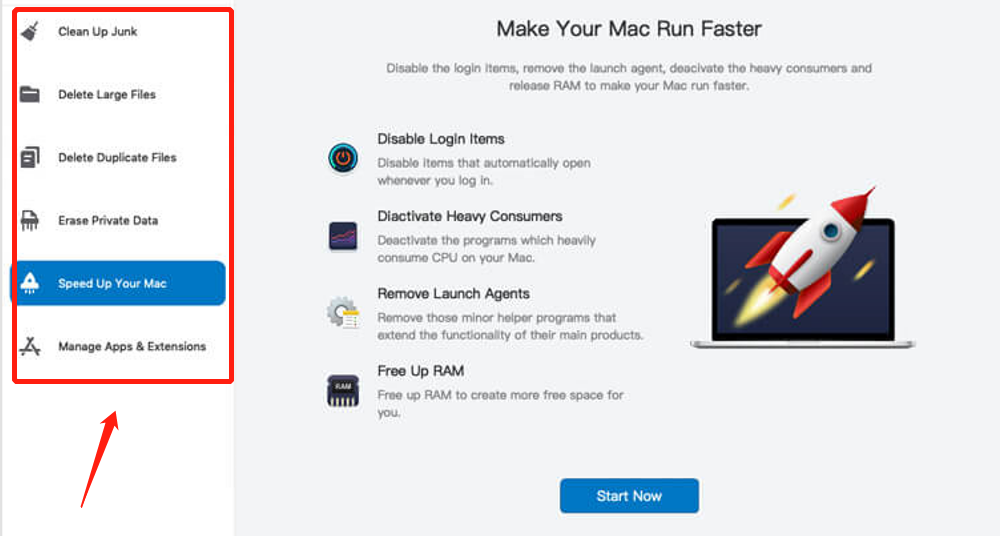
Step #2: Choose a Cleaner Module
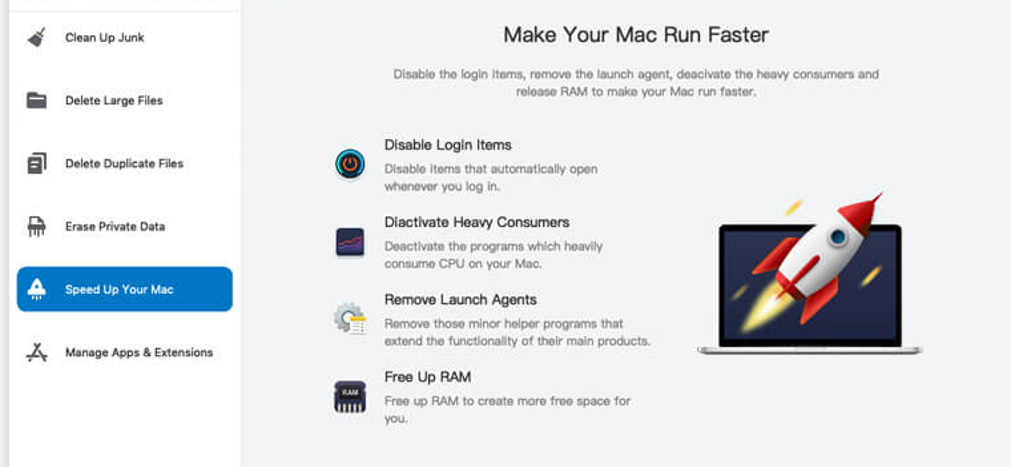
There will be a sidebar to the left of the interface. There, you’ll find six different options, namely (1) Clean Up Junk, (2) Delete Large Files, (3) Delete Duplicate Files, (4) Erase Private Data, (5) Speed Up Your Mac, and (6) Manage Apps & Extensions.
These are the modules that Mac Cleaner has to offer. Each module is useful in different scenarios, and in your case, you’ll mostly need the first three modules which we like to call the cleaning modules. They delete files according to specific criteria, which vary from module to module. Here’s a look at the files that you can delete for each of these three modules:
- Clean Up Junk focuses on junk files, which may include system cache, app cache, downloads, Trash, and the corresponding files inside their directories. It can also delete files from default apps, like Photos, iTunes, and more.
- Delete Large Files specializes in detecting and deleting files that exceed the size of 50MB.
- Delete Duplicate Files allows you to scan a folder of your choosing. The system then scans all the directories outside of that folder to see if there are any duplicates of the files inside your specified folder.
To proceed to the next step, you must select a module by clicking on it from the left side of the software.
Step #3: Scan Your Mac for Files
Each cleaning module will show you a different-looking interface when you select it. Therefore, the steps will vary from this point onwards, though the idea behind the third step is to scan for files. Here’s how to scan for files for each cleaning module:
- Clean-Up Junk: The interface will consist of two sides, Quick Clean and Deep Clean. Quick Clean is on the left side and it’s a scanning method for the following file types: System Junk, App Junk, Trash Bin, and iTunes Junk. Deep Clean is on the right side and can scan for the following file types: Downloads, iOS Junk, and Unused Disk Images, as well as the file types scanned by quick Clean. Select between these two options and click the Scan button afterward.
- Delete Large Files: Click the Scan button at the center of the interface.
- Delete Duplicate Files: There will be a field that says Select a File Directory at the center of the window. If you look at its left, you’ll find a button that says Browse. Click that button. A popup window will then appear, and all you have to do is navigate to the folder you want to scan for duplicate files. Select that folder, then click the Scan button.

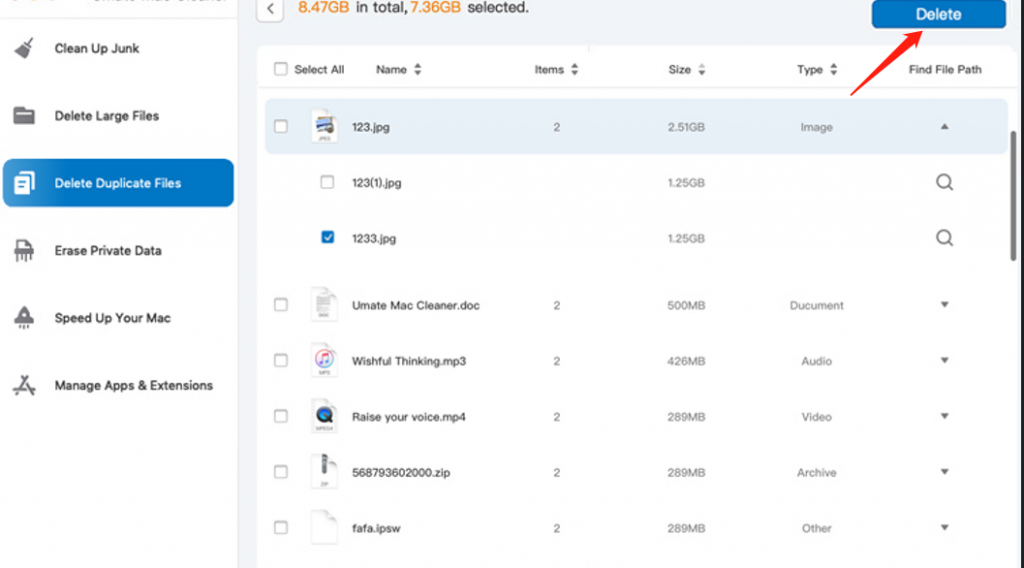
Step #4: Pick a File/s
The idea behind this next step is to select the files that you wish to remove. For Delete Large Files and Delete Duplicate Files, you’ll find a list of files right away, and it may consist of the following file types: image, video, document, song, folders, etc. You simply have to select the files you wish to delete by clicking their corresponding checkboxes. You can click Select All if you wish to delete all the files in the list. For Clean Up Junk, you have to do the same thing, but you must first choose a file category from the left side of the interface, which may consist of the following: System Junk, Downloads, Trash Bin, and more.

Step #5: Delete the File/s
Once you’ve confirmed that you selected all the files you want to delete, look at the top-right corner of your window and click that button there that says either Clean or Delete. That will finalize the process, though you have to wait for a few minutes.
It’s usually not this easy to learn how to clean MacBook storage. As you may have realized in the previous methods, it often takes a couple of minutes just to find and delete 100GB worth of disk space. With this method, however, you don’t have to find them yourself, since the app detects them automatically. You simply have to click a few buttons and you’re pretty much done.
Parting Words
Storage has a lot to do with a device’s performance. If there’s insufficient disk space, the device may struggle to figure out where to place the files it generates. Naturally, this can cause delays and eventually lags, which is why you may notice that your MacBook performs poorly when you haven’t done a cleanup for a while. Unfortunately, there’s a limit to how many files you can delete from your laptop, but that’s why you’re here. With this guide, you’re able to learn how to clean MacBook storage.
Latest Articles