Here we offer you guidance on how to Clear Disk Space on iMovie.
iMovie is the built-in video editing software of macOS computers. It has the features that most video editing tools nowadays have, and more. In short, it’s a relatively good application, so it may come as a surprise that not many macOS computer users like to use the software. That’s simply because it often generates large amounts of files that the app alone takes the majority of your disk space. But while it is quite frustrating, there’s not much you can do since these files are often assets that your video editing project requires. In other words, deleting them carelessly may put your hours of work to waste.
The good news is that while there are indeed files you cannot delete, there are also files you can delete, and that’s what was here to talk about. Read on as this guide goes over four ways on how to clear disk space on iMovie on macOS computers.

Method #1: Remove Items from The Library
When you open the iMovie app, you’ll be met with a rather complex interface. To the very left, you’ll find the LIBRARIES section where there are different libraries. Every item under that section corresponds to a file inside the iMovie directory.
The simplest way to free up space on the iMovie app is to simply delete some of the projects in the library, including the All Events, All Projects, and iMovie Library. If you have a couple of files you no longer need, here’s how to clear disk space on iMovie with this method. Keep in mind that the steps will vary depending on the library. Let’s start with iMovie Library:
- Open the iMovie app.
- On the Libraries section, expand the iMovie Library option.
- Expand every folder until you find actual files, which are those that don’t have a folder icon to its left.
- Click on the file while holding the Ctrl key.
- Select Move Event to the Trash from the resulting dropdown menu.
To remove items from the All Projects library, here’s what you need to do:
- Click the All Projects option.
- A list of items will appear to its right. Find the ones you want to delete.
- Click on an item while holding the Ctrl key.
- Select Move to Trash.
That should delete the selected files, but keep in mind that it only moves them to the Trash. If you didn’t know, the files inside the Trash can be recovered and still takes up disk space. To ensure they don’t consume space needlessly, you must delete them for the second time, though this time, it’s in the Trash. You can also click the Empty Trash to delete all files at the same time.

Method #2: Delete Render Files
Render files are the type of files that the iMovie app creates automatically whenever it needs certain assets. You can think of them as the temporary files that the app will no longer need once the project is complete. In other words, you can delete them if you’re done with your project, without actually deleting the project itself. Here’s how you delete render files:
- Open the iMovie app.
- Click iMovie from the top menu bar.
- Select Preferences from the resulting dropdown menu.
- A popup window will appear. At the very bottom of that window, you’ll find a Delete button. Click that button.
It may take a while, but that should do the trick. While render files aren’t necessarily the largest in size, at least compared to other assets that might be lurking inside the iMovie folder, their quantity is the main issue. Over time, they can pile up to take GBs or even tens of GBs, so it’s definitely worth deleting the render files every once in a while. The best part is it won’t lead to data loss and your existing movie projects shouldn’t be affected, even if you delete all the render files at once.

Method #3: Delete Files Via Finder
Though you should typically be able to clear disk space on iMovie using the previous methods, there are instances where your interface is different or messed up. As a result, you may not be able to use the same cleanup features as other users. In that case, what you can do is use Finder, the file management app of macOS. With it, you should be able to jump to the iMovie directory manually and delete files from there. Here’s how to clear disk space on iMovie via the Finder app:
- Open the Finder app on your macOS computer.
- Click Movies from the left side of the window.
- Find and click the iMovie Library folder while holding the Ctrl key on your keyboard.
- Select Show Package Contents.
- Find and delete the projects you want inside the folder.

Method #4: Use Mac Cleaner
Though the iMovie is a built-in software, one must keep in mind that it’s still an application. And just like most applications in macOS computers, you can manage its storage in any way you want. The aforementioned methods should help you in that regard. But you must also remember that while it’s possible to learn how to clear disk space on iMovie, you cannot completely delete all files. After all, that can make your video editing project utterly useless. Alas, distinguishing a vital file from a useless one inside the iMovie folder tends to be an extremely difficult task, but not if you use Mac Cleaner.
Mac Cleaner is a cleaning app that allows you to automatically delete files from your macOS storage. It specifically targets unnecessary files, so it’s perfect for your task. Here’s how to clear disk space on iMovie with this software:
Step #1: Start Mac Cleaner On Your Computer/Laptop
The first step is to get the software on your computer. To do so, you need to open a browser and click this link. Doing so will take you to the Mac Cleaner download site where you must click the Download Now button. The browser will then download a DMG file, which you must open promptly after the download finishes. It’ll start the installer and all you have to do is follow the instructions that appear accordingly. The software should open automatically once the installation finishes.

Step #2: Choose Clean Up Junk
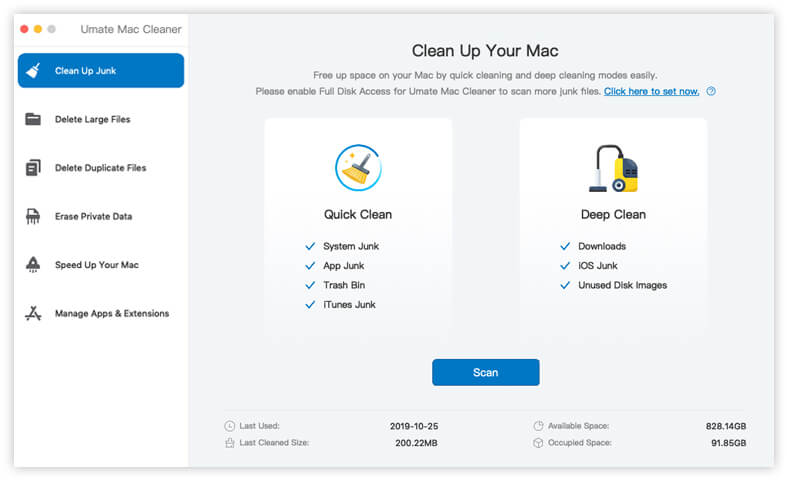
On the left side of the interface, you’ll find a sidebar that consists of six options. These include (1) Clean Up Junk, (2) Delete Large Files, (3) Delete Duplicate Files, (4) Erase Private Data, (5) Speed Up Your Mac, and (6) Manage Apps & Extensions. Though each module has different functionalities, you’ll only need the help of the first module, Clean Up Junk, to clear the files inside the iMovie directory. That’s because the module allows you to get rid of System Junk, App Junk, Trash Bin, iOS Junk, iTunes Junk, and other file types, and the iMovie directory coincidentally belongs to the App Junk category.

Step #3: Click the Scan Button
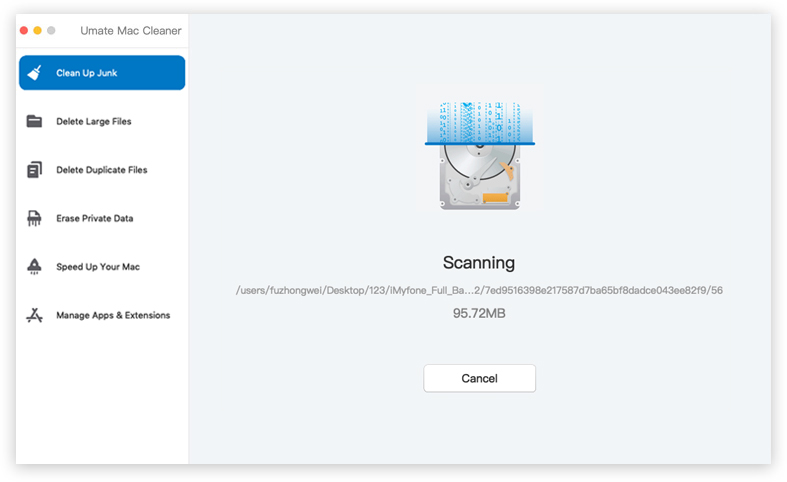
Once you click the Clean Up Junk module from the left sidebar, the software will change accordingly. To be precise, the interface will split into two. One side says Quick Clean while the other says Deep Clean. Quick Clean allows you to find and get rid of System Junk, App Junk, Trash Bin, and iTunes Junk. Deep Clean scans file more slowly, but it should be able to detect the aforementioned categories in addition to Downloads, iOS Junk, and Unused Disk Images. You can select either one since both can scan your computer for App Junk. After selecting an option, you must click the Scan button underneath.

Step #4: Pick a File Category and File/s
The next screen will have a list on the left side. The list will consist of the file categories mentioned earlier, such as System Junk, App Junk, Downloads, Trash Bin, Unused Disk Images, etc. Select App Junk from this list to proceed. In doing so, a new list will appear on the right side of the interface, from which you’ll find files that belong to the selected category. Simply find and select the files that you think belong to the iMovie directory. To select an item, click on its corresponding checkboxes on its left. If you can’t distinguish those files, you can also click the Select All box to include all items from the list.

Step #5: Click the Clean Button
To finalize the process, you simply need to delete the files you selected. To do so, you must click the blue button located at the top-right corner of the screen which should say Clean. It’ll take a few minutes or seconds, but that should be the last step.
It may require a bit of technical knowledge, but compared to other methods, it’s much more efficient since the software automatically detects the files. You don’t have to find them manually, which is typically what takes most of the time when you learn how to clear disk space on iMovie. Furthermore, you can use Mac Cleaner for purposes other than clearing the iMovie directory. You can uninstall apps, speed up your Mac, and more, so there’s really no reason to not use the software.

Conclusion
The iMovie application tends to consume tens of GBs worth of disk space. Considering the average maximum storage capacity of macOS computers is 128GB, even 10GB is already a considerable amount of space, making up almost 10 percent of your total disk space. So, while the aforementioned, except for the last, takes time, it’s still almost always worth it given the potential benefits it can bring to your computer. Not only will it free up space for more important files, but you can also always speed up your computer by eliminating unnecessary files.
Latest Articles