

A macOS computer consists of countless files that you may or may not be aware of. System files, in particular, are difficult to keep track of since the computer constantly generates them. However, there are certain system files that you can delete permanently, meaning they won’t ever recover, at least without intervention. They’re an excellent target for deletion since you can free up space on your computer and only have to delete them once, unlike temp files which often recover constantly.
Language files are one such example of these files. You can delete them and never have to worry about them going back, though that’d require you to know how to delete language files on Mac. But first, can you even delete them in the first place?
Can You Delete Language Files on Mac?
There are certain system files that you cannot delete simply because they’re encrypted or require admin permissions and privileges. While language files are technically part of the system, thankfully, they aren’t the type that you cannot delete.
While there’s a possibility that they’re encrypted, it’s unlikely, since they’re usually just like regular files. You can delete them, as long as you can find where they are, which is the main problem. As for whether it’ll break your computer if you delete them, deleting them won’t do much to your macOS computer. As you may already know, you can only ever use one language for your system at a time. You can’t use two languages at once. That’s why unless you delete all the system language files on your computer, the operating system should still be able to operate and behave without any issue.
Of course, if you’re going to leave a language alone, then it should be the one you normally use. If you’re an English speaker, for example, you must leave the English language file alone. The same goes for foreign speakers of other languages.
Furthermore, it’s important to understand that the main reason behind this guide is to give you a way to free up space on your computer without affecting the system too much. With that said, here’s how to delete language files on Mac.

Method #1: Install Monolingual
Although it’s technically a third-party software, many users found that the best way to delete language files on Mac is to use the utility app, Monolingual. As the name suggests, it’s a language-related app that allows you to delete unnecessary language files from your computer. It’s available in macOS and the main idea behind it is just to allow users to limit themselves to only one language, which is plenty enough for anyone. Without further ado, here’s how you can use the Monolingual application to delete unnecessary language files from any macOS computer:
- Open a browser.
- Go to this link where you can download the Monolingual app. Make sure you download the macOS version.
- Run the installer and follow the onscreen instruction to install it.
- Once it’s installed, open the app.
- There are two tabs, Languages and Architectures. On the Languages tab, you’ll get a list of languages currently installed on your computer. Tick the checkbox of the ones you want to delete from your computer.
- Click the Remove button at the bottom-right corner of the window to finalize the process.
With this, you should be able to delete the language files rather easily. Unfortunately, there’s no guarantee it would delete all unnecessary language files since it may not be able to detect other folders, especially the ones in hidden areas.
For that, you need to take a more manual approach.
Method #2: Use The Finder App
Finder is the file management app for macOS computers. It allows you to jump from one folder to another, and most importantly, with the app, you can delete files and folders rather easily. You can use the Finder app if you want to delete language files on your computer, as long as you know where to look. With that said, here’s how you can do it:
- Open a session of Finder on your computer.
- Click Applications from the left side of the window.
- Choose an app from the list that would appear on the right side of Finder.
- Hover over that app and click on it while holding the Ctrl key on your keyboard.
- Select Show Package Contents from the resulting dropdown menu.
- A new window will appear which takes you to the Contents folder. There, find and open the Resources folder.
- In the Resources folder, you’ll find a couple of folders. The ones with names that end in .lproj are the fodders that contain your language files. Before the .lproj part of the name are two letters, which indicate the language. For example, the English folder has a file name of en .lproj. Find the ones you don’t need and delete them accordingly.
- Make sure you also delete them from the Trash app of your computer to ensure they don’t take up any space.

Method #3: Utilize Mac Cleaner
The issue with the aforementioned methods is that they may or may not work. The first method is likely to work but if your macOS version is outdated, it may not work as well. The second method can be difficult to execute since you must find the language files first, which often takes several minutes to an hour, especially if you don’t know your way inside the macOS storage system. The good news is there’s yet another method that’s most definitely faster, and it involves Mac Cleaner.
Mac Cleaner is a cleaning app that allows you to delete certain files from your computer. Language files happen to be one of the many file types that the software can detect and delete. If you’re interested, here’s how you can use the software:
Step #1: Launch Mac Cleaner on Your Computer
To start with, you must get the software by opening your browser and going to this site. That should take you to the Mac Cleaner download page where you must click the Download Now. That’ll download a DMG file, which you must then open once it’s downloaded. That should start the installer, and all you have to do is follow the onscreen instructions.

Step #2: Choose Clean up Junk
If you look at the left side of the interface, you’ll find six different options. These are the modules that Mac Cleaner currently has, and they include: (1) Clean Up Junk, (2) Delete Large Files, (3) Delete Duplicate Files, (4) Erase Private Data, (5) Speed Up Your Mac, and (6) Manage Apps & Extensions. For your purposes, you’ll need the Clean Up Junk module, which gets rid of junk like System Junk, App Junk, Trash Bin, iOS Junk, iTunes Junk, and Downloads. Coincidentally, language files happen to be under System Junk, so you must select this module by clicking on it from the left sidebar.
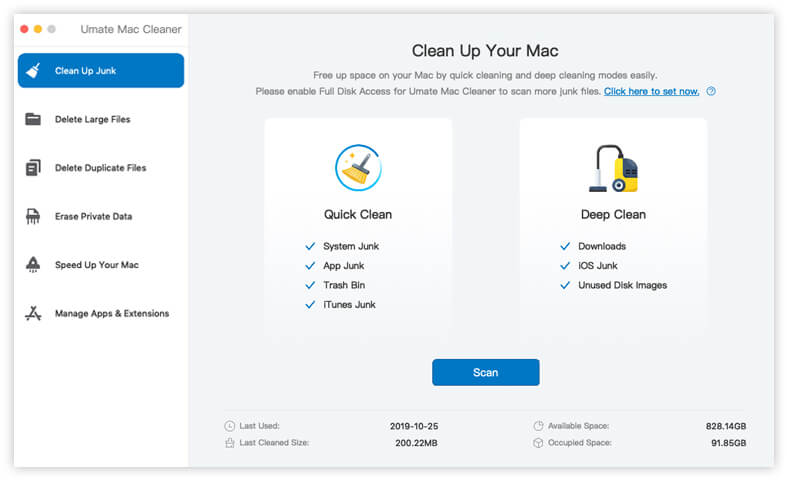
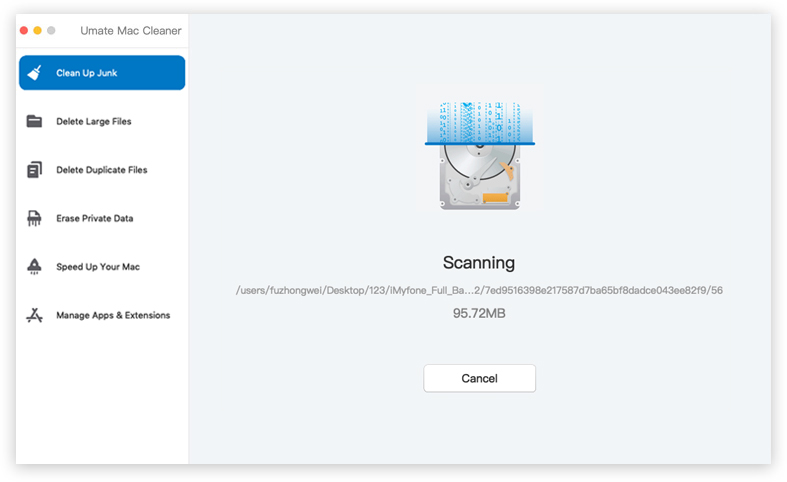
Step #3: Click the Scan Button
Upon selecting the module, the software will split into two parts. One side says Quick Clean and the other says Deep Clean. Quick Clean allows the software to find and delete System Junk, App Junk, Trash Bin, and iTunes Junk, whereas Deep Clean detects and deletes those file categories in addition to Downloads, iOS Junk, and Unused Disk Images.
You can select either of the two since they both include language files, though we suggest choosing Deep Clean just to be doubly sure. Upon selecting an option between the two, you must click the Scan button underneath the options.
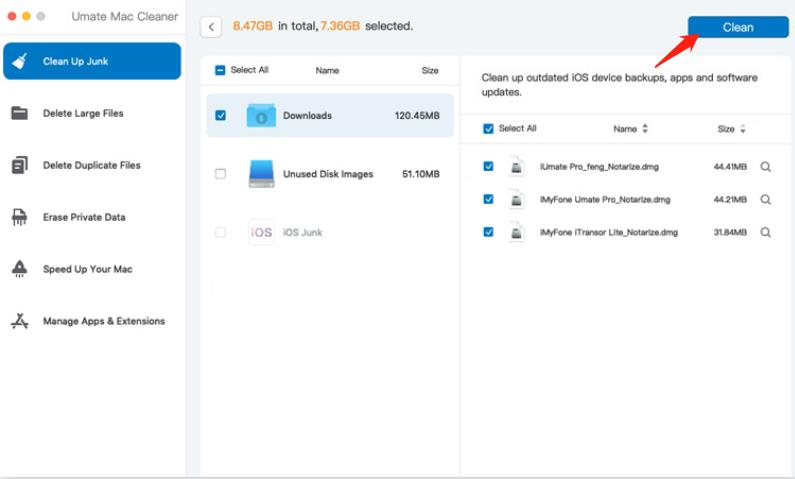
Step #4: Select a File Category and File/s
The next page will consist of a list on the left side of the interface. It’ll consist of file categories like System Junk, Downloads, Trash Bin, Unused Disk Images, and the like. All you have to do is select a category from this list. Since language files belong to the System Junk category, you must select that item. Upon selecting a category, another list will appear on the right side of the interface consisting of files that belong to the selected category. Find the language files among them and click their corresponding checkboxes to select them. You can also click Select All if you’re not sure which of them is the language files.

Step #5: Click the Clean Button/Delete the File/s
To finalize the process, you need to click the blue button at the upper right corner of the window which should say Clean. Once you click that button, the deletion process will start and all you have to do is wait for the process to complete.
Final Words
A single language file typically has a size of tens of MBs. Since the system usually has a couple of dozens of them lying around, deleting them should save you hundreds of MBs worth of disk space. Furthermore, there are also language files in applications, as this article has discussed, so you can further free up space on your computer. The problem with it is the method, but with this guide, that shouldn’t be an issue. Not only do you have several options to choose from, but you can also opt to use tools like Mac Cleaner, which should make the process a lot easier and more streamlined.
Latest Articles