

Whenever there’s an update on your macOS computer, you can perform it immediately. The computer starts by downloading the update, and once the download is complete, the operating system proceeds to install it by distributing the contents of the update file accordingly. That’s the standard procedure with software updates on macOS computers and even Windows PCs. It’s often a relatively smooth process, but there’s one problem—the system doesn’t automatically delete the software update files.
As a result, software updates would often consume twice the amount of space they should be taking, so it’s not unusual for a computer to run out of space fairly quickly. With that in mind, this guide will go over how to delete software updates on Mac.
Part 1: Can I Delete Software Updates on Mac?
Yes, you certainly can. Deleting a software update will not do any harm to your macOS computer. The worst it can do is perhaps waste several hours of waiting for the download to complete if you happened to delete a software update you have yet to install on your computer. Apart from that, there should be no issue with deleting them. And yes, deleting these updates won’t redo the update you just did. The files that your computer is currently using are hidden, so there’s no way of deleting them.
Therefore, even if you wanted, you wouldn’t be able to delete the software updates that really matter on your computer. Put simply, once you know how to delete software updates on Mac, you should definitely do it. But why? you may ask.

Part 2: Why Would I Want to Delete Software Updates on Mac?
There are actually a number of reasons why one would want to delete software updates on a Mac. Here are a few reasons:
- They consume a considerable amount of disk space, which would’ve been used for other more important files.
- When your Library folder gets full, there’s a good chance your computer will perform poorly, or at least worse than before it was full. And it just so happens that deleting the software updates is one of the best ways to clear it.
- You might accidentally install a previous software update, which can then cause issues or conflicts with the computer.
Now that you know why you’d want to do it, here’s how to delete software updates on Mac.
Method #1: Use The Spotlight
The first method involves Spotlight—the built-in search feature of macOS computers. With Spotlight, you can look up folders or files by entering their corresponding keyword or file path. Then, you’ll get several results arranged in a list upon doing so.
Spotlight is available on most macOS versions, so your computer likely has it too. Here’s how you can use this method:
- Go to your desktop.
- On the desktop, there should be a relatively large search bar. Click that search bar. It should be the Spotlight.
- Type in the following text: /Library/Updates
- A number of results may appear. Find and select the folder with the name ‘Updates’.
- Upon selecting the folder, it’ll take you inside it. Find the software updates you want to delete.
- Drag them over to the Trash.
Make sure you empty the trash afterward so they don’t take up space on your computer. But if you think you will need them later, then perhaps it’s best to leave them in the Trash. While most updates are no longer necessary if your macOS is already up-to-date, it’s still good to be cautious. After all, you might accidentally delete an update that took hours to download. Also, keep in mind that the operating system automatically deletes software updates, so there’s no guarantee you’ll find one.

Method #2: Utilize The Go to Folder Feature
Apart from Spotlight, there is yet another search feature that could work perfectly in this scenario. We’re referring to Finder’s very own Go to Folder feature. Basically, this feature allows you to jump to a specific file or folder immediately, as long as you enter its file or folder path. It works perfectly for your goal since you already know the file path. Here‘s what you need to do:
- Open the Finder app on your computer.
- Click Go from the top menu bar.
- Select Go to Folder… from the dropdown menu.
- When a popup window appears, type in the following text: /Library/Updates
- Click Go to proceed.
- Finder will take you to the Updates folder. There, you’ll find a variety of files, and each one should correspond to a type of update, including software updates. Select the ones you think correspond to your software updates.
- Press the Delete key on your keyboard.
Again, make sure you empty the Trash so the software updates don’t take up space on your computer. With this, you now know two ways how to delete software updates on Mac. But there is yet another method that one may say is a bit unconventional.

Method #3:Mac Cleaner
It may seem like you’ve purged all the software updates from your computer using the aforementioned methods, but there are likely a couple more update files left. Perhaps they’re located in other directories. Maybe they have the “Hidden” tag, meaning you won’t be able to find them normally. Either way, your job here isn’t done yet. Unfortunately, it’ll never be done if you were to rely on traditional methods. To truly get rid of ALL software updates, you’ll have to use tools like Mac Cleaner.
Mac Cleaner is a cleanup software designed to get rid of files from every corner of your computer, whether they’re hidden or not. Without further ado, let’s talk about how to delete software updates on Mac usingMac Cleaner:
Step #1: Download, Install, and Launch Mac Cleaner
The first thing you need to do is click this link. It should take you to the software’s download site, and there, you’ll find a Download Now button. Click that button to download a DMG file—the file extension for installers in macOS computers. Once the download is finished, open the DMG file to start the installation process. Follow the instructions on the installer from that point onward. Mac Cleaner will open automatically once the installation is complete.
Step #2: Select Clean Up Junk
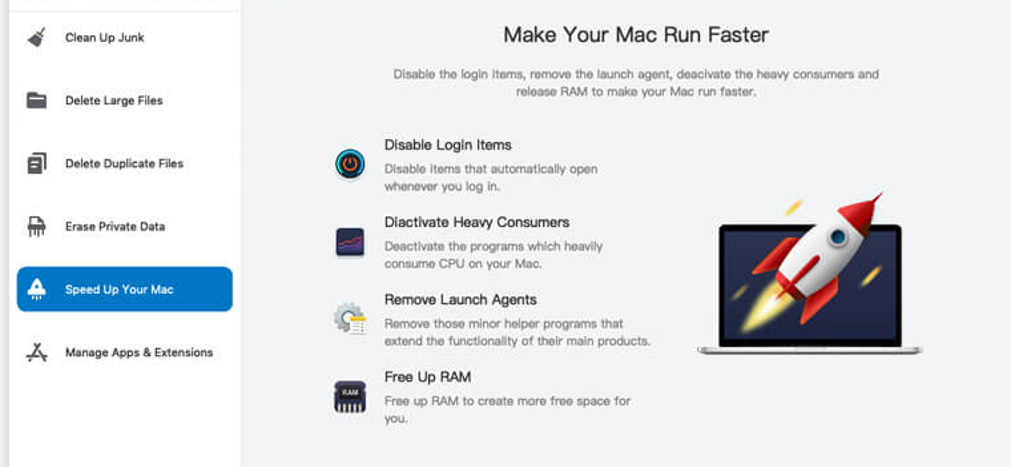
If you look at the left side of the interface, you’ll find that there are a total of six different options. These include (1) Clean Up Junk, (2) Delete Large Files, (3) Delete Duplicate Files, (4) Erase Private Data, (5) Speed Up Your Mac, and (6) Manage Apps & Extensions. These are the modules thatMac Cleaner has. For your purposes, you’ll need to choose the Clean Up Junk module as it allows you to get rid of junk files like System Junk, App Junk, Trash Bin, iOS Junk, iTunes Junk, Unused Disk Images, and Downloads. Coincidentally, software updates belong to the System Junk category, so it’s perfect for your objective.
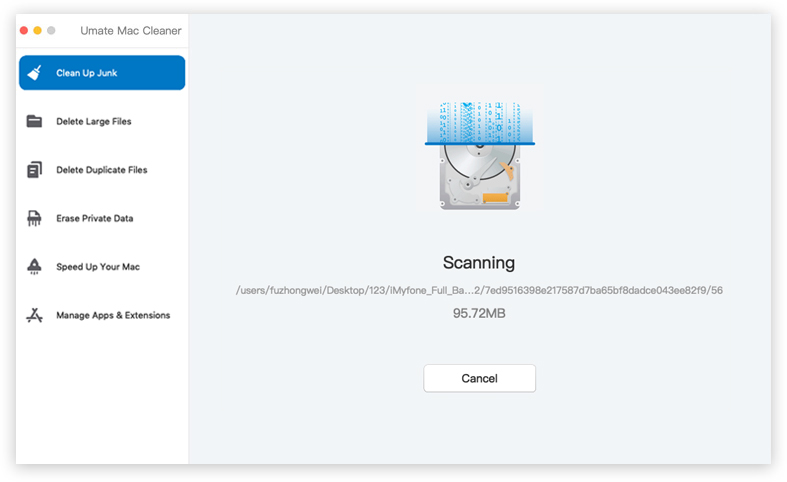
Step #3: Click the Scan Button
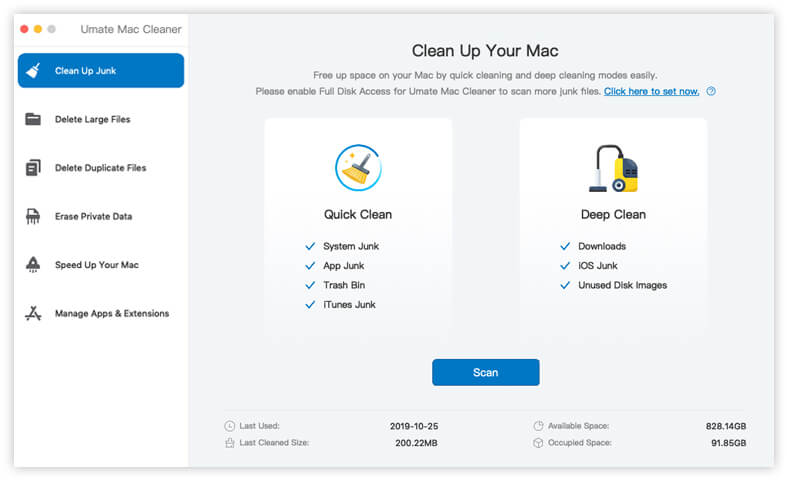
Upon selecting the module, you’ll find that there are now two sides to the interface. One side says Quick Clean while the other says Deep Clean. These are the scanning methods available in the software. Quick Clean scans for the following files: System Junk, App Junk, Trash Bin, and iTunes Junk, while Deep Clean scans for those four file types in addition to three more, including Downloads, iOS Junk, and Unused Disk Images. Select a scanning method, then click the Scan button underneath the options.
Step #4: Pick a File Category and File/s
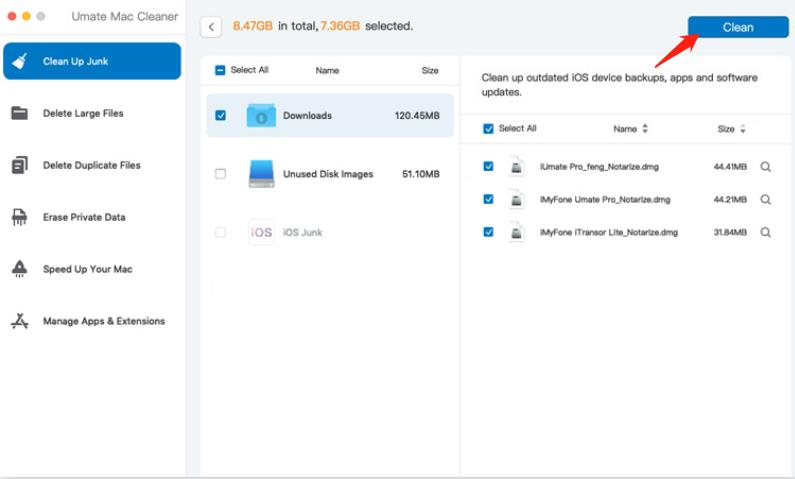
The next step is to select the files you want to delete. For that, you must first select an item from the list on the left, which should consist of file categories like System Junk, Downloads, Trash Bin, Unused Disk Images, etc. Make sure you select System Junk since that’s where software updates belong to. After doing so, a new list will appear on the right side of the interface, and that’s where you’ll find the files that belong to the selected category. Chances are that’s also where you’ll find the software updates. Select the files you want to delete by clicking their checkboxes, or you can click Select All to include all items in the list.

Step #5: Delete the File/s
To finalize the process, you must click the blue button at the top-right corner of the page. That’s where you’ll find the Clean button. Upon clicking this, the software will start deleting the files you selected in the previous step.
Keep in mind that all the items you’ll find in the list will be files that the software deems as unnecessary. That means you’re less likely to delete files that would cause problems if they’re gone. That’s the beauty of the Mac Cleaner software.
Conclusion
It’s not every day that Apple releases software updates on their macOS computers. Be that as it may, it’s still possible to run out of space because of software updates. After all, they’re usually relatively large, as their sizes may range from 100MB to several GBs. That’s why learning how to delete software updates on Mac can go a long way in freeing up space on your computer. Though you need to keep in mind that you shouldn’t delete the software update unless you’ve installed it already.
Latest Articles