Duplicating files can be a useful tool for a variety of reasons, such as creating backup copies or creating copies to share with others. There are several ways to duplicate files, including using built-in features on your computer or third-party software. In this blog post, we will explore some of the different methods you can use to duplicate files on your computer.
What is A Duplicate File?
A duplicate file is an identical copy of a file that exists on a computer or storage device. It can be created intentionally or unintentionally, through various means such as copying and pasting, backing up files, or saving files multiple times. Duplicate files can take up valuable storage space and may cause confusion when trying to locate the original file. Therefore, it is important to manage and eliminate duplicate files regularly to ensure efficient use of storage space and to keep files organized.

Method 1: Using Built-in Features on Your Computer
Many operating systems, including Windows and macOS, have built-in features that allow you to duplicate files easily. Here’s how to do it:
For Windows:
- Locate the file you want to duplicate in File Explorer.
- Right-click on the file and select “Copy”.
- Right-click on an empty space in the same folder and select “Paste”.
- Windows will create a copy of the file with “Copy of” added to the beginning of the filename.
For macOS:
- Locate the file you want to duplicate in Finder.
- Hold down the “Option” key and drag the file to a new location or right-click on the file and select “Duplicate”.
- macOS will create a copy of the file with “copy” added to the end of the filename.
Method 2: Duplicate Files with Resource Fork
Resource forks are a feature of the macOS file system that allow files to store additional metadata, such as icons, file previews, and application-specific data. When you duplicate a file on macOS, the resource fork is also duplicated, resulting in two files with identical content but different metadata. To duplicate files with resource forks, you can use the Terminal application on macOS. Here’s how:
- Open Terminal by clicking on the spotlight search icon (magnifying glass) on the top right corner of the screen and typing “Terminal”, then press enter.
- Navigate to the directory containing the file you want to duplicate. You can use the “cd” command to change directories.
- Type the following command and press enter: ditto <source_file> <new_file>
- Replace <source_file> with the name of the file you want to duplicate, and <new_file> with the name of the duplicate file you want to create.
- For example, to duplicate a file called “my_file.txt” and create a duplicate called “my_file_copy.txt”, you would type: ditto my_file.txt my_file_copy.txt
- The duplicated file will have the same content as the original file, including the resource fork.
Note that not all file systems support resource forks. If you copy a file with a resource fork to a file system that does not support them, the resource fork may be lost. Additionally, if you share files with users on non-macOS systems, they may not be able to access the resource fork.
Method 3: Using Third-Party Software
If you need to duplicate multiple files or want more control over the duplication process, you may want to use third-party software. There are many programs available that can help you duplicate files quickly and easily. Here are a few examples:
Fast Duplicate File Finder (Windows)
Fast Duplicate File Finder is a free program that allows you to find and delete duplicate files on your computer. It can also be used to create duplicate files. Here’s how to use it:
- Download and install Fast Duplicate File Finder.
- Launch the program and select the folders you want to search for duplicates.
- Click on the “Scan” button to start the search.
- Once the search is complete, select the files you want to duplicate and click on the “Copy Checked” button.
Duplicate File Finder (macOS)
Duplicate File Finder is a free program that can help you find and delete duplicate files on your Mac. Here’s how to use it:
- Download and install Duplicate File Finder.
- Launch the program and select the folders you want to search for duplicates.
- Click on the “Scan” button to start the search.
- Once the search is complete, select the files you want to duplicate and click on the “Copy Selected” button.
Method 4: Delete Duplicate Files using Mac Cleaner
Mac Cleaner is an application intended to assist users in removing various types of unwanted files. With this app, you can delete files directly, bypassing the need for the Trash. Furthermore, it erases any remnants that the deleted file might have left, functioning as a shredder in essence. If you are considering using this software, we have provided a detailed guide below outlining the steps to delete duplicate files on Mac with the app. To delete duplicate files using Mac Cleaner, follow these steps:
Step #1: Open Mac Cleaner on Your Computer
To begin securely deleting duplicate files on your Mac, the first step is to open Mac Cleaner on your computer. To acquire the software, click on this link, which will direct you to the Mac Cleaner download page. Once on the download page, locate and click the “Download Now” button, which will prompt the download of a DMG file, the file type for installers on macOS computers. Once the download is complete, open the DMG file to initiate installation. Follow the onscreen instructions to complete the installation, and the software will automatically launch upon completion.
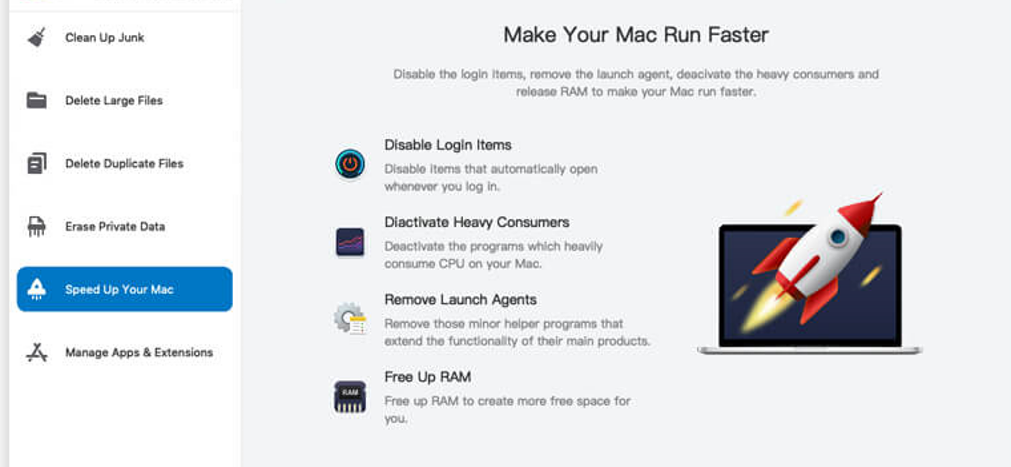
Step #2: Select a Cleaner Module
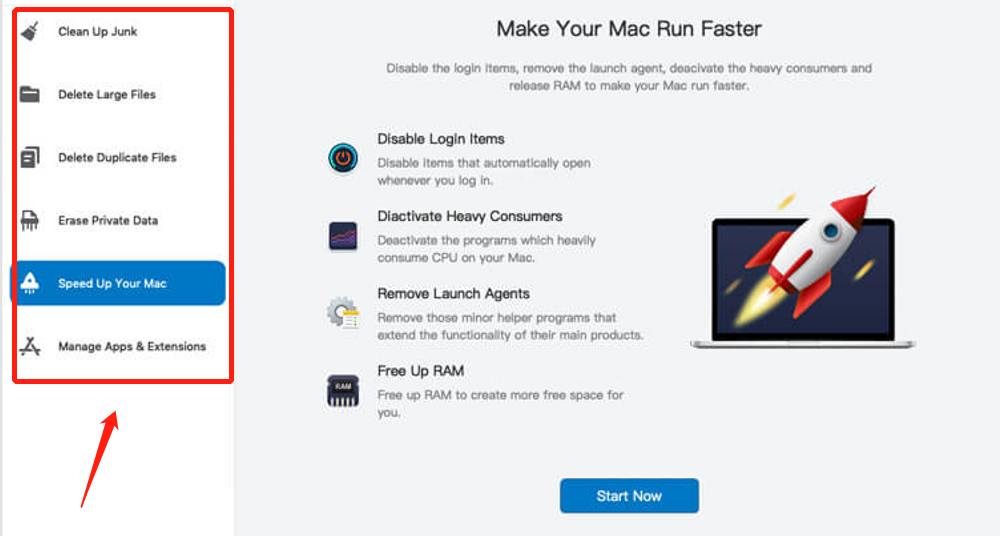
The second step is to choose a cleaner module. On the left side of the interface, you will find six options, each corresponding to a module that Mac Cleaner offers. The first three modules are known as the cleaning modules, as they are specifically designed to delete unnecessary files, which aligns with your objective. These modules include (1) Clean Up Junk, (2) Delete Large Files, and (3) Delete Duplicate Files.
- Clean Up Junk can identify and remove unnecessary files, such as system cache, app cache, Trash bin files, unused disk images, and other unneeded files from iOS default apps and iTunes.
- Delete Large Files searches your computer for files that are larger than 50MB.
- Delete Duplicate Files examines a folder of your choice and locates files that have another copy or duplicate elsewhere on the computer, allowing you to delete them.
To select a module, simply click on the option you want to choose from the left side of the interface. Click on the “Delete Duplicate Files” option in the left sidebar.
Step #3: Scan Your Mac for Files
The third step involves scanning your Mac for files that you can delete in the subsequent steps. As each module has a different interface, the method for scanning files varies accordingly. Here’s how to scan files for each of the three cleaning modules:
- Clean-Up Junk: After selecting this module, the software will display two options: Quick Clean and Deep Clean. Quick Clean scans for System Junk, App Junk, Trash Bin, and iTunes Junk, while Deep Clean scans for these file types and three more, including Downloads, iOS Junk, and Unused Disk Images. Choose the scan option you prefer and click the Scan button.
- Delete Large Files: Simply click the Scan button located at the bottom-middle part of the interface.
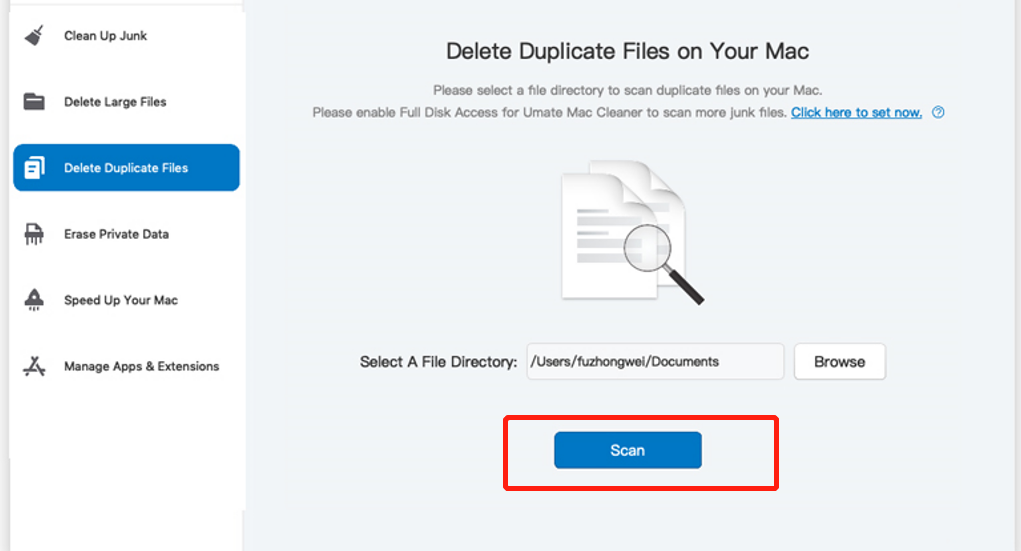
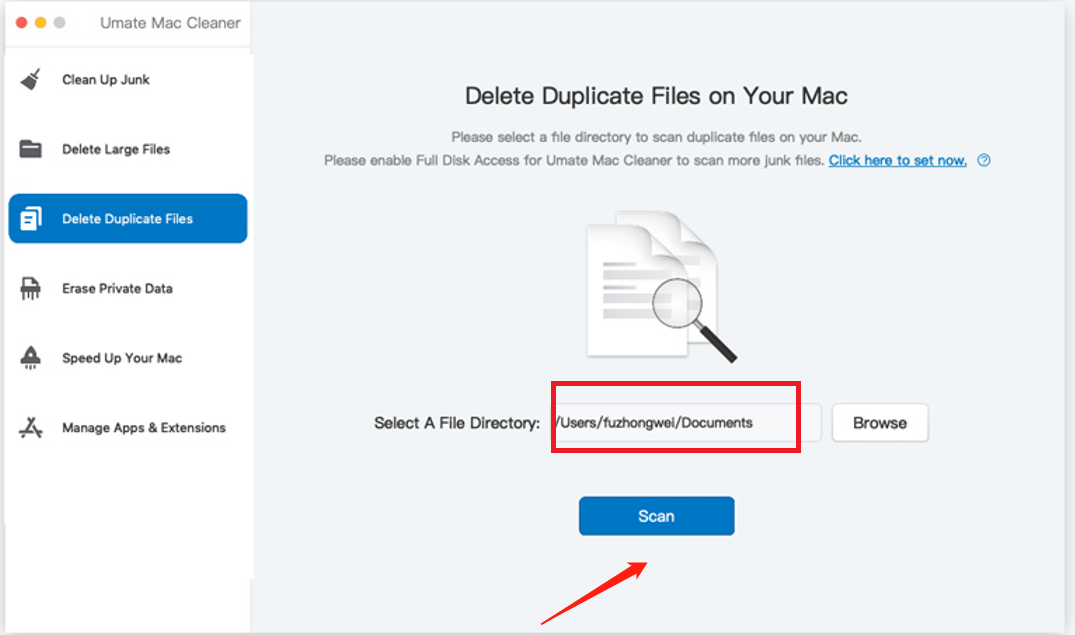
- Delete Duplicate Files: In the center of the interface, there will be a field labeled “Select a File Directory” with a Browse button to its left. Click the Browse button and navigate to the folder you want to scan for duplicates in the popup window. After selecting the folder, click the Scan button to initiate the scan.
Wait for the app to scan your computer for duplicate files. Once the scan is complete, you will see a list of all the duplicate files that were found.
Step #4: Pick a File/s
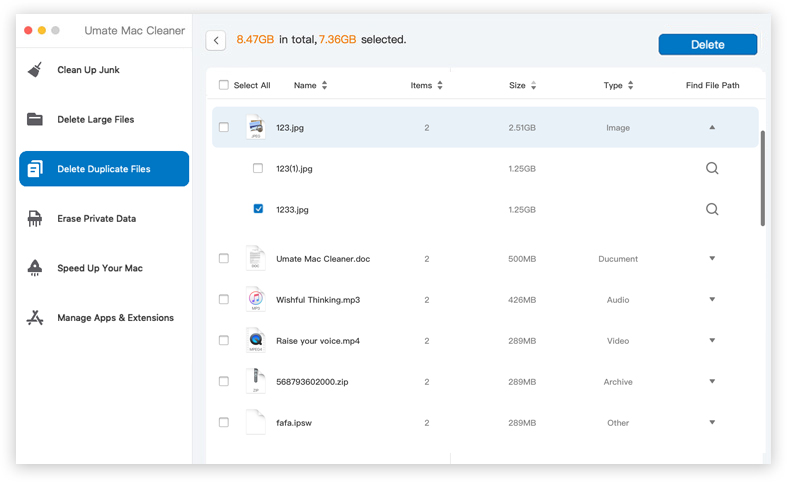
In the fourth step, you will need to select the files you wish to delete. For the Delete Large Files and Delete Duplicate Files modules, you will see a list of files immediately, which may include images, videos, documents, songs, folders, etc. You can select the files you want to delete by clicking on their corresponding checkboxes. Alternatively, you can click the Select All button to delete all the items in the list.
As for the Clean Up Junk module, you must first choose a file category from the left side, such as System Junk, Downloads, Trash Bin, and others, before proceeding to select the files you want to delete. Select the duplicate files that you want to delete by clicking on the checkbox next to each file.
Step #5: Delete the File/s
You have chosen the files you want to delete. To complete the process, click the button located in the upper right corner of the window, which will either say Clean or Delete. It is important to note that although this method allows you to securely delete files on Mac, it also comes with risks.
Since the file won’t be sent to the Trash, you will not be able to recover it in any way. Therefore, it’s crucial to carefully review the files via the interface to ensure you don’t delete something you still need. The interface displays useful information such as the file name and size, so you can make informed decisions. After selecting the files, click on the “Delete” button to remove them from your computer.
Conclusion
Duplicating files is a useful tool that can save you time and help you keep your files organized. Whether you use built-in features on your computer or third-party software, there are many different methods you can use to duplicate files quickly and easily. Choose the method that works best for you and start duplicating your files today!
Latest Articles