How to empty Trash on Mac? When using a Mac, you’ll occasionally find yourself looking at an almost-full storage. After all, Mac computers and laptops often have smaller and more compact storage than devices from other brands, like Windows, for example.
Furthermore, Mac computers often create unnecessary data that consumes a lot of storage space. One such data is what we call the Trash items, which are essentially the files contained in the Trash bin of Mac. Yes, the file you delete on Mac will go to this location, just like how deleted items in Windows PCs go to the Recycle Bin. Anyway, it’s advisable to empty trash every now and then. In that regard, this article will discuss everything you need to know about how to empty Trash on Mac.

Part 1: How to Empty Trash on Mac
The process to empty Trash on Mac is fairly simple, not to mention there are several ways to go about it. Some are harder but more likely to work, while others are simple but may fail. Let’s start with the most basic method to empty Trash on Mac.
- Click the Trash icon from the Dock.
- On the Trash window, find and click the option that says Empty all of the Trash. This option should be on the top-right corner of the window.
- This is what most people do to empty Trash. However, if you want an easier way, here’s what you can do:
- Right-click on the Trash icon from the Dock.
- Select Empty Trash.
Compared to the previous method, right-clicking the icon and simply selecting the appropriate option involves fewer clicks and takes less time. Of course, it has the disadvantage of not showing you the contents of the Trash, but that often doesn’t matter. If you changed your mind and feel like there’s a file you should recover from the Trash, simply enter the folder, select the item you want to recover, and click File > Put Back. Alternatively, you can click and drag the file out of the Trash.

Part 2: Remove Items from Trash Automatically
If you don’t want to regularly visit the Trash and empty it every now and then, you might want to change its settings so that any item that’s 30 days old in the Trash will automatically get deleted. This is a handy setting if you don’t want your Trash to store large volumes of files. Here’s what you need to do to enable this particular configuration:
- Open the Finder app on your Mac.
- Click the Finder icon from the top menu bar.
- Select Preferences from the resulting options.
- Click Advanced.
- Check the box for Remove items from the Trash after 30 days.
This should eliminate the need to regularly check the Trash on Mac and make things a little bit easier for you.

Part 3: Get Rid of Junk Outside of Trash With Mac Cleaner
Though the Trash is the primary storage location for junk, there are other types of junk that you can find outside of this location. Heck, you can even find system or app junk on your desktop. If you wish to get rid of all junk on your Mac, regardless of whether it’s in the Trash, you either have to find them manually or use file finder software. Of course, you’d prefer the latter since the former will take forever to do. In that case, we suggest using Mac Cleaner—a Mac cleaner tool that can help you get rid of all kinds of the junk within minutes. Read on for a guide on how to use Mac Cleaner:
Step 1. Open The Mac Cleaner Program on Your Mac
Before anything else, you must download and install the Mac Cleaner via its official website. After the download and installation process, open the software and proceed to the next step.
Step 2. Select The Clean up Junk Module
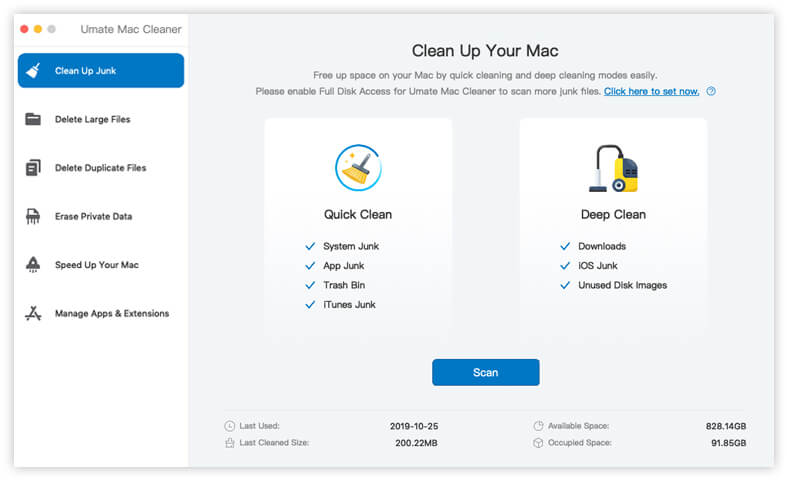
After opening the software, you’ll be met with several options, as shown in the left sidebar. These options include (1) Clean Up Junk, (2) Delete Large Files, (3) Delete Duplicate Files, (4) Erase Private Data, (5) Speed Up Your Mac, and (6) Manage Apps & Extensions. Though all modules aim to eliminate unnecessary data or files from your Mac, only the Clean Up Junk will delete files or junk that are similar to the Trash Bin items. It even allows you to delete the contents of the Trash Bin.

Step 3. Select Between Quick Scan And Deep Scan
Upon selecting Clean Up Junk from the left sidebar, the software will display various information about the module, such as what kinds of files it’ll detect. Under Quick Clean, it’ll detect System Junk, App Junk, Trash Bin, and iTunes Junk. Under Deep Clean, it’ll scan for Downloads, iOS Junk, and Unused Disk Images. Simply select the action you wish to perform and click the Scan button at the bottom of the software.

Step 4. Delete The Junk Files
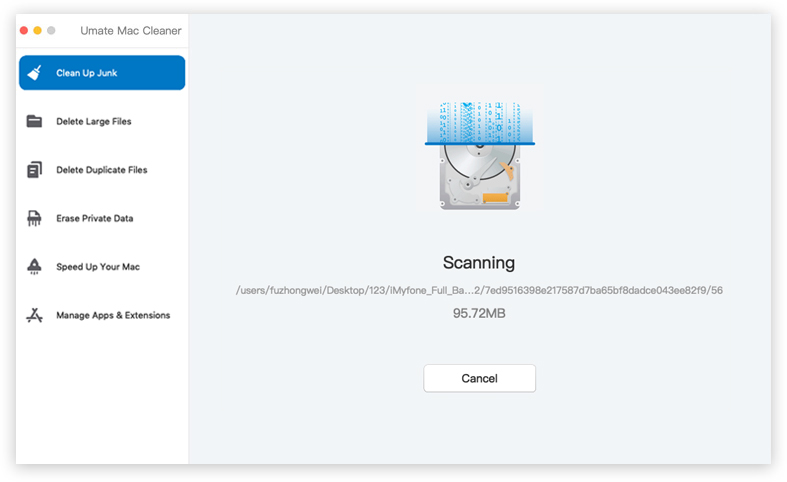
The Mac Cleaner software will take a few minutes to finish scanning, but once it’s done, you’ll find a list of items on the screen. Simply select the ones you wish to delete, then click the Clean button at the top-right corner of the software.
With these steps, you can very easily get rid of all the junk on your Mac that you don’t need, including the contents of your Trash Bin. But of course, you must make sure you select only the files that you think are unnecessary. The best part about this is it also shows the file names and other information about the detected files, so you can find files that you haven’t been able to find using normal means. Regardless, that should solve your issue of having insufficient storage space on your Mac.

Part 4: Final Words
The Trash may be a handy feature in Mac, but sometimes, it can bring detriment to your computer. After all, it can consume hundreds of gigabytes worth of storage space from your Mac. That’s precisely why experts advise emptying the Trash regularly. The same goes for any other computer, be it Windows or Linux. Fortunately, it’s fairly easy to learn how to empty Trash on Mac, as you’ve done so in this guide, but keep in mind that the contents of the Trash aren’t the only files that are taking up your storage space. There are many other kinds of junk you must delete, and Mac Cleaner can help in that regard.
Latest Articles