

Google Photos is a popular cloud-based photo storage service that offers users unlimited storage space for their photos and videos. While the platform has many features to help users organize and manage their media, finding duplicates can be a challenging task. However, there are a few simple steps that you can follow to find duplicates in Google Photos.
Part 1: Why Are There Duplicates in Google Photos?
There can be several reasons why duplicates may appear in Google Photos. Here are a few common reasons:
- Uploading photos from multiple devices: If you have multiple devices that are set up to automatically back up photos to Google Photos, you may end up with duplicates. For example, if you have a phone and a tablet that are both set up to back up photos, and you take a photo with your phone that is automatically backed up, then later edit that same photo on your tablet and it is also backed up, you will end up with two copies of the same photo.
- Manually uploading photos: If you manually upload photos to Google Photos, it’s possible that you may accidentally upload the same photo more than once.
- Syncing with other cloud storage services: If you have other cloud storage services, such as Dropbox or OneDrive, that are also backing up your photos, and you have Google Photos set up to sync with those services, you may end up with duplicates.
- Software glitches: It’s possible that a software glitch or error could result in duplicates being created in your Google Photos library.
Regardless of the reason for duplicates appearing in your Google Photos library, it’s important to regularly check for and remove duplicates to keep your library organized and free up storage space.

Part 2: How to Remove Duplicates in Google Photos Manually
If the “Remove duplicates” option in Google Photos settings doesn’t work or you want to manually remove duplicates, there are a few steps you can follow:
Step 1: Open Google Photos and Go to Settings
To begin, open the Google Photos app or website and go to the settings menu. In the app, tap on your profile picture in the top-right corner, and then tap on “Photos settings.” On the website, click on the three horizontal lines in the top-left corner, and then click on “Settings” from the dropdown menu.
Step 2: Turn on the “Remove duplicates” Option
Once you are in the settings menu, scroll down until you see the “Library” section. Here, you will find the “Remove duplicates” option. Toggle the switch to turn it on.
Step 3: Allow Google Photos to Scan Your Library
After turning on the “Remove duplicates” option, Google Photos will begin scanning your library for duplicate photos and videos. This process may take some time, depending on the size of your library.
Step 4: Review and Delete Duplicates
Once the scanning process is complete, Google Photos will display a list of duplicate photos and videos that it has found. You can review this list and select the duplicates that you want to delete. To delete a duplicate, simply tap on the three dots in the top-right corner of the photo or video, and then tap on “Delete from the device.”
After deleting the duplicates, they will be moved to the trash folder. To permanently delete them, you need to empty the trash folder. To do this, tap on the three horizontal lines in the top-left corner of the screen, and then tap on “Trash” from the menu. Tap on “Empty Trash” to permanently delete the duplicates. It’s important to note that when you delete a photo from Google Photos, it will also be deleted from your Google Drive and any other devices where you have synced your Google Photos library.
Manually removing duplicates from your Google Photos library can be time-consuming, especially if you have a large library with many duplicates. However, by following the steps outlined above, you can efficiently remove duplicates and keep your library organized and free of unnecessary clutter.

Part 3: Automatic Way to Remove Google Photos Duplicates
Earlier, it was mentioned that there is no built-in method to automatically identify duplicates in Google Photos. However, if you utilize Google’s Backup and Sync application to store your files on your computer, you can take advantage of Mac Cleaner to simplify the process. Upon installing Mac Cleaner on your Mac, you can select specific folders to be scanned for duplicate files, which will help you eliminate them efficiently. The added benefit is that you can give Mac Cleaner a try for free. Here’s a breakdown of how it operates:
For a quicker solution, we recommend using Mac Cleaner, which is modular software designed to automatically clean your Mac with just a few clicks, freeing up space on your scratch disk faster than other methods. It is a software program designed to clean up and optimize your Mac, which includes finding and deleting unnecessary files, including duplicates. Here’s how to find duplicates in Google Photo using Mac Cleaner:
Step #1: Set Up Mac Cleaner
Set up Mac Cleaner by downloading and installing the software from the Mac Cleaner download website.

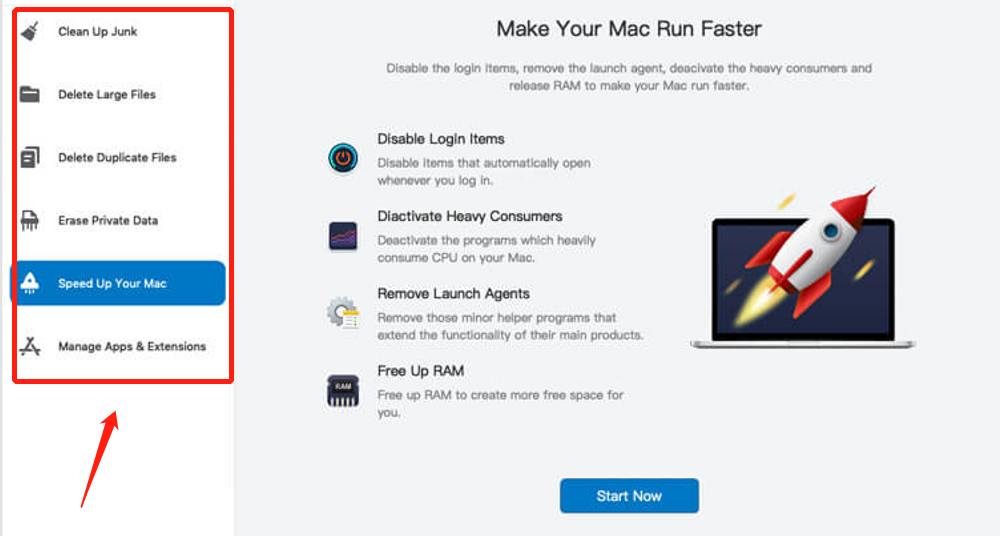
Step #2: Select from the Six Different Modules
Select one of the six modules on the left side of the software. To clear space on your computer for the scratch disk, we recommend using the first four modules: Clean Up Junk, Delete Large Files, Delete Duplicate Files, and Erase Private Data.
There are four modules available in Mac Cleaner to help free up space on your computer. The first one, Clean Up Junk, searches for unnecessary files commonly referred to as junk files, such as iTunes Junk, iOS Junk, System Junk, and App Junk. This is a great way to reclaim storage space without accidentally deleting important files. The second module, Delete Large Files, scans your computer for files that are considered large, according to the software’s standard of 50MB, and only targets unnecessary files to avoid deleting important ones.
The third module, Delete Duplicate Files, scans your computer for files that have multiple copies and detects all kinds of files, including important ones, so you must double-check before deleting to ensure that you don’t unintentionally delete an important backup copy. The fourth module, Erase Private Data, targets files that the software recognizes as private data, such as browsing history, chat data, and email attachments, to reduce the risk of cyberattacks.
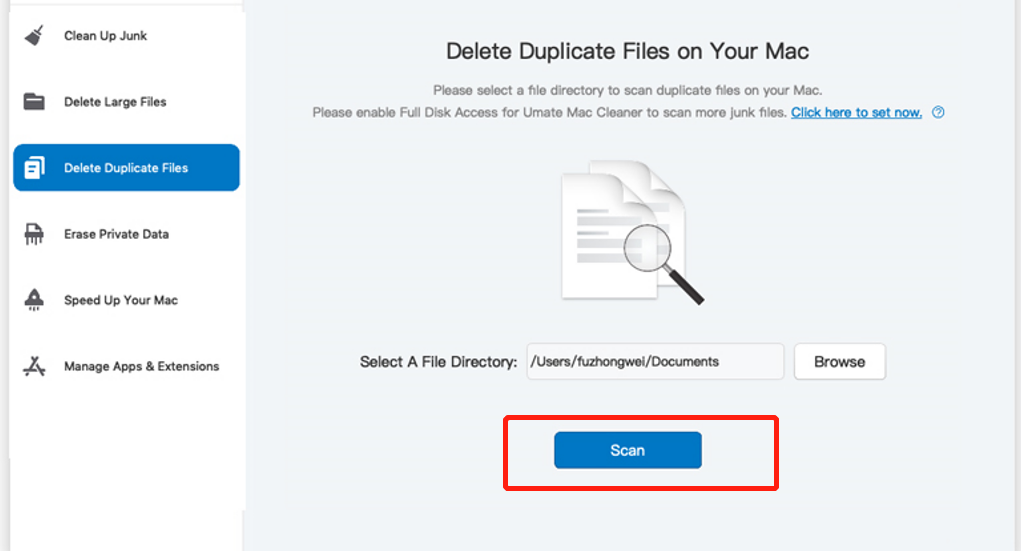
Step #3: Scan for Files
Click the Scan button after selecting a module, and wait for the software to complete a scan of your computer.
To use Mac Cleaner to find duplicates in Google Photos, you first need to download and install Mac Cleaner on your Mac. Once installed, open the program and select the “Delete Duplicate Files” module.
Step #4: Select Files or Folders
Once the scan is complete, a list of files and folders that can be deleted will appear on the left side of the interface. Select the items you want to delete by checking their corresponding checkboxes. This module scans your computer for duplicate files, including photos, and displays them in a list. You can then review the list and select the duplicates you want to delete.
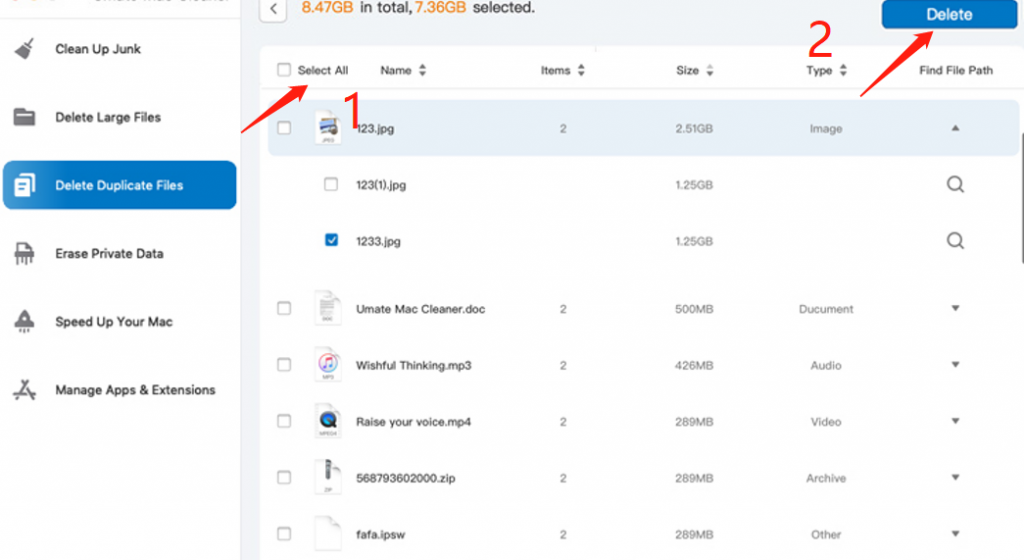
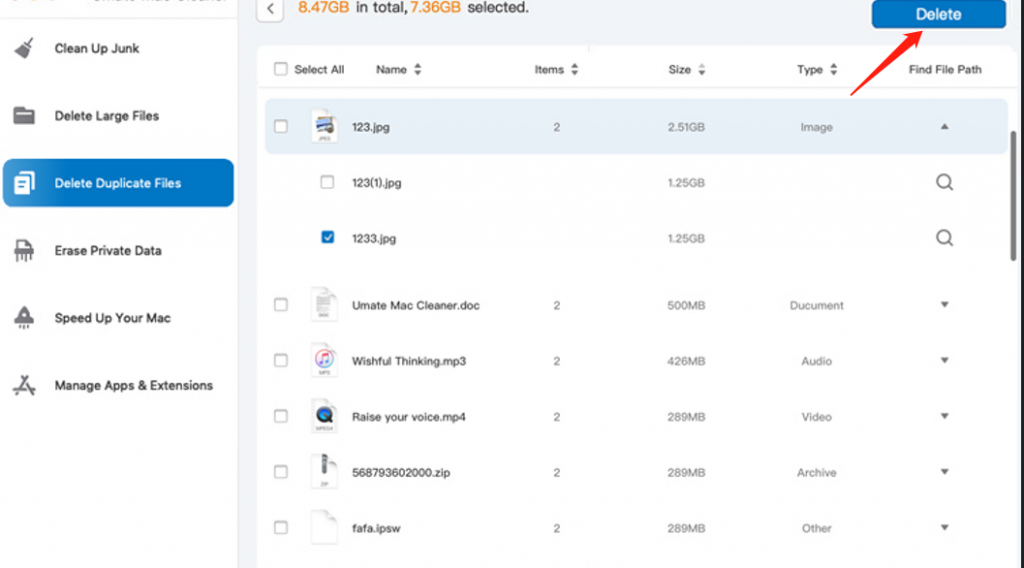
Step #5: Delete the Files or Folders
Finally, click the Delete, Clean, or Erase buttons, depending on the module you selected, to finalize the process.
Conclusion
Finding duplicates in Google Photos can be a time-consuming and frustrating task, but with the “Remove duplicates” option, the process can be much easier. By following the simple steps outlined above, you can quickly and efficiently find and delete duplicate photos and videos from your library, freeing up space and making it easier to organize your media.
Latest Articles