It’s not uncommon to have a computer with too little storage space. That’s particularly true for macOS users. We will tell you how to free up space on external hard drive Mac.
Unfortunately, there’s not much you can do if your computer has an inherently small internal hard drive. Even if you put your all into deleting unnecessary files or getting rid of unused apps, you’ll still struggle to free up enough space for your files.
That’s why rather than relying solely on one’s internal hard drive, it’s common practice to rely on another storage drive, and this drive is what they call the external hard drive. But what happens if even that external hard drive becomes full?
Well, the answer is simple, you just have to free up space on that drive. It’s much simpler than when it’s only the internal hard drive since it most likely has more capacity. But can you even free up space on external hard drive in the first place?

Can You Free Up Space on External Hard Drive?
When you empty the Trash, delete files from Downloads, uninstall apps, and clear the cache, what you’re doing is you’re freeing up space on your internal hard drive. That’s because the files that you’ve just deleted are located inside the internal hard drive, also known as the main hard drive. That’s why it’s not sure if you can do the same with external hard drive.
Thankfully, you can indeed free up space on external hard drive, just in a different way.
However, it’s important to remember that unlike when you delete files from your internal hard drive, you won’t be able to recover the files you delete from the external hard drive. Therefore, you must have a backup of those files prepared.
That’s in case you change your mind and you decide you still want the files you just deleted. Let’s start with that.
Create a Backup Of Your Files
There are several ways to create a backup of your files from the external hard drive. You can create a copy of them and move them to the cloud, or you can move them to another storage drive. Basically, you just need to move them to a different place.
It’s a simple process, but it’ll most definitely consume a lot of your time.
So, to put it in simple terms, to create a backup, simply copy the files, then move it to another place. Once that’s done, you can proceed with the actual process of freeing up space on your external hard drive. There are three ways you can approach this.
Let’s start with the simplest method.
Method #1: Delete Files Manually
As the name implies, this involves simply going inside the external hard drive and looking for files to delete. This is the simplest method out of the three and is also the most time-consuming one. That’s because you have to look at each file individually and check whether you no longer need it or not. You may have to spend hours with this method with little to show for it.
Nevertheless, it’s the safest option since you’re able to check if you truly need the file or not. That means there’s a lower chance of accidentally deleting important files. But if you no longer need all the files, the second method is more suitable.
Method #2: Format the Drive
Formatting basically means emptying the drive. It’s the most efficient method out of the three but it’s also the least safe since you may still have important files in that drive. Therefore, only use this as a last resort if you’re confident that you no longer have files you still want to keep. Here’s how to free up space on external hard drive Mac through formatting:
- Connect the external hard drive to your computer.
- Open the Finder app.
Note: The Finder app is the file management app of macOS computers, similar to File Explorer on Windows PCs.
- Click Go from the top menu bar.
- Select Utilities from the resulting dropdown menu.
- On the Utilities folder, find and open the Disk Utility app.
- The Disk Utility window will open. On the left sidebar, you’ll find a list of drives. Select the external hard drive you want to format.
- Once the correct drive is selected, click the Erase button from the top menu bar.
- A popup window will appear. Enter a name on the Name field, select an option in the Format dropdown menu, and select an option in the Scheme menu.
- Click Erase to finalize the process.
That’s how you can format the drive and basically delete all the files inside it.

Method #3: Use Tools Like Mac Cleaner
The first method is too time-consuming, while the second method is too unsafe. This method, however, is not time-consuming and is relatively safe as it only deletes files you no longer need. It involves a software called Mac Cleaner—a cleanup software designed to get rid of unnecessary files from your macOS computer. Here’s how you can use this software:
Step #1: Open Mac Cleaner on Your Computer/Laptop
To begin, you must first obtain the software. To do that, you need to go to the software’s download, which you can find in this link. On that page, click the Download Now button. Upon doing so, the browser will start downloading a DMG file, which is the software installer. Once that’s complete, open the DMG file promptly. There will be instructions on the installer, so just follow the onscreen instructions from that point onward. The software will open automatically after the installation is finished.
Step #2: Select a Cleaner Module
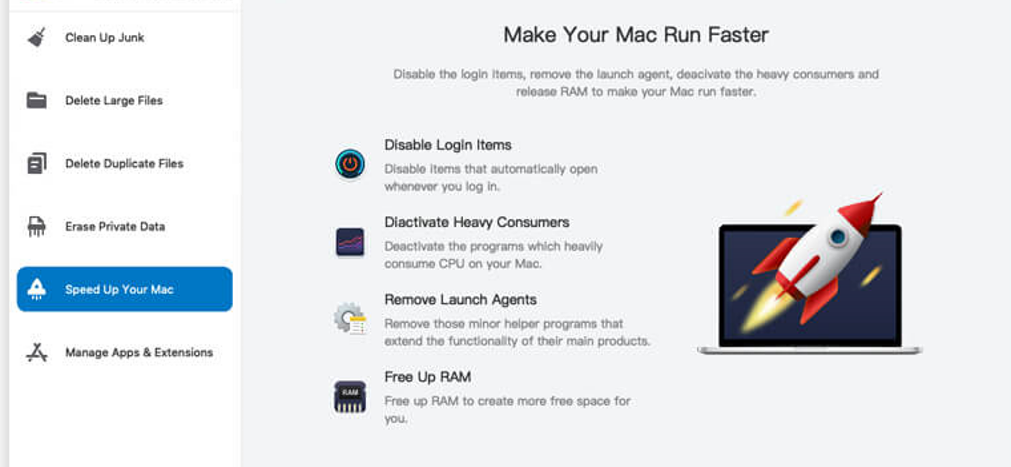
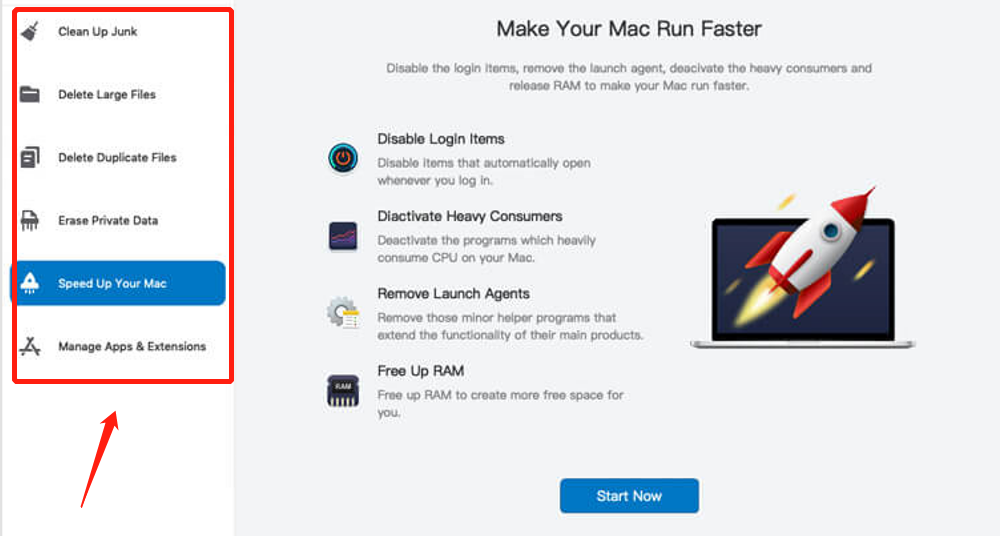
On the left side of the interface, you’ll find six different options. These correspond to the modules the software has to offer. Each module has different functionalities and can be used for various purposes. Therefore, you must choose the module that would be the most handy for your particular goal. With that in mind, below are the six modules in Mac Cleaner:
- Clean Up Junk
- Delete Large Files
- Delete Duplicate Files
- Erase Private Data
- Speed Up Your Mac
- Manage Apps & Extensions
All you have to do is select a module out of these six. You can select a module by clicking on it from the left sidebar. Since you intend to free up space on your computer, you’ll need either one of the first three modules which we call cleaner modules.
Simply put, you must choose between Clean Up Junk, Delete Large Files, and Delete Duplicate Files.
Step #3: Click the Scan Button
For this next step, you need to scan your computer for files, programs, or whatever it is you want to get rid of. The exact way to approach this will depend on the module you chose in step #2. So, it might be best to look at the steps for all six modules:
- Clean Up Junk: Upon selecting Clean Up Junk, you’ll find two options on your screen. One option is Quick Clean while the other is Deep Clean. These are the two scanning methods that the module offers.
Quick Clean is the ideal option if you want to quickly get this over with and you only want to delete any file you can delete. But if you’re looking for a specific file type, Deep Clean is more suitable since it provides more accurate search results. You can choose whatever you want or need. Afterward, click the Scan button at the bottom of the interface.
- Delete Large Files: Click the Scan button.
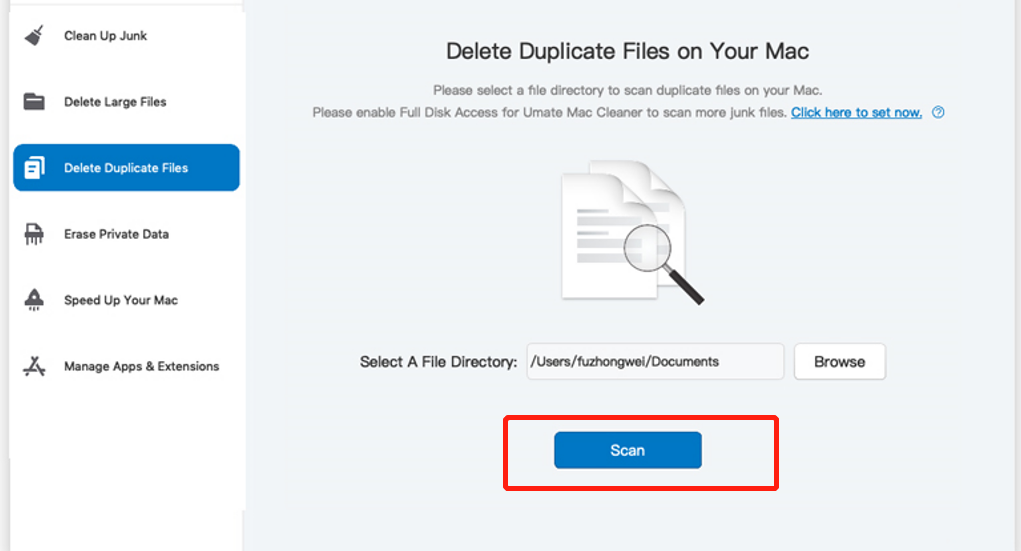
- Delete Duplicate Files: After you select Delete Duplicate Files, you’ll find a button at the center of the interface that says Browse. Click that button, and a popup window will appear.
Using that popup window, navigate to the folder or directory that you want to scan for duplicate files. After finding it, select it and click the Open button found on the popup window. Then, click the Scan button.
Step #4: Pick Item/s
For this next step, you need to select the items you want to delete from a list you’ll find on the software. The items’ type will vary according to the module you chose. It can be files, programs, or apps. Let’s look at what you need to do for each module:
- Clean Up Junk:: Select a file category (e.g., System Junk, Downloads, Trash Bin, Unused Disk Images, etc.) from the list on the left sidebar. Afterward, select a file from the items listed on the right. Click Select All to include all items.
- Delete Large Files: Select the item (e.g., file, folder, disk image, archives, etc.) you want to delete from the list.
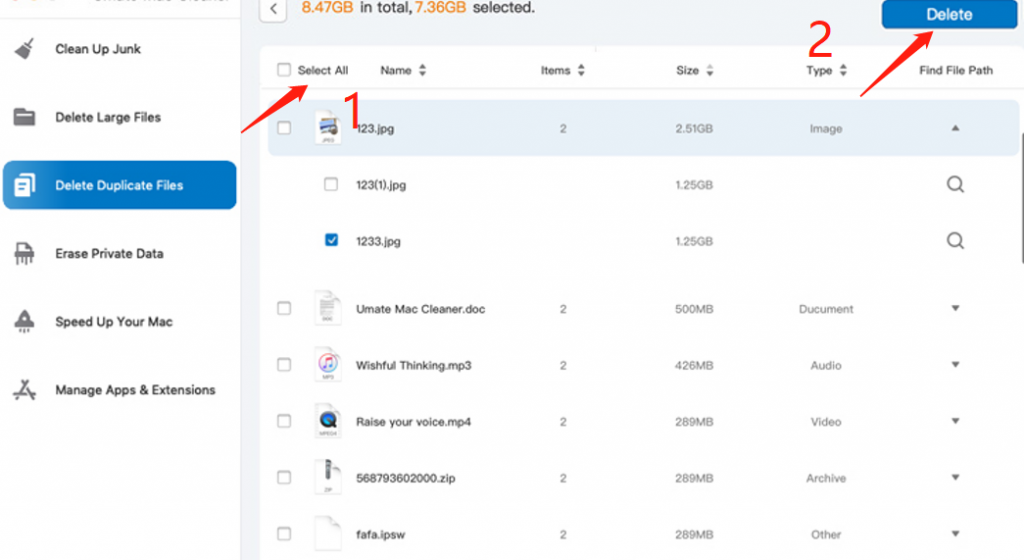
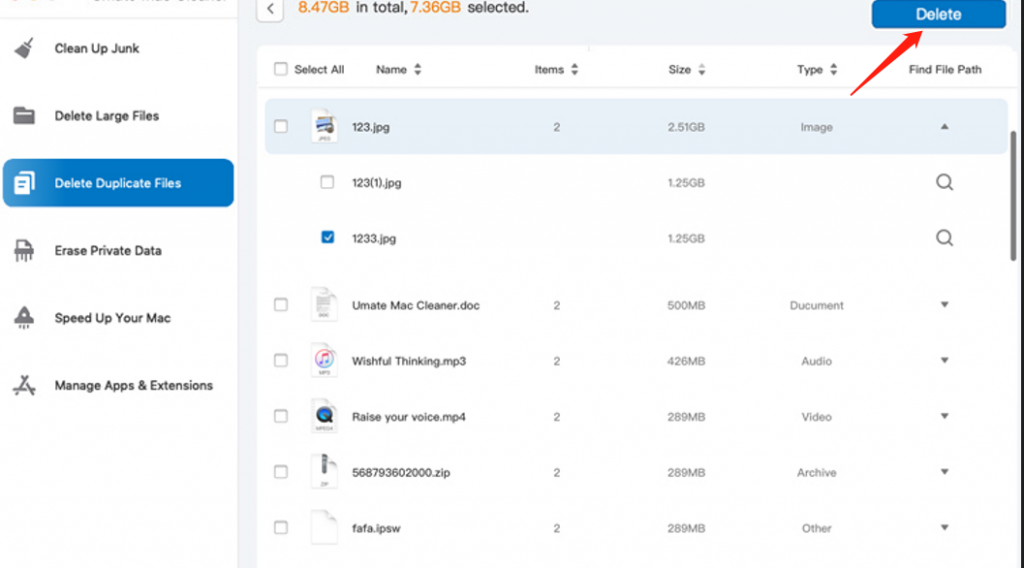
- Delete Duplicate Files: Select the items (e.g., image, document, audio, video, etc.) you want to delete from the list.
Step #5: Click the Blue Button
After steps 1 to 4, you can now do what you set out to do. Just click the blue button at the upper right corner of the interface that says Clean, Delete, or Erase. It takes a few minutes to execute the process, so you may have to wait for a while.
Wrapping Up
It’s difficult enough to free up space on a computer’s internal hard drive. It’s even more difficult to learn how to free up space on external hard drive Mac. Not only are your options more limited, but it’s also difficult to avoid deleting important files. But with this guide, you should be able to do it more easily without causing data loss unintentionally.
Latest Articles