

If you’re a Mac user, you probably already know that the Library folder is an essential component of the operating system. It contains important files and settings that help your Mac run smoothly. However, finding the Library folder on your Mac can be a little tricky, especially if you’re a new user. In this article, we’ll show you how to get to the Library folder on your Mac.
Part 1: What is the Library Folder on Mac?
The Library folder on Mac is a hidden folder that contains important system files, settings, and resources for applications installed on your Mac. It’s located in the root directory of your Mac’s startup drive and is organized into subfolders that store different types of data. The Library folder is an essential component of the operating system and is used by macOS and applications to store preferences, caches, logs, plug-ins, fonts, and other resources.
Some of the folders you may find inside the Library folder include Application Support, Caches, Preferences, and Logs. Accessing the Library folder can be useful for troubleshooting issues with applications, managing system settings, and customizing your Mac’s behavior. However, it’s important to exercise caution when making changes to files and folders within the Library folder, as deleting or modifying critical files can cause problems with your Mac’s functionality.

Part 2: Why is the Library Folder Hidden?
The Library folder on Mac is hidden by default for security reasons, as it contains important system files and preferences that should not be tampered with unless you know what you are doing. The folder contains files and settings that are required by the operating system and by various applications installed on your Mac.
In earlier versions of macOS, the Library folder was easily accessible from the Go menu in Finder. However, starting with macOS Lion (10.7), Apple decided to hide the Library folder from users to prevent accidental modification or deletion of important files.
While the Library folder is hidden by default, it is still possible to access it by using the Go to Folder command in Finder or by using a third-party app like Funter to show hidden files and folders. However, it is important to be cautious when making changes to files or settings in the Library folder, as modifying the wrong file can cause problems with your Mac’s performance or even lead to data loss.

Part 3: What is the Library Folder on Mac?
Method 1: Using Finder
The easiest way to access the Library folder is through the Finder application. Here’s how to do it:
- Open Finder by clicking on the icon in the Dock or by pressing Command + Space and typing in “Finder“.
- In the Finder menu bar, click on “Go” and hold down the Option key on your keyboard. This will reveal the “Library” option in the dropdown menu.
- Click on “Library” to open the folder.

Method 2: Using Terminal
If you prefer to use the Terminal application to navigate your Mac’s file system, you can also use it to access the Library folder. Here’s how:
- Open Terminal by clicking on the icon in the utility folder, which is located in the Applications folder.
- Type the following command into the Terminal window and press Enter:open ~/Library/

Method 3: Creating a Shortcut
If you find yourself frequently needing to access the Library folder, you can create a shortcut to it on your desktop or in the Dock. Here’s how:
- Open Finder and navigate to the Library folder using one of the methods described above.
- Click on the Library folder once to select it, and then click on “File” in the Finder menu bar.
- Hover over “New Folder” and click on “Alias“.
- You’ll see a new alias appear in the same folder as the Library folder. Click and drag this alias to your desktop or the Dock to create a shortcut.
Part 3: How to Find the Library Folder using Mac Cleaner
Mac Cleaner is a third-party cleaning and optimization app for Mac that can help you find and clean up unnecessary files, including those in the Library folder. Designed as modular software, Mac Cleaner is intended to assist users in removing redundant files from their computers while also offering optimization features. While its primary function is to clean up, it also includes features to optimize your system’s performance. Here’s how to find the Library folder using Mac Cleaner:
Step #1: Launch Mac Cleaner
First and foremost, you must obtain the software and install it on your computer. To do this, visit the Mac Cleaner download site by following this link. On the website, click the “Download Now” button to initiate the download of a DMG file. Once the download is complete, open the file to begin the installation process and follow the on-screen instructions. Upon completion of the installation, the software will launch automatically.

Step #2: Select from Six Modules
The Mac Cleaner software comprises six modules, each with its own set of functionalities and features. These modules are: (1) Clean Up Junk, (2) Delete Large Files, (3) Delete Duplicate Files, (4) Erase Private Data, (5) Speed Up Your Mac, and (6) Manage Apps & Extensions. This program allows you to optimize your computer’s performance by reducing CPU, GPU, and RAM usage. To select a module, simply click on it from the left-hand side of the interface. Launch Mac Cleaner and select the “System Junk” option from the sidebar.
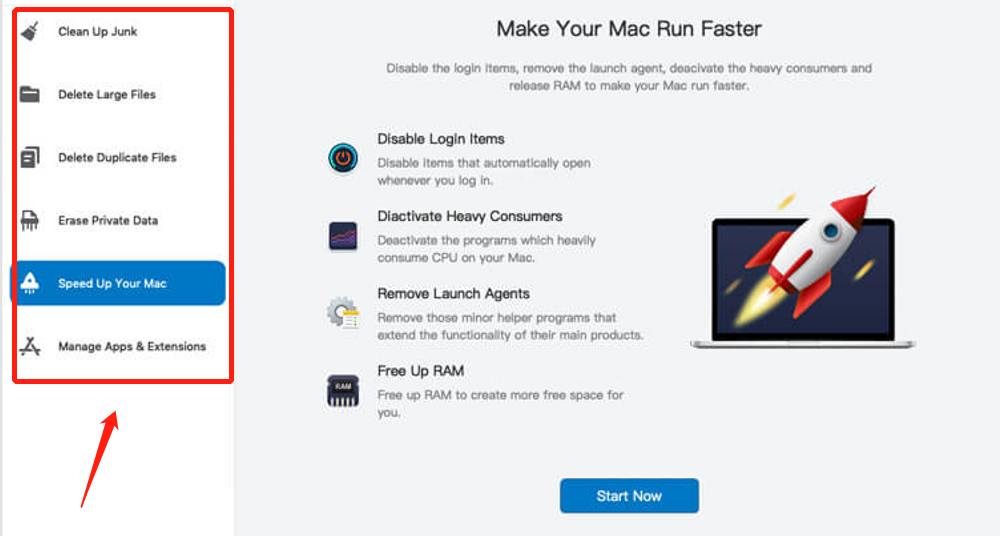
Step #3: Click Start Now
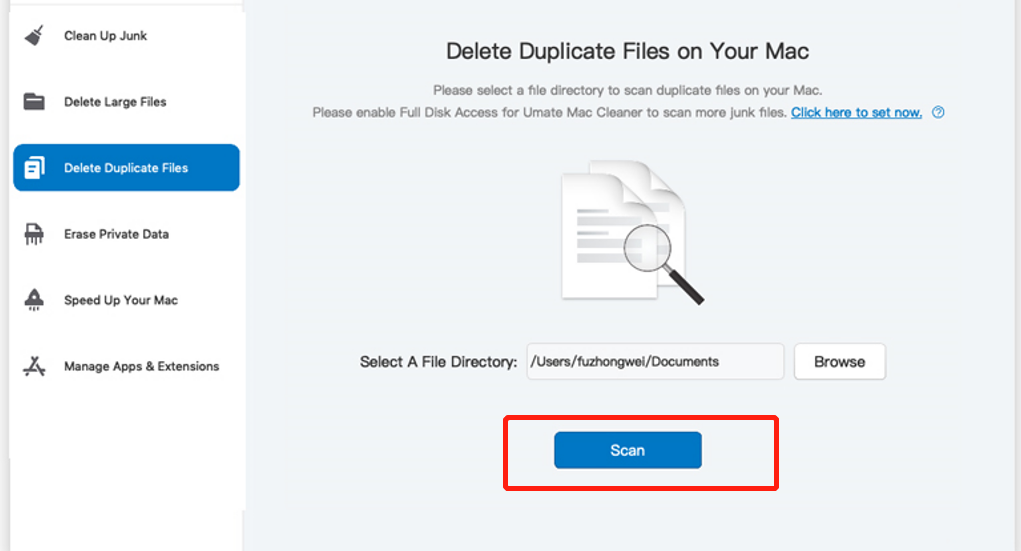
Once you select a module, the Mac Cleaner software will display information about its respective features and functionalities. For instance, the Speed Up Your Mac module will present you with various actions it can perform. To proceed, simply click the “Start Now” button. Click on the “Scan” button to scan your Mac for unnecessary files.
Step #4: Choose Item/s
The next page displays a list on the left-hand side of the interface, comprising four items that correspond to the actions you can take with the module. Here’s a breakdown of each option and how it can optimize your Mac:
- “Disable Login Items” force quits apps and processes that automatically open upon computer startup.
- “Deactivate Heavy Consumers” finds and disables apps and processes with high CPU and GPU consumption.
- “Remove Launch Agents” temporarily disables programs that open alongside other apps and processes.
- “Free Up RAM” optimizes memory usage by force-closing programs with high RAM usage.
To proceed, choose an action from the list. Once selected, a new list will appear on the right side of the interface, displaying apps and processes that you can deactivate to perform the selected action. Simply check the boxes next to the apps and processes you want to disable. If you want to disable all the programs, click the “Select All” option.
Click on the “Review Details” button next to “Large & Old Files” or “System Cache & Logs” to view the files in those categories. Use the filter at the top of the window to search for files within the Library folder. You can filter by file type, size, and modification date to help you locate specific files.
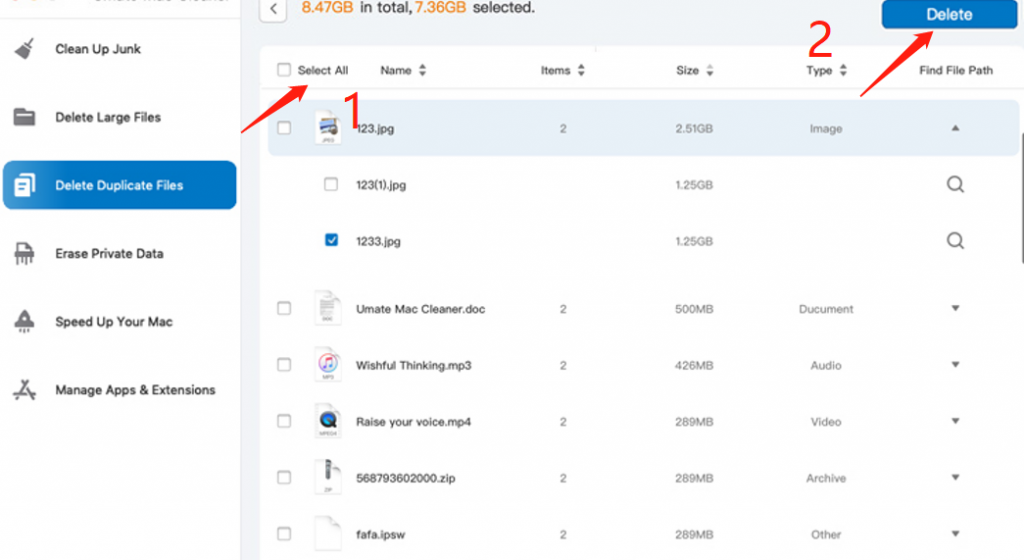
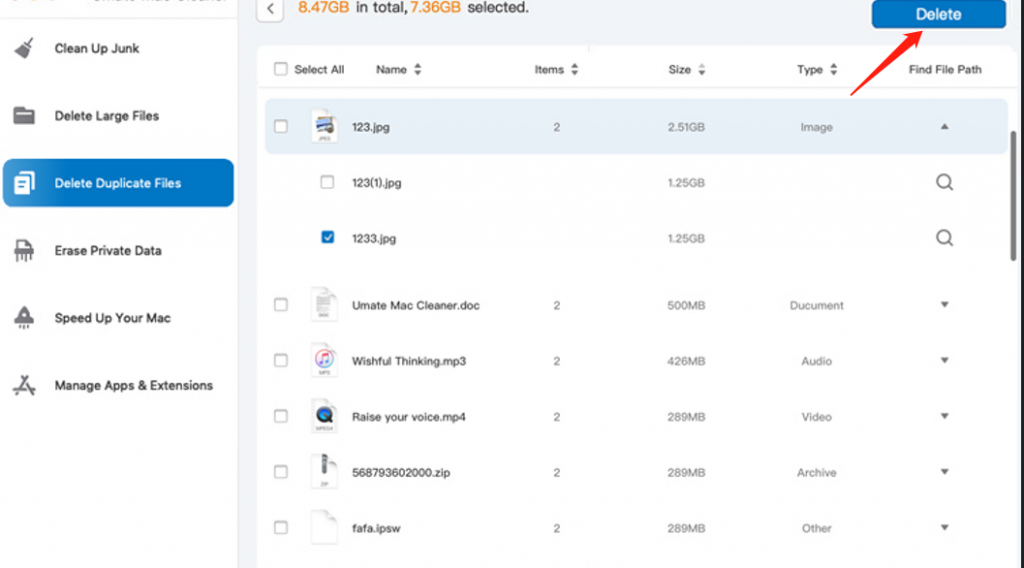
Step #5: Click the Blue Button
To delete files from the Library folder, select them and click on the “Remove” button. Be careful not to delete any critical system files or folders, as this could cause problems with your Mac’s performance or stability.
Note that while Mac Cleaner can help you find unnecessary files in the Library folder, it is generally not recommended to delete files from the Library folder unless you know what you are doing. Deleting the wrong file can cause problems with your Mac’s performance or stability. If you’re not sure which files to delete, it’s best to leave them alone or seek assistance from a qualified Mac technician.
Closing Thoughts
Accessing the Library folder on Mac is a useful skill that can help users customize their system settings and access important files. By following the simple steps outlined in this guide, Mac users can easily navigate to the Library folder and begin exploring the various options and features available. Whether for troubleshooting or customization purposes, knowing how to get to Library on Mac is an essential skill for any Mac user.
Latest Articles