How to open files on MacBook is one of the most common tasks performed by Mac users on a daily basis. It’s so routine that many of us do it without even thinking, and we tend to use the same method repeatedly. However, there are actually a dozen or more different ways to open files on MacBook, some of which are hidden and not commonly used.
Part 1: how to Open Files on MacBook
Opening files on a MacBook is a simple process. Here are the steps:
Locate the file you want to open. This can be done by navigating to the folder or using Spotlight search. Once you have found the file, double-click on it. This will automatically open the file in its default application. If the file type is not associated with a default application, you can right-click on the file and select “Open With” to choose an appropriate application.
If the file is located in a compressed folder (such as a ZIP file), you will need to extract it first before you can open it. To extract the file, double-click on the compressed folder to open it, and then drag the file to a different location. If you encounter any issues opening a file, make sure that you have the appropriate software installed on your MacBook to open the file.
Part 2: How to Open Files That Are Hidden
By default, Mac OS X hides certain files and folders that it considers to be system files or files that users don’t typically need to see. However, you can still access and open these hidden files using the following steps:
- Open the Finder application.
- Click on the “Go” menu in the top menu bar and select “Go to Folder.“
- In the “Go to Folder” window that appears, type in the path to the hidden file or folder you want to open. For example, to open the hidden “Library” folder in your user account, you would type in “~/Library” (without the quotes).
- Click the “Go” button or press the “Enter” key on your keyboard.
- This should open the hidden file or folder in a new Finder window. You can then double-click on any files within the folder to open them in their respective applications.
Note: Be careful when modifying or deleting hidden files, as they may be important system files that can cause issues with your Mac if removed or altered improperly. Only modify or delete hidden files if you know what you’re doing and have a backup of your system.
Part 3: How to Double-click to Open Files
Double-clicking to open files is a basic function of most operating systems. Here’s how to double-click to open files on different systems:
Windows:
- Navigate to the file you want to open using File Explorer.
- Double-click on the file to open it.
MacOS:
- Navigate to the file you want to open using Finder.
- Double-click on the file to open it.
Linux:
- Navigate to the file you want to open using your file manager (such as Nautilus or Thunar).
- Double-click on the file to open it.
In general, double-clicking on a file will open it with the default application associated with that file type. If you want to open the file with a different application, you can right-click on the file and select “Open With” to choose a different application.
Part 4: How to Drag and Drop to Open Files
Dragging and dropping is another common way to open files. Here’s how to drag and drop to open files on different systems:
Windows:
- Navigate to the file you want to open using File Explorer.
- Click and hold the left mouse button on the file, and drag it to the application you want to open it with (such as dragging a Word document to the Word icon).
- Release the mouse button to drop the file onto the application, and the file should open.
MacOS:
- Navigate to the file you want to open using Finder.
- Click and hold the left mouse button on the file, and drag it to the application you want to open it with (such as dragging a PDF file to the Preview icon).
- Release the mouse button to drop the file onto the application, and the file should open.
Linux:
- Navigate to the file you want to open using your file manager (such as Nautilus or Thunar).
- Click and hold the left mouse button on the file, and drag it to the application you want to open it with (such as dragging a text file to the Text Editor icon).
- Release the mouse button to drop the file onto the application, and the file should open.
- In general, dragging and dropping a file onto an application will open the file with that application. If you want to open the file with a different application, you can drag and drop the file onto a different application instead.
Part 5: How to Use the Application’s File Menu to Open Files on Macbook
Using the application’s File menu is another way to open files on a MacBook. Here’s how:
- Open the application that you want to use to open your file.
- In the top menu bar, click on the “File” menu.
- Select “Open” from the dropdown menu. This will open a new window where you can navigate to the file you want to open.
- Use the file browser to navigate to the location of the file you want to open.
- Select the file you want to open and click the “Open” button.
The exact steps may vary slightly depending on the application you are using, but most applications on a MacBook will have a “File” menu with an “Open” option to allow you to open files. You can also use keyboard shortcuts to quickly access the “File” menu (such as “Command + O” on most applications) to open files even faster.
Part 6: How to Use Macos’ Recent Files to Open Files on Macbook
The Dock is a handy shortcut bar that’s always visible at the bottom (or side) of your screen on a MacBook. Here’s how to use it to open files:
- Locate the file you want to open in Finder.
- Drag the file icon from Finder and drop it onto the application icon in the Dock that you want to use to open the file (for example, drag a Word document onto the Microsoft Word icon in the Dock).
- The application will launch and the file will open in that application.
Alternatively, if you’ve recently opened the file using the same application, you can simply click and hold on the application icon in the Dock. This will bring up a menu that shows the most recently opened files for that application. You can then click on the file you want to open to launch the application and open the file.
Using the Dock is a quick and easy way to open files, especially if you use the same applications frequently. Just make sure that the application you want to use is already in the Dock. If it’s not there, you can add it by dragging its icon from Finder or the Applications folder onto the Dock.
Part 7: How to Open Files Via Spotlight to Open Files on Macbook
Spotlight is a powerful search tool on a MacBook that allows you to quickly find and open files. Here’s how to use Spotlight to open files:
- Press the “Command + Spacebar” keys on your keyboard to open Spotlight.
- Start typing the name of the file you want to open. Spotlight will start showing results as you type.
- Once you see the file you want to open in the search results, click on it to open it.
- The file should open in its default application.
If you don’t see the file you want to open in the search results, you can try refining your search by adding more keywords or using filters. For example, you can use “kind:” followed by the file type (such as “kind:pdf“) to only show results for that particular file type. Spotlight is a convenient way to quickly find and open files without having to navigate to their location in Finder. It’s especially useful for finding files that you can’t remember where you saved them.
Part 8: How to Use the Keyboard to Open Files on Macbook
Using the keyboard is a quick and efficient way to open files on a MacBook. Here are some keyboard shortcuts you can use to open files:
- “Command + O” – This will open the “Open File” dialog box in most applications, allowing you to navigate to the file you want to open.
- “Command + Shift + O” – This will open the “Open Folder” dialog box, allowing you to navigate to the folder that contains the file you want to open.
- “Command + Shift + G” – This will open the “Go to Folder” dialog box, allowing you to navigate to a specific folder or directory.
- “Command + Spacebar” – This will open Spotlight, which you can use to search for and open files (as explained in the previous answer).
- “Command + Tab” – This will bring up the application switcher, allowing you to quickly switch between open applications. If the file you want to open is already open in an application, you can use this shortcut to switch to that application and the file.
These keyboard shortcuts should work in most applications on a MacBook. However, some applications may have their own custom keyboard shortcuts for opening files, so be sure to check the application’s documentation or menu options for more information.
Part 9: How to Use Quicklook to Open File
QuickLook is a built-in feature of macOS that allows you to quickly preview the contents of a file without actually opening it in an application. Here’s how to use QuickLook to open a file:
- Locate the file you want to preview in Finder.
- Click on the file once to select it.
- Press the “Spacebar” key on your keyboard to open QuickLook.
- The file preview will appear in a separate window. You can use the arrow keys on your keyboard to navigate through multiple files in the same folder.
- If you want to open the file in its default application, simply click on the “Open with” button in the top-right corner of the QuickLook window and select the application you want to use.
QuickLook supports a wide variety of file types, including documents, images, videos, and more. It’s a great way to quickly preview the contents of a file without having to open it in a separate application. If you need to edit the file, you can use the “Open with” button in QuickLook to quickly open it in the appropriate application.

Part 10: How to Open File with Terminal
You can open files from Terminal using the “open” command. Here’s how to do it:
- Open Terminal by navigating to Applications > Utilities > Terminal.
- Type “open ” (with a space after “open“) in the Terminal window.
- Drag the file you want to open into the Terminal window. The path to the file will be automatically inserted after the “open ” command.
- Press “Enter” on your keyboard to open the file in its default application.
For example, to open a file named “example.txt” that is located on the desktop, you would type the following command: open ~/Desktop/example.txt
Note that the “~” symbol is a shorthand for your home directory. You can also open a file using Terminal by specifying the full path to the file. For example, to open a file named “example.txt” that is located in a folder named “Documents” in your home directory, you would type the following command: open ~/Documents/example.txt
Opening files with Terminal can be especially useful if you need to perform a series of actions on the file using command-line tools.
Part 11: How to Re-Open File from the Open Recent Menu
If you recently worked on a file and closed it, you can reopen it quickly from the Open Recent menu. Here’s how:
- Click on the Apple menu in the top-left corner of the screen.
- Select “Recent Items” and then “Documents” from the dropdown menu.
- A list of recently opened files will appear. Scroll through the list and click on the file you want to reopen.
Alternatively, you can also access the Open Recent menu from within an application. Here’s how to do it:
- Open the application you used to work on the file (such as Microsoft Word or Preview).
- Click on the “File” menu in the top-left corner of the screen.
- Select “Open Recent” from the dropdown menu.
- A list of recently opened files will appear. Scroll through the list and click on the file you want to reopen.
The Open Recent menu in macOS is a convenient way to quickly reopen files that you were recently working on, without having to navigate through Finder to find them.

Part 12: One More Trick to Open Hidden Files and Folders
When it comes to managing files on a MacBook, it’s not uncommon for folders to become disorganized and important files to become misplaced. This can result in lost folders taking up valuable storage space on your computer. If you’re looking for a way to locate and open these hidden files, there’s a helpful method you can try.
Using Mac Cleaner, you can generate an infographic map of your drive that allows you to easily navigate and unveil hidden folders. This will give you insight into which files are taking up the most storage space, allowing you to make informed decisions about which files to keep or delete. With these tips and tricks for how to open files on MacBook, you can take control of your file management and maximize your available storage space.
If you’re looking to speed up your MacBook and free up some valuable storage space, Mac Cleaner can be a useful tool to have in your arsenal. With Mac Cleaner, you can easily scan your device for unnecessary files and delete them accordingly, resulting in a faster and more efficient computer.
The main purpose of this handy tool is to identify and remove files that are no longer needed, optimizing the performance of your MacBook. To use Mac Cleaner to scan and delete unnecessary files on your MacBook, follow these simple steps.
Step 1. Download And Install Mac Cleaner
To get started with using Mac Cleaner to optimize your MacBook’s performance, you’ll first need to download the software from its official website and install it on your computer. Once you’ve successfully installed the software, launch it to begin the optimization process.

Step 2. Select A Module
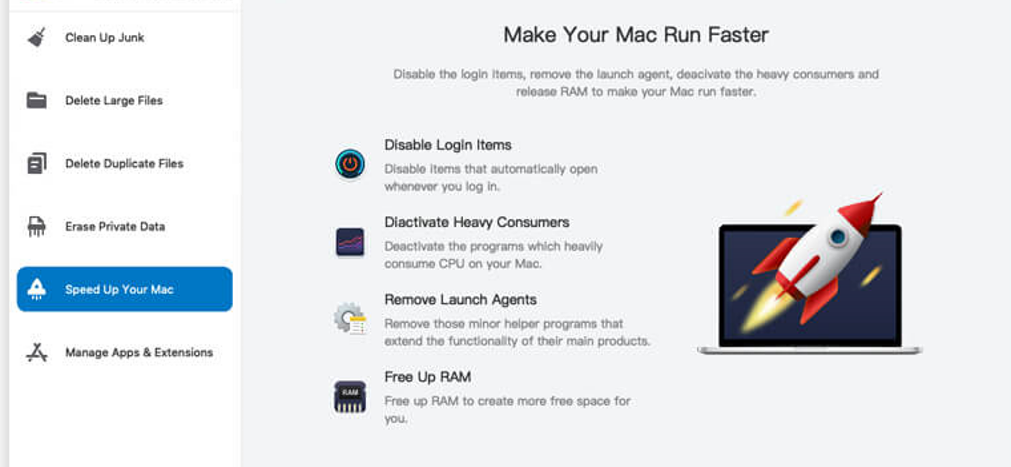
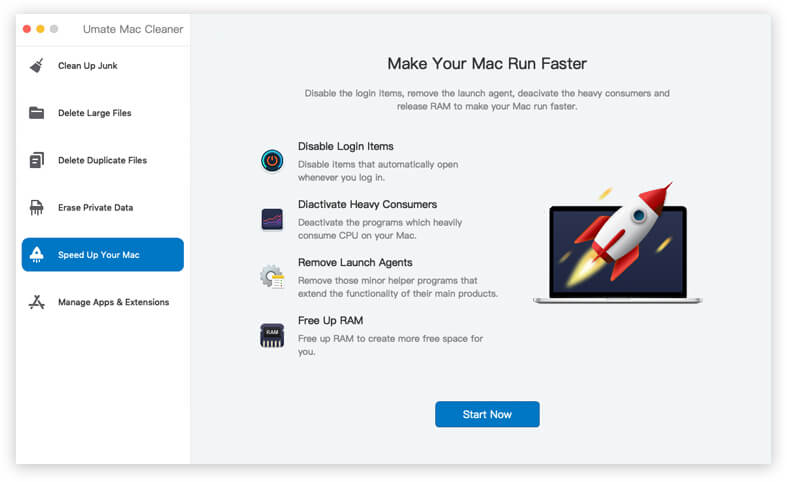
Next, you’ll need to select a module from the six different options available on the left sidebar of the software. These options include Clean Up Junk, Delete Large Files, Delete Duplicate Files, Erase Private Data, Speed Up Your Mac, and Manage Apps & Extensions.
For the most effective results, we recommend starting with the Speed Up Your Mac module, which is specifically designed to clear up space on your MacBook and improve its overall performance. However, you can also choose to explore each module to fully leverage the software’s capabilities.

Step 3. Scan for Files
After selecting a module in Mac Cleaner, the screen on the right side of the software will display relevant information and options for that specific module. To begin scanning for files, click the blue Scan button for modules such as Clean Up Junk, Delete Large Files, and Erase Private Data.
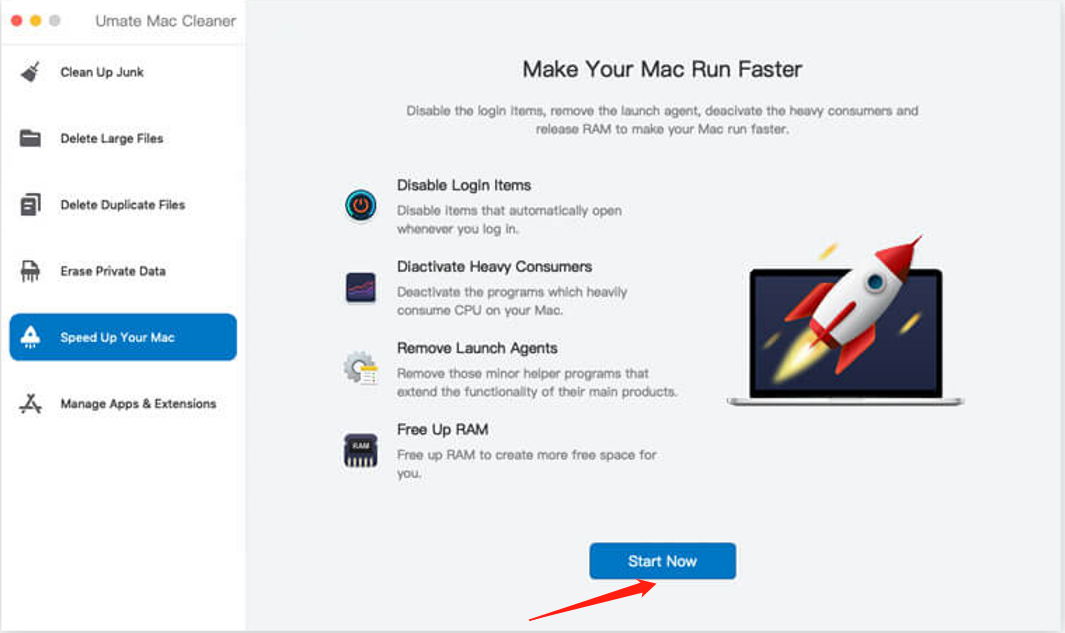
For the Delete Duplicate Files module, you’ll need to specify a directory or file path before clicking Scan. The Speed Up Your Mac module requires you to click the Start Now button to initiate the scanning process.

Step 4. Select And Delete The Files
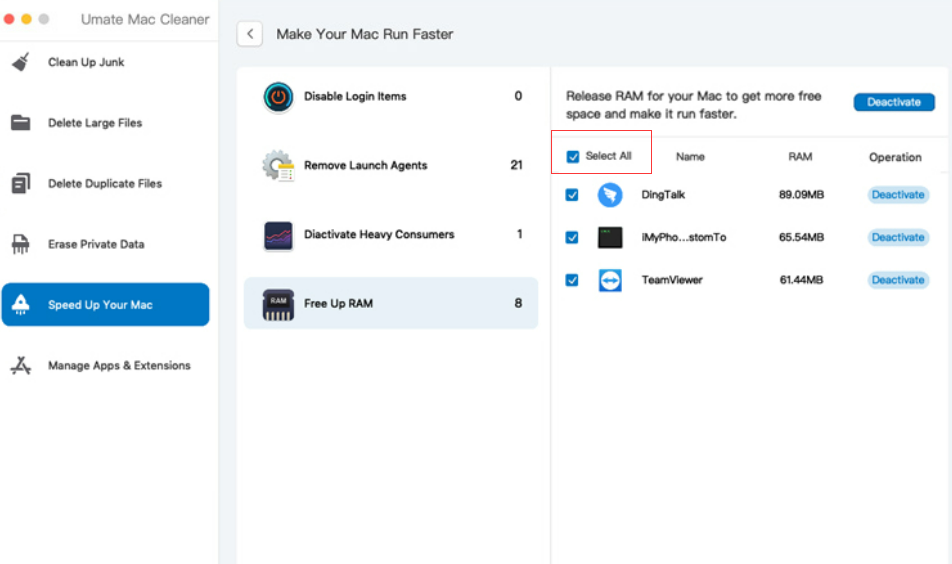
Once the scan is complete, you’ll be presented with a list of files that can be deleted. Simply select the files you wish to delete and click the appropriate button, such as Delete or Erase, located in the top-right corner of the screen.
The Speed Up Your Mac module offers several options, such as Disable Login Items and Free Up RAM, which can be selected one at a time followed by clicking the relevant button. Overall, Mac Cleaner is an efficient tool for freeing up space on your MacBook, and its user-friendly interface makes it easy to navigate.

Conclusion
There are numerous ways to open files on a MacBook, each with its own unique set of benefits and use cases. From using the Dock and Finder to accessing files through Spotlight and QuickLook, Mac users have a wide range of options to choose from when opening files. By knowing and utilizing the various methods available, you can streamline your workflow and increase your productivity on your MacBook.
Latest Articles