

The desktop is where most people dump their files and folders whenever they’re in a hurry. It happens very frequently that there must’ve come a point in every macOS user’s life that their desktop has a ton of files and folders in it. While it may not seem that impactful at first, it can actually slow down your performance as the number of folders increases, and for specific reasons. This article aims to explain why that happens and how to remove folders from desktop Mac so you don’t have to deal with that issue. Let’s first talk about why you might want to remove them from the desktop in the first place.
Why Must You Remove Folders from Desktop?
There are several reasons why you might want to remove folders from your desktop. Here’s a look at some examples:
- You want to organize your desktop. Deleting some items in it is naturally an excellent way to go about it.
- You want to boost your macOS performance. Every folder on your desktop corresponds to an icon, and each icon uses RAM constantly as they act as a background program. Removing them will reduce RAM usage.
- You want to free up space. Folders will naturally contain files that are most likely consuming a specific amount of disk space on your computer. Deleting them will most definitely reduce the used space on your storage drives.
- You no longer need the folders. If the folders on your desktop were from a long time ago, then perhaps you no longer need them for anything. If that’s the case, then it’s only natural for you to remove the folders from the desktop.
Regardless of the reason, you’ll inevitably have to learn how to remove folders from desktop Mac. With that in mind, here’s a look at four ways you can do that. Let’s start with the first method which is perhaps the simplest of them all.

Method #1: Delete The Folders
The simplest way to remove folders from your desktop is to simply delete them altogether. Deleting a folder is pretty much the same as deleting a file, though it takes a few more seconds since it may contain several files. Here’s how you can do this:
- Find the folders you want to delete from your desktop.
- Drag and drop them into the Trash icon on your Dock.
- Do this to all the folders you want to delete.
Note: Alternatively, you can click the folders while holding the Ctrl key on your keyboard. Then, select Move to Trash from the resulting dropdown menu. If you wish to delete it permanently, go to Trash and delete it again.

Method #2: Arrange Them As Stacks
On macOS computers, there are what they call stacks. Stacks are basically a compilation of files and folders that were once on your desktop. Its main purpose is to minimize the number of desktop icons on your computer, making it the perfect solution for your problem if you’re struggling with RAM usage. Here’s how you can remove folders by using desktop stacks:
- On the desktop, click View from the top menu bar.
- Select Group Stacks By from the resulting dropdown menu.
- Choose an option. It can be by file type, file size, name, etc.
Keep in mind that this doesn’t necessarily remove or delete the folders. Stacks simply compile them into one place, so you can access them later. It does, however, remove the desktop icon, if that’s what you’re aiming for when you looked up this guide.

Method #3: Move Them to A Single Folder
If you’re not fond of using stacks, then you can go the traditional route of compiling files and folders by placing them into a bigger folder. It’s a bit more complex, but it is at least more reliable since it was a common practice back in the day for macOS computer users. Here’s how you can pull this off:
- Go to your Desktop.
- Click on any blank space on the desktop while holding the Ctrl key on your keyboard
- A drop-down menu should appear. From the menu, select New Folder.
- Type in the name of the folder you want to create.
- Now, drag and drop all the folders on your desktop into that new folder to compile them into one folder.

Method #4: Remove Them With Terminal
If your desktop is full of folders and you have no time to delete them individually, then you can use Terminal, a command line that allows you to execute tasks by typing in lines of codes. Here’s how to remove folders from desktop Mac using Terminal:
- Open Finder on your computer.
- Click Applications from the left sidebar of the window.
- Find and open the Utilities folder.
- Double-click the Terminal icon.
- On Terminal, type in the following command: defaults write com.apple.finder CreateDesktop false.
- Press Enter or Return.
- Type in another command: killall Finder.
- Press Enter or Return.

BONUS: Speed up Your Mac With Mac Cleaner
As stated earlier, the main purpose of deleting folders from the desktop or removing them in any way is to reduce the RAM usage on your computer, which in turn speeds it up. Though it’s an excellent and rather easy way to boost your macOS computer’s performance, it’s not the only method. There are other ways you can speed up your Mac, though they require a lot of time and effort. If you wish to boost your Mac’s performance quickly, then we suggest apps like Mac Cleaner.
Mac Cleaner is a modular software that aims to delete files from your Mac, hence its name. While its specialty is cleaning files, it can also speed up your Mac. Here’s how to remove folders from desktop Mac using Mac Cleaner:
Step #1: Open Mac Cleaner On Your Computer/
The first step is to simply set up the software on your computer. To do that, you must open a browser and visit the cleaning app’s download site. On that site, click the Download Now button. That should prompt a download of a DMG file, which you must then open. It’ll run the installer and you only have to follow the onscreen instructions from that point onwards. The software should open automatically once the installation is complete.

Step #2: Select Speed up Your Mac
Mac Cleaner has a total of six modules, namely (1) Clean Up Junk, (2) Delete Large Files, (3) Delete Duplicate Files, (4) Erase Private Data, (5) Speed Up Your Mac, and (6) Manage Apps & Extensions. While each module does have its functionalities, since your main goal, for now, is to boost your Mac computer’s performance, you’ll mostly need the Speed Up Your Mac module, which specializes in boosting the performance. Select the option by clicking on it from the left side.

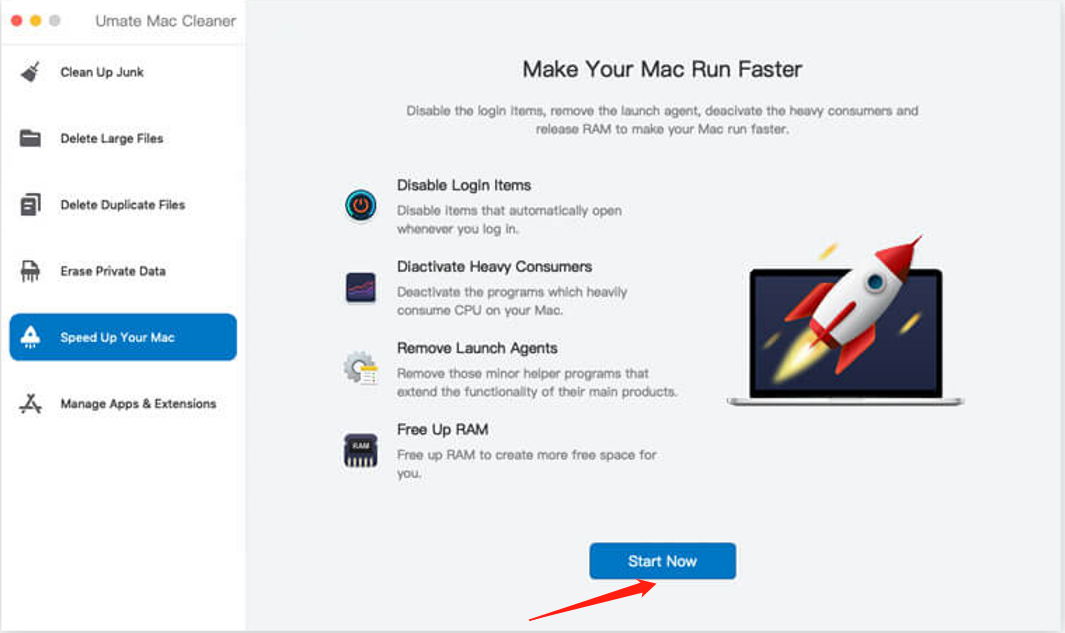
Step #3: Click Start Now
Usually, the next step is to scan your computer for files. However, in the case of Speed Up Your Mac, your next step is to look for things the software can do to speed up the computer. To do that, you simply have to click the Start Now button.
Step #4: Select an Action
Upon clicking the Start Now button, the software will take you to the next page where you’ll find a list consisting of four different items. These items correspond to the different actions you can take using the module. Here’s a look at each option:
- Disable Login Items allows you to stop certain apps and processes from opening automatically upon boot up.
- Deactivate Heavy Consumers ensures that programs that consume too much CPU don’t open automatically.
- Remove Launch Agents force quits apps and processes that open along with certain programs.
- Free Up RAM reduces your macOS computer’s RAM usage by disabling specific apps and processes.
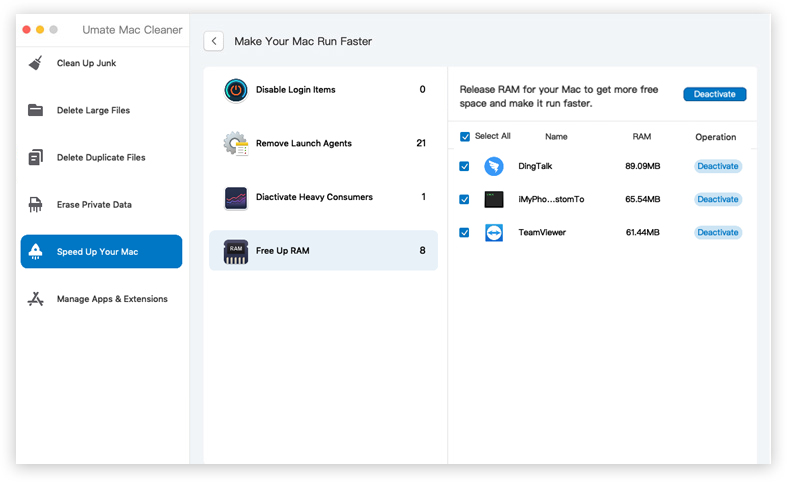
Your next step is to simply select an option between these four. Upon doing so, you’ll find yet another list on the right side of the interface. On that list are apps and processes that you can deactivate. Select the ones you want to disable by simply clicking on their corresponding checkboxes. You may also click the Select All checkbox if you want to deactivate all items.
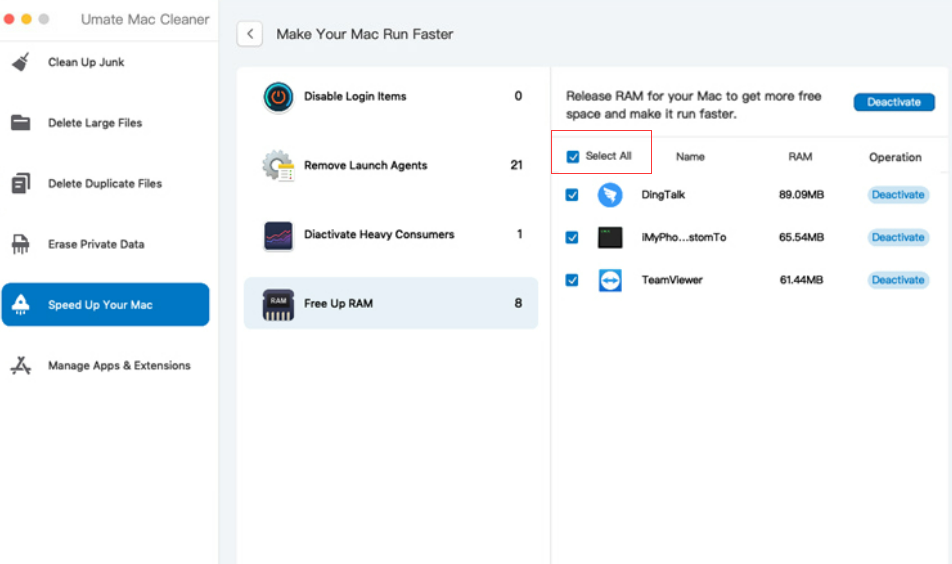
Step #5: Deactivate the App/Process
Once you’ve selected all the apps and processes you want to deactivate, what’s left is for you to click the Deactivate button at the top-right corner of the software. That should finalize the process and all you have to do by then is wait a few minutes.
Upon doing this, you should notice a boost in your macOS computer’s performance that is far more noticeable than when you simply removed the folders from the desktop. That’s because deactivating unnecessary apps and processes is much more impactful than just the disappearance of a few desktop icons on your computer.
Takeaways
It might seem like a useless action, but removing folders from your desktop can actually go a long way in improving the performance of your computer. Not only does it reduce the RAM usage, but it also frees up disk space on your computer. The good news is it’s relatively easy to learn how to remove folders from desktop Mac, as you may have realized from the aforementioned methods. Moreover, if the methods didn’t work out for you, you always have the option to use cleaning apps like Mac Cleaner. They can delete not only folders from the desktop but also other unnecessary files.
Latest Articles