

The Trash contains all the files you’ve deleted on your Mac over the past 30 days. Though its contents are technically junk since you cannot use them unless restored, those files still take up space, meaning they still exist on your computer. This is that if you ever need those files again, you can easily retrieve them. However, it also raises the issue of having insufficient storage since they consume a considerable amount of disk space. That’s why it’s advisable to regularly empty the Trash.
Unfortunately, there are cases where your Mac Trash won’t empty, which can cause a variety of issues. In this article, you’ll learn why this happens and what you can do to prevent it from happening again. Let’s start with its probable causes.
Reasons Why Mac Trash Won’t Empty
The Trash might not be an advanced feature in Mac, but it shouldn’t normally encounter issues where it won’t empty. That’s why it’s safe to assume that something must be wrong with your computer, which is why this problem is happening.
With that said, below are a few reasons why Mac trash won’t empty:
- You haven’t updated your macOS.
- There’s a software or program that’s interfering with the functionality of the Trash.
- You’re currently using one of the files in the Trash.
- There are certain files in the Trash that are locked or protected.
- You don’t have permission to modify system folders, including the Trash.
While some of these reasons are easy to determine, others are not. The issue that involves the interference of an app, for instance, is quite difficult to identify since your computer must have a bunch of apps installed. Similarly, it can be tricky to check whether you have permission to modify system folders since only the admin can assign these permissions. If you’re the owner of the computer, then that can be even more confusing since you should have all the necessary permissions. With that in mind, here’s how you can solve these issues and resolve the error where Mac Trash won’t empty.
Solution #1: Update Your macOS
Since one of the reasons why Mac Trash won’t empty is because your macOS is outdated, one of the solutions you can try is to update your operating system. If you didn’t know, software updates patch out bugs, and the issue with the Trash app is most likely a bug. Therefore, by updating, you can fix it very easily. Here are the steps to update a Mac operating system:
- Click the Apple logo at the top-left corner of your screen.
- Select System Preferences… from the resulting menu.
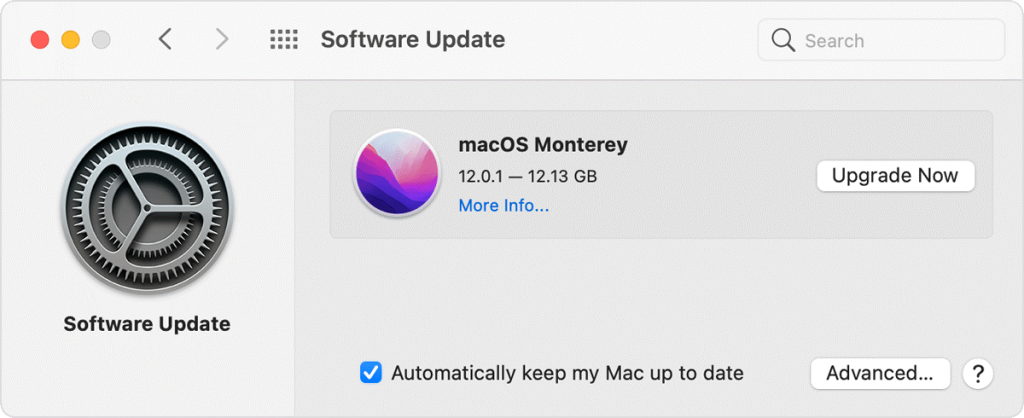
- A window should appear. On this window, click Software Update.
- There should be a button that says either Upgrade Now or Update Now. Click that button.
With this, the issue with Trash as well as other bugs should be patched, though it may take a while for the upgrade or update to finish since it usually involves installing GBs worth of files.
Solution #2: Force Quit All Apps
The second reason is that an app or program is interfering with the Trash. Therefore, for the second solution, you must force quit apps that are currently open on your computer. This involves the Force Quit feature. Here’s how you can use it:
- On your computer, press the keys Command + Option + Escape.
- A window should appear. In this window, you’ll find the apps currently open on your computer. Select the ones you want to force quit.
- Click the Force Quit button at the bottom-right corner of the window.
For every app you force close/quit, check whether you can empty the Trash. That way, you can also figure out the app that’s causing the problem, and hopefully fix it by either updating it or deleting it altogether.

Solution #3: Restart Your Computer
The third reason why Mac Trash won’t empty is that one of the files in the Trash is open. The easiest way to go about this is to close all the apps on your computer, including folders. However, chances are the file is open but hidden. Therefore, the best solution for this is to simply restart the computer. It should close all apps automatically. Once the computer boots up again, empty the Trash to see if the problem has been solved.

Solution #4: Unlock Files
On Mac, files can be locked. If they’re locked, you can’t edit them, move them, and most importantly, delete them. If one of the files in the Trash is locked, it’d explain why you can’t empty it. Here’s how you can unlock a file on macOS computers:
- Open the Trash app.
- Select a file.
- Click the File tab from the top menu bar.
- Select Get Info.
- Uncheck the box for Locked.
- Do this for each file in the Trash.

Solution #5: Check The Permission
The last reason why Mac Trash won’t empty is that you don’t have permission to delete one of the files on it. But if you do, you should be able to fix the issue. Thankfully, you can see and edit permissions rather easily with the following steps:
- Open the Trash app.
- Select a file.
- Click File > Get Info the same way you did in the previous solution.
- Click the arrow beside the Sharing & Permissions.
- Here, you can find the users that have access to the file and what kind of permissions they have. You should have the privilege of Read & Write soyou can delete the file. Click the plus (+) icon if you’re not included.
- Add your username to the list, or just add everyone.
- Edit the privileges to Read & Write.

Mac Cleaner: Alternative Way to Empty The Trash
Though it’s a bit unlikely, there’s a possibility the aforementioned solutions won’t fix the problem where Mac Trash won’t empty. If so, there’s a good chance the issue is caused by a bug in the macOS. In that case, you simply need to wait for an update from Apple, which should patch the bug. But of course, you may face difficulties while waiting, so we suggest finding an alternative to empty your Trash. For that, we recommend using third-party software called Mac Cleaner.
Mac Cleaner is a modular software that allows you to find and delete unnecessary files from your computer. It can scan every nook and cranny of your computer, including the Trash. Here’s what you need to do to empty your trash:
Step #1: Download, Install, and Start Mac Cleaner
To use the software, naturally, you need to get it first. For that, you need to open a browser and navigate to the Mac Cleaner download site. Click the Download Now button found on that page to download a DMG file. Then, open that file to run the installer. Follow the onscreen instructions from then on. The software will open automatically once installed.

Step #2: Pick Clean up Junk
Mac Cleaner has a total of six modules, namely (1) Clean Up Junk, (2) Delete Large Files, (3) Delete Duplicate Files, (4) Erase Private Data, (5) Speed Up Your Mac, and (6) Manage Apps & Extensions. For your purposes, you’ll only need the first module, Clean Up Junk. It allows you to scan and delete junk files on your computer and may include System Junk, App Junk, iOS Junk, and most importantly, the Trash Bin. Therefore, you can delete files from the Trash even if Mac Trash won’t empty. Simply select the module by clicking on it from the left-hand side of the interface to proceed to the next step.
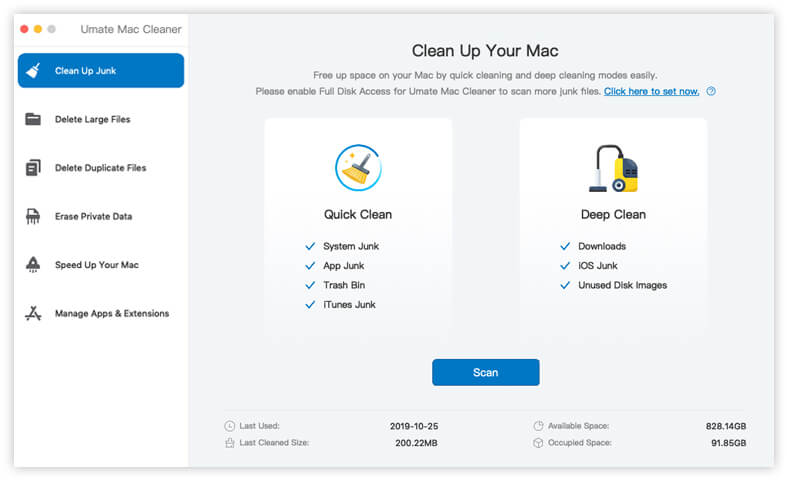
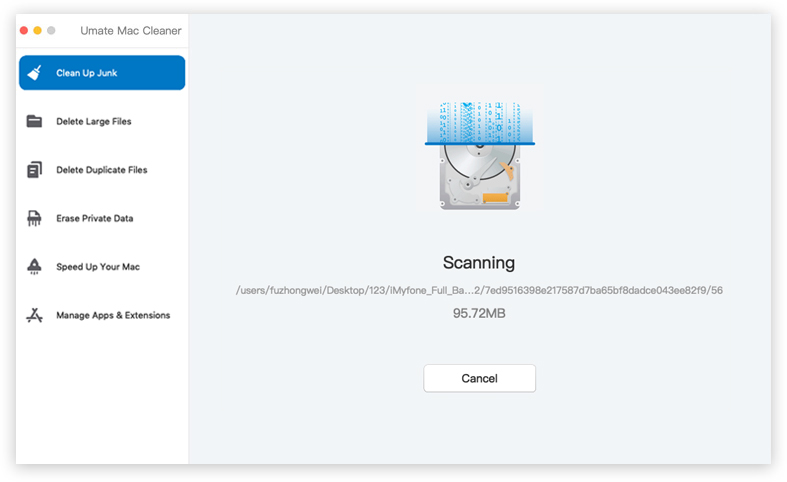
Step #3: Click the Scan Button
You’ll find two different sides in the interface. One side says Quick Clean, while the other side says Deep Clean. Each of the two scans for different types of files. Quick Clean only scans System Junk, App Junk, iTunes Junk, and Trash Bin. Deep Clean scans those as well as Downloads, iOS Junk, and Unused Disk Images. Choose between the two, then click the Scan button to start scanning for files. We suggest choosing Deep Clean as it’s less likely to leave behind other junk files.
Step #4: Choose a File Category and File/s
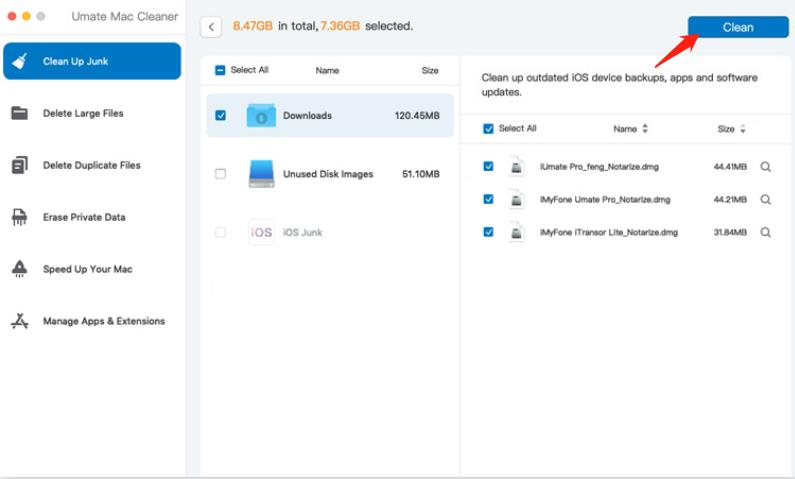
There should be a list of items on the left side of the software, and it should include the categories shown in the previous section, like System Junk, App Junk, Trash Bin, Downloads, etc. Select a category from this list, and once you do that, another list will pop up from the right side of the interface. These are the files you can delete that belong to the selected category. Select the files you wish to delete by clicking their checkboxes. Click Select All if you want to delete all the items.
Step #5: Click the Clean Button
Now all that’s left is to delete the selected files. You can do this by clicking the Clean button upper-right corner of the window, and upon doing so, wait for a few seconds or minutes for the cleaning process to complete.
That’s how you can empty your Trash if Mac Trash won’t empty using traditional methods. It’s a bit more laborious, but it should serve as an alternative while you’re waiting for Apple to patch out the bug that’s causing the issue. If you want, you can even use the software to delete other unnecessary files using the other modules Mac Cleaner has to offer.
Going Forward
Just like all operating systems, a macOS can encounter all kinds of errors. These issues can affect the entirety of the computer or just one part of it. The error where Mac Trash won’t empty, as the name suggests, affects the Trash, which can be disastrous. After all, it can inhibit your ability to clear a huge part of your storage. Fortunately, it’s a rare occurrence, and if it does hit your computer, it’s not that difficult to fix, especially when you have this guide around.
Latest Articles