If you’re like most people, you probably have a ton of photos stored on your Mac. And while having all those memories at your fingertips is great, it can be overwhelming trying to keep everything organized. Fortunately, there are several photo organizer apps available for Mac that can help you get your photos in order. In this blog post, we’ll take a look at some of the best photo organizer apps for Mac.
Part 1: How to Select the Photo Management?
Choosing the best photo management solution can be a daunting task, especially with the numerous options available in the market. However, with the following tips, you can select the best photo management solution that suits your needs:
- Identify your needs: First, identify what you need in a photo management solution. Do you want a basic program that helps you organize your photos, or do you need a more advanced solution that allows you to edit and share your images?
- Consider the user interface: The user interface of a photo management solution can make or break your experience. Look for a solution with an intuitive and user-friendly interface that you find easy to navigate.
- Look for organization features: One of the primary purposes of a photo management solution is to help you organize your images. Look for a program with features like tagging, sorting, and searching that allows you to quickly and easily find your photos.
- Evaluate editing tools: If you plan on editing your photos, look for a solution with robust editing tools. Some photo management solutions come with basic editing tools, while others offer more advanced features like filters, retouching, and batch editing.
- Check for storage options: Consider how much storage space you need for your photos and look for a solution that offers ample storage options. Some photo management solutions offer cloud storage, while others allow you to store your photos locally.

Part 2: How to Organize Photos Library on Mac
Organizing your photos library on Mac can help you find and access your photos easily. Here are the steps to organize your photos library:
- Create Albums: Albums are a great way to organize your photos into specific categories. To create a new album, select the photos you want to include, right-click, and choose “Add to Album.” Then, name the album and click “OK.”
- Use Smart Albums: Smart Albums are dynamic albums that automatically update based on the criteria you set. For example, you can create a Smart Album for all photos taken in a specific year or by a specific camera. To create a Smart Album, go to File > New Smart Album and set the criteria.
- Add Keywords: Keywords are descriptive tags that you can add to your photos to make them easier to find. To add a keyword, select a photo or group of photos, right-click, and choose “Add Keyword.” Then, enter the keyword and click “OK.”
- Use Faces: Faces is a built-in feature in the Photos app that can recognize faces in your photos and group them together. To use Faces, go to the People album, click “Add People,” and identify the person in the photo. Then, click “Confirm Name” to add the person to your People album.
- Sort and Filter: You can sort your photos by date, title, or keyword by clicking on the “Sort” button in the toolbar. You can also filter your photos by album, date, or keyword by clicking on the “Filter” button in the toolbar.
- Delete Duplicates: If you have duplicate photos in your library, you can use a duplicate finder app to find and delete them. Some popular duplicate finder apps for Mac include Gemini 2, Duplicate File Finder Remover, and Photos Duplicate Cleaner.
By following these steps, you can effectively organize your photos library on Mac and easily find the photos you need.
Part 3: Software for Mac to Organize Photos
there are several great photo organizer apps available for Mac, each with its own unique set of features. Whether you’re a casual user or a professional photographer, there’s an app out there that can help you keep your photos organized and easily accessible. So take some time to explore these apps and find the one that works best for you.
Photos app
The Photos app is a built-in photo organizer app that comes with your Mac. It’s simple to use, with a user-friendly interface that makes organizing your photos a breeze. You can create albums, add tags, and even create smart albums that will automatically organize your photos based on certain criteria. The Photos app also has some basic editing features, so you can make quick adjustments to your photos without having to switch to a separate app.
Adobe Lightroom
Adobe Lightroom is a professional-grade photo organizer app that offers more advanced features than the Photos app. With Lightroom, you can create collections, add keywords, and apply ratings to your photos to help you keep everything organized. It also offers a wide range of editing tools that allow you to make more advanced adjustments to your photos. And if you’re already using other Adobe apps like Photoshop or Premiere Pro, Lightroom integrates seamlessly with those apps as well.
Google Photos
Google Photos is a cloud-based photo organizer app that offers unlimited storage for your photos. It’s free to use, and it automatically backs up all your photos to the cloud, so you don’t have to worry about losing them if something happens to your Mac. Google Photos also offers advanced search features that allow you to search for photos based on location, people, and even objects in the photos.
ACDSee Photo Studio
ACDSee Photo Studio is another professional-grade photo organizer app that offers advanced features for organizing your photos. With ACDSee, you can create folders, add keywords, and apply ratings to your photos. It also offers a range of editing tools that allow you to make more advanced adjustments to your photos. And if you’re working with RAW files, ACDSee has built-in support for a wide range of RAW file formats.
Apple Aperture
Apple Aperture is a discontinued photo organizer app that is no longer supported by Apple. However, if you’re still using it, it’s a great option for organizing your photos on a Mac. Aperture offers advanced features like image stacking, color matching, and advanced search options. It also integrates seamlessly with other Apple apps like Final Cut Pro and Motion.

Best Photo Management Software for Mac: Mac Cleaner
Mac Cleaner is a third-party software that can help you manage and optimize your Mac. Mac Cleaner also offers additional features such as duplicate photo detection, photo preview, and backup options. These features can further help you manage and organize your photo library on Mac. Here’s how you can use Mac Cleaner to manage your photos:
Step #1: Start Mac Cleaner on Your Computer/Laptop
To start using Mac Cleaner on your computer or laptop, click the link that will take you to the software’s download site where you can find the “Download Now” button to download a DMG file. After the download, open the DMG file to start the installation process and follow the instructions until Mac Cleaner opens automatically after installation.
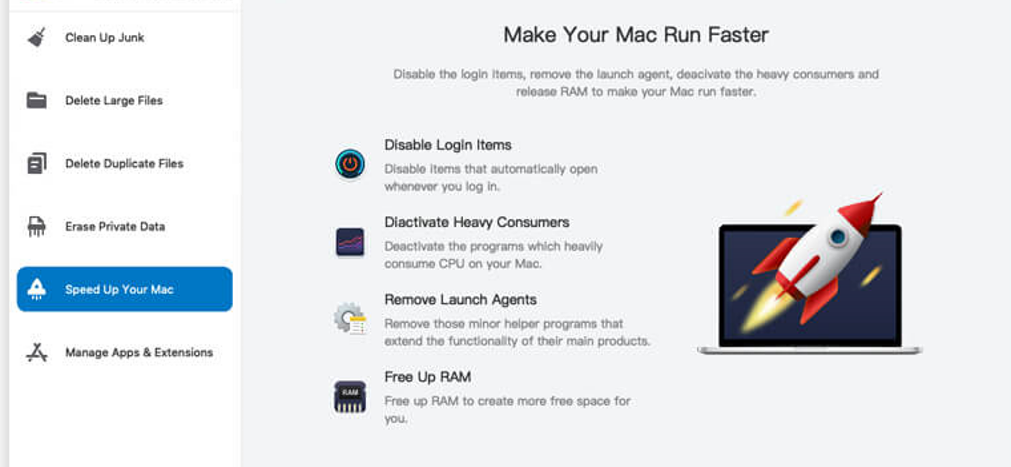
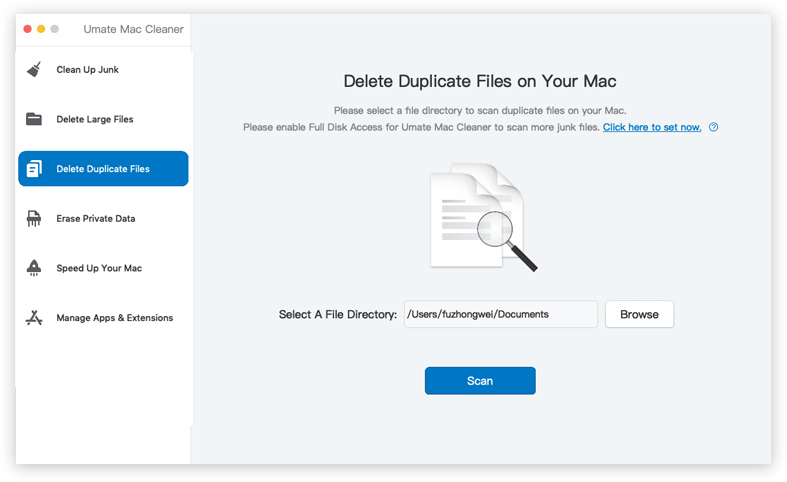
Step #2: Choose from Six Modules
Mac Cleaner offers six different modules, which you can access on the left-hand side of the interface. Each module has its own set of functionalities and features to help you optimize your Mac. To continue, you should select the module that is most relevant to your needs. The six modules available in Mac Cleaner are:
- Junk Cleaner
- Large File Cleaner
- Duplicate File Cleaner
- Privacy Cleaner
- Mac Speedup
- App Manager
To proceed to the next step, click on your desired module from the left sidebar of the window.
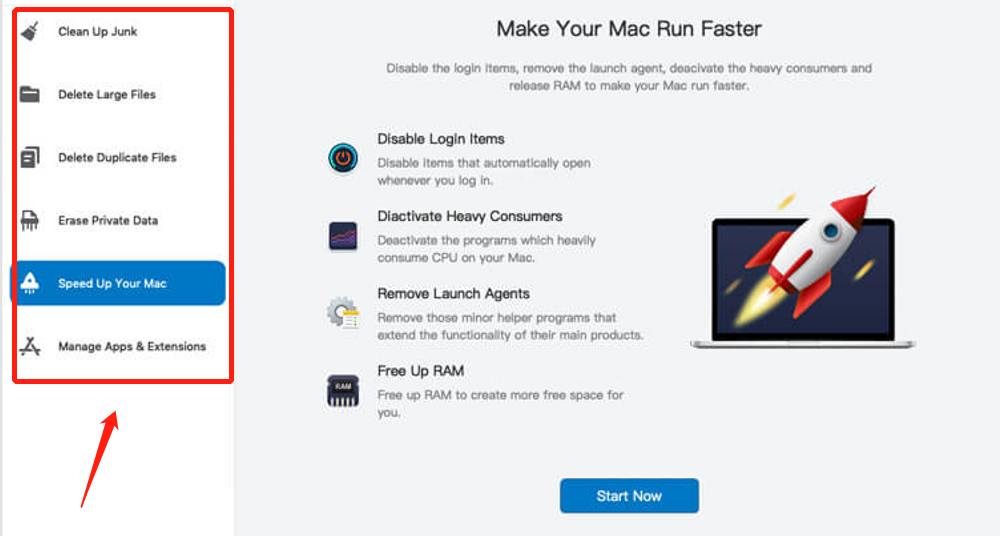
Step #3: Click Scan/Start Now/View Items
Once you have selected the module in step #2, the next step is to scan your computer for files, programs, or other items that you wish to delete or manage. The scanning process differs depending on the module you have chosen. Here are the steps for each of the six modules in Mac Cleaner:
- Clean Up Junk: The module has two scanning methods – Quick Clean and Deep Clean. Quick Clean is ideal for fast cleanup, but it doesn’t detect all types of junk files. Deep Clean scans for all sorts of junk files but takes longer. Choose the method you prefer and click the Scan button.
- Delete Large Files: Click the Scan button.
- Delete Duplicate Files: After selecting the Delete Duplicate Files module, navigate to the folder or directory you want to scan for duplicates using the Browse button beside the Select a File Directory field in the center of the interface. Click the Scan button once you have selected the folder.
- Erase Private Data: Click the Scan button.
- Speed Up Your Mac: Click the Start Now button.
- Manage Apps & Extensions: Upon selecting Manage Apps & Extensions, the interface will display two options – Uninstall Applications and Remove Extensions. Choose the one you need and click the View Items button.
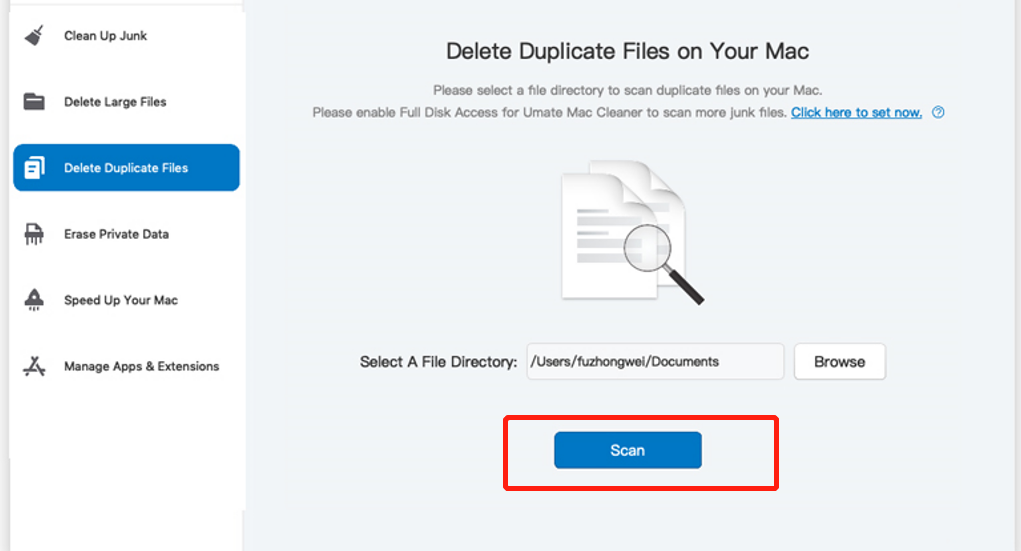
Step #4: Pick Item/s
Step #4 requires you to select the items you wish to remove from the list provided by the module you chose. The steps for each module vary and are outlined below:
- Clean Up Junk: After scanning, the software displays a list of file categories. Choose a category to display a list of files that belong to that category. Select the items you wish to delete by checking their checkboxes or select all items with the Select All option.
- Delete Large Files: Select the file, folder, disk image, archive, or any other item you wish to delete from the list.
- Delete Duplicate Files: Select the items, such as images, documents, audio, or video files, that you want to remove from the list.
- Erase Private Data: Choose a file category from the list on the left side of the interface (Online Traces, Usage Traces, Chat Data, Photo Junk, or Mail Attachment) to display the files belonging to that category on the right side. Select the files you want to delete by checking their checkboxes or select all files with the Select All option.
- Speed Up Your Mac: Select an action from the list on the left side of the interface (Disable Login Items, Deactivate Heavy Consumers, Remove Launch Agents, or Free Up RAM) to display the list of apps on the right side. Choose the apps you want to deactivate by checking their checkboxes or selecting all apps with the Select All option.
- Manage Apps & Extensions: If you selected Uninstall Application, the software displays a list of applications. If you selected Remove Extensions, select the app with the extensions you want to remove from the list on the left side of the interface to display the extensions on the right side. Check the checkboxes of the extensions you want to remove or select all extensions with the Select All option.
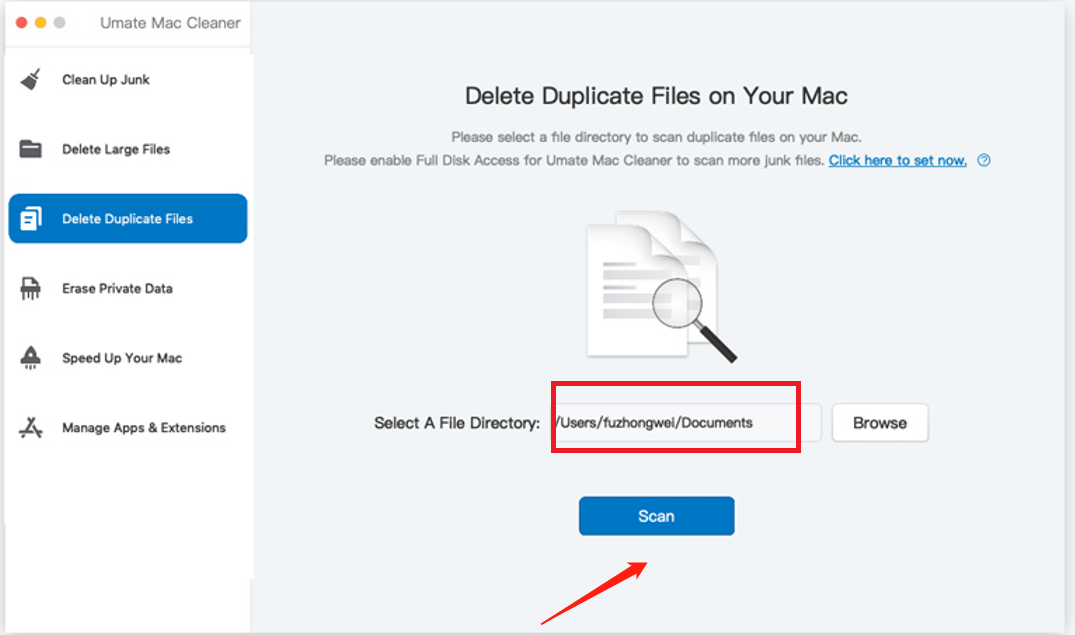
Step #5: Click the Blue Button
The final step is to click the blue button located at the upper right corner of the window. The button’s label varies depending on the action you’re taking, and it can be Clean, Delete, Erase, Deactivate, Uninstall, or Remove. Once you click it, the software will begin performing the selected action, and it may take several minutes to complete.
Wrapping up
In conclusion, there are several great photo organizer apps available for Mac, each with its own unique set of features. Whether you’re a casual user or a professional photographer, there’s an app out there that can help you keep your photos organized and easily accessible. So take some time to explore these apps and find the one that works best for you.
Latest Articles