In today’s digital age, where sharing and displaying photos online has become the norm, it’s essential to understand the art of resizing photos. Whether you need to optimize your pictures for web upload, email attachments, or social media platforms, Mac offers a range of powerful tools to help you resize photos with ease. In this guide, we’ll explore various methods and tools available on Mac for efficiently resizing your images while maintaining their quality.

Part 1: How to Resize a Photo on Mac
Understanding the Importance of Photo Resize:
When it comes to sharing images online, size matters. Large, high-resolution photos not only occupy more storage space but also take longer to upload or download. Moreover, they may not display correctly on certain devices or platforms. By resizing your photos appropriately, you can ensure faster loading times, better compatibility, and improved overall user experience.
- Resizing Photos using Preview:
Mac’s native image viewer, Preview, provides a quick and straightforward way to resize images. Follow these steps:
- Open your image in Preview:
Right-click on the image file, select “Open With,” and choose “Preview” from the options.
- Access the Tools menu:
In the Preview menu bar, click on “Tools” and select “Adjust Size.”
- Set the desired dimensions:
In the “Width” and “Height” fields, enter the desired dimensions for your resized image. You can choose pixels, inches, centimeters, or other units.
- Maintain the aspect ratio (optional):
To ensure your image retains its original proportions, check the box next to “Scale proportionally.”
- Save the resized image:
Click on “OK” to resize the image. Finally, go to the “File” menu and choose “Save” to save the resized version
- Using Third-Party Apps for Advanced Resizing Options:
While Preview offers basic resizing capabilities, third-party applications provide additional features and flexibility. Here are a few popular Mac apps for more advanced photo resizing:
- Adobe Photoshop:
Photoshop is an industry-standard image editing software that offers comprehensive resizing options, including precise control over dimensions, resolution, and image quality.
- Pixelmator Pro:
Pixelmator Pro is a powerful image editing tool that provides intuitive resizing features, allowing you to resize your photos while maintaining sharpness and clarity.
- Resize Sense:
Resize Sense is a dedicated batch image resizing app that streamlines the process of resizing multiple photos at once, making it ideal for photographers and content creators.

Part 2: How to Batch Resize Images on a Mac
- Batch resizing images on a Mac can save you a lot of time and effort, especially when you have a large number of images to resize. Here’s a step-by-step guide on how to batch-resize images using the native Preview app:
- Create a new folder: Start by creating a new folder on your Mac where you’ll save the resized images. This will help keep your original files intact.
- Select the images you want to resize: Navigate to the folder containing the images you wish to resize. Select all the images you want to include in the batch resizing process. You can do this by holding the Command key and clicking on each image.
- Open the images in Preview: Once you’ve selected the images, right-click on any one of them, then choose “Open With” and select “Preview” from the dropdown menu. This will open all the selected images in Preview.
- Access the Markup toolbar: In Preview, click on the “Show Markup Toolbar” button located in the toolbar. It looks like a toolbox.
- Enable the Edit mode: In the Markup toolbar, click on the “Edit” button. This will enable the editing mode in Preview.
- Select the desired size: With the editing, mode enabled, click on one of the images, then press Command + A to select all the images. Next, go to the “Tools” menu and choose “Adjust Size.”
- Set the dimensions: In the Adjust Size window, enter the desired dimensions for your resized images. You can choose pixels, inches, centimeters, or other units. Make sure to maintain the aspect ratio to avoid distorting the images.
- Apply the changes: After setting the dimensions, click on the “OK” button to apply the changes to all the selected images. Preview will resize the images accordingly.
- Save the resized images: Once the images are resized, go to the “File” menu and choose “Save All.” Select the folder you created in Step 1 as the destination for the resized images. Preview will save the resized images in the specified folder.
By following these steps, you can easily batch-resize images on your Mac using the Preview app. It’s a convenient and built-in solution that can handle basic resizing needs. If you require more advanced features or options, you may consider using third-party image editings software like Adobe Photoshop or Pixelmator Pro.

Part 3: How to Find the Largest Files on Mac using Mac Cleaner
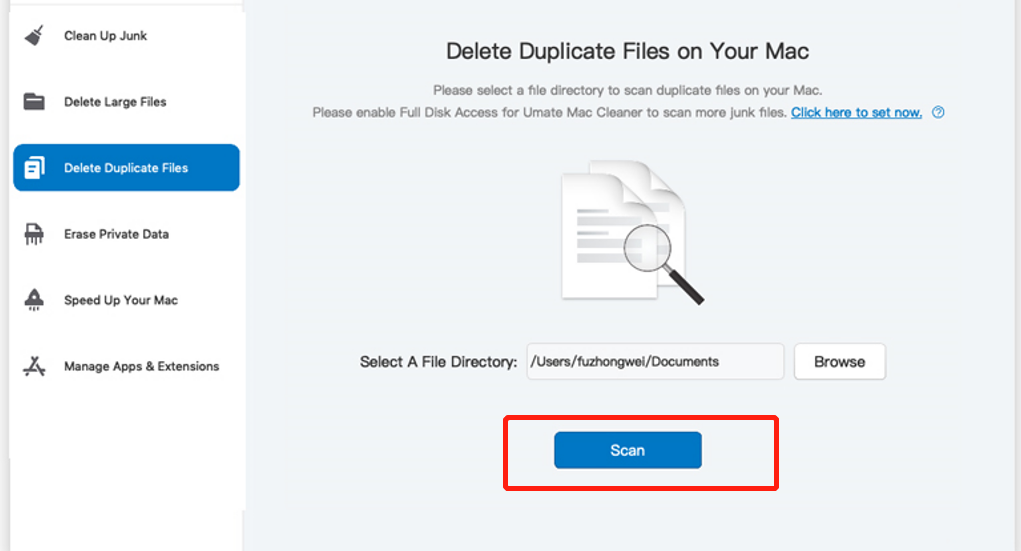
If you prefer to use a dedicated tool like Mac Cleaner to find the largest files on your Mac and free up storage space, here’s a step-by-step guide:
Install and launch Mac Cleaner:
Download and install reputable Mac Cleaner software from a trusted source.
Launch the Mac Cleaner application on your Mac.

Scan your Mac:
Look for an option like “Scan” or “Start Scan” within the Mac Cleaner interface.
Click on the scan button to initiate the scanning process. The software will analyze your Mac’s storage.

View the scan results:
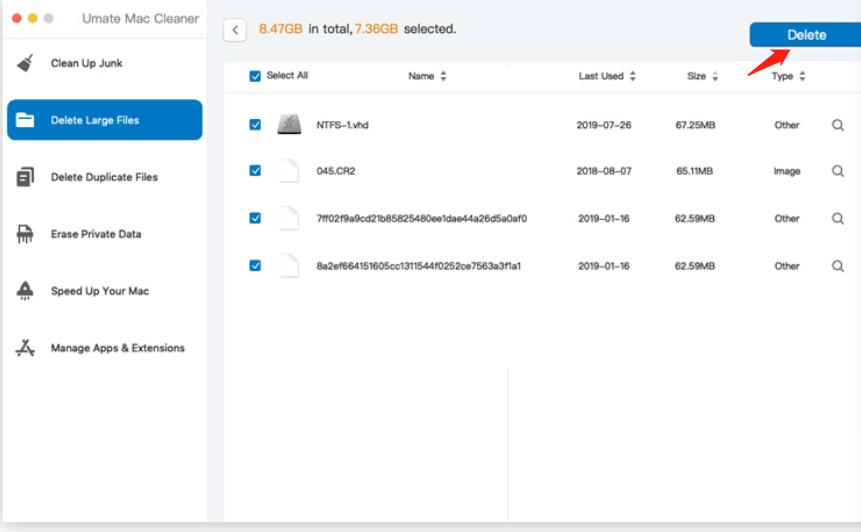
Once the scan is complete, the Mac Cleaner will present a list of files and their respective sizes.
Look for a section or tab labeled “Largest Files” or something similar to access the list of largest files on your Mac.
Sort files by size:
In the largest files section, you’ll typically find the files sorted by size, starting with the largest ones.
You may have the option to sort the files in ascending or descending order based on size.
Review and manage files:
Go through the list of the largest files to identify any unnecessary or large files that you can delete or move elsewhere.
Mac Cleaner might provide options to directly delete or manage these files within its interface.
Alternatively, you can note down the file paths and manually delete or move them using Finder.
Perform necessary actions:
Select the files you want to delete or manage.
Use the provided options within Mac Cleaner to delete the files, move them to another location, or take any other required actions.
It’s important to exercise caution when deleting files, as you don’t want to delete any important or necessary system files. Always double-check the files you are deleting and ensure they are not critical to the functioning of your Mac or any applications. Using a reliable Mac Cleaner tool can simplify the process of finding and managing large files on your Mac, allowing you to free up valuable storage space and improve overall system performance.

Conclusion
Resizing photos on a Mac is a fundamental skill that can greatly enhance your digital media-sharing experience. Whether you use the native Preview app or opt for more advanced tools like Photoshop or Pixelmator Pro, mastering the art of resizing ensures your images are optimized for various online platforms and devices.
Remember to strike a balance between file size and image quality, and always keep backups of your original photos for future reference. With the knowledge gained from this guide, you can confidently resize your photos on your Mac and showcase your visual content in the best possible way.
Latest Articles