If you’ve ever wondered how to show hidden files on Mac, look no further. Your Mac’s Library folder contains thousands of essential files to keep it running at its best. Discover how to unveil these secret files with ease. Show hidden files on Mac like a pro with our expert tutorial. Take control of your system and uncover its secrets.
Part 1: What are the Hidden Files on Mac?
The hidden files on a Mac are system files and folders that are normally not visible to users in the Finder app. These files and folders are essential for the functioning of the Mac operating system and various apps.
Some examples of hidden files on a Mac include the Library folder, which contains important files related to the operating system and installed applications, and configuration files for various apps. By default, these files are hidden to prevent users from accidentally deleting or modifying them, which could cause issues with the system and apps.

Part 2: How to Make Mac Show Hidden Files Using Terminal
To make Mac show hidden files using Terminal, follow these steps:
- Open the Terminal application. You can do this by searching for “Terminal” in Spotlight or navigating to Applications > Utilities > Terminal.
- In Terminal, type the following command: defaults write com. apple. finder AppleShowAllFiles YES
- Press Enter to execute the command.
- After executing the command, type the following command to relaunch the Finder: killall Finder
- Press Enter to execute the command.
- The Finder will now restart with hidden files visible.
- To hide the hidden files again, follow the same steps but replace YES with NO in the command in step 2.

Part 3: How to Hide Any File or Folder Using Terminal
You can hide any file or folder on your Mac using Terminal by following these steps:
- Open Terminal on your Mac by going to Applications > Utilities > Terminal or by using Spotlight Search.
- Type “chflags hidden ” (without the quotes) in Terminal and add a space after it.
- Drag and drop the file or folder that you want to hide into the Terminal window.
- Press Enter on your keyboard.
- The file or folder will now be hidden from view in Finder and other applications. Note that you can still access the hidden file or folder through the Terminal by using the “ls -a” command to show all files, including hidden ones. To unhide the file or folder, repeat the above steps but use “chflags nohidden” instead of “chflags hidden” in step 2.
Part 4: How to View Hidden Files on Mac Use Finder
To view hidden files on Mac using Finder, follow these steps:
- Open a new Finder window.
- Press the Command + Shift + Period (.) keys simultaneously. This will reveal all hidden files and folders in the Finder window.
- To hide the hidden files again, press the same key combination – Command + Shift + Period (.) – once more.
Part 5: How to View Your Mac’s ~/Library Folder
You can view your Mac’s ~/Library folder by following these steps:
- Open a new Finder window by clicking on the Finder icon in your Dock.
- Click on the “Go” menu in the top menu bar and select “Go to Folder…”
- Type in “~/Library” (without the quotes) in the text field and click “Go” or press Enter.
- The ~/Library folder should now appear in the Finder window.
- Note that the ~/Library folder is hidden by default in macOS, so you will need to follow these steps to access it. Be careful when working with hidden files and folders, as deleting or modifying them can cause issues with your Mac.

Part 6: How to View Hidden Files on Mac
Before you unhide files on Mac, keep in mind that they’re hidden for a reason. Accidentally deleting or modifying them could cause problems. Instead of manually deleting app support files, use a dedicated uninstaller like Mac Cleaner. This software is free to download and will help you remove all files associated with an app.
With Mac Cleaner, you can easily clear gigabytes of disk space by removing unnecessary files that are clogging up your hard drive. Mac Cleaner simplifies the task of deleting unwanted files, even those that are considered iTunes junk. Its straightforward design makes it an easy-to-use cleaning app. Check out this guide to see how it works:
Step #1: Open Mac Cleaner on Your Computer/Laptop
The initial step to start cleaning your Mac is to download and install Mac Cleaner on your computer/laptop. To do this, click on this link to access the Mac Cleaner download site and click on the Download Now button to download a DMG file. Once downloaded, open the file and follow the onscreen instructions to run the installer. The software will automatically launch once the installation process is complete.

Step #2: Select a Cleaner Module
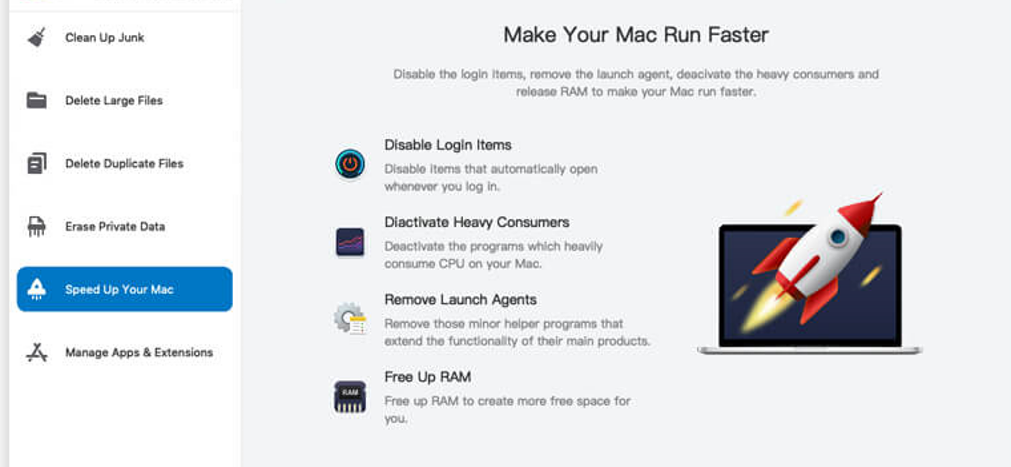
On the left sidebar of Mac Cleaner’s interface, you will see six different modules: (1) Clean Up Junk, (2) Delete Large Files, (3) Delete Duplicate Files, (4) Erase Private Data, (5) Speed Up Your Mac, and (6) Manage Apps & Extensions. For cleaning purposes, you will only need the first three modules. These are the modules that can perform cleanups on your computer. Each module has a specific function that can help you optimize your Mac’s performance:
- Clean Up Junk: This module allows you to scan and delete junk files, including system cache, app cache, Trash files, and disk images.
- Delete Large Files: This module finds files that are larger than 50MB.
- Delete Duplicate Files: This module scans a specified directory to locate files with extra copies elsewhere on your computer. It then allows you to remove those duplicates to save space on your storage drives.
To proceed, simply click on the module you want to use from the left sidebar of the interface.

Step #3: Scan Your Mac for Files
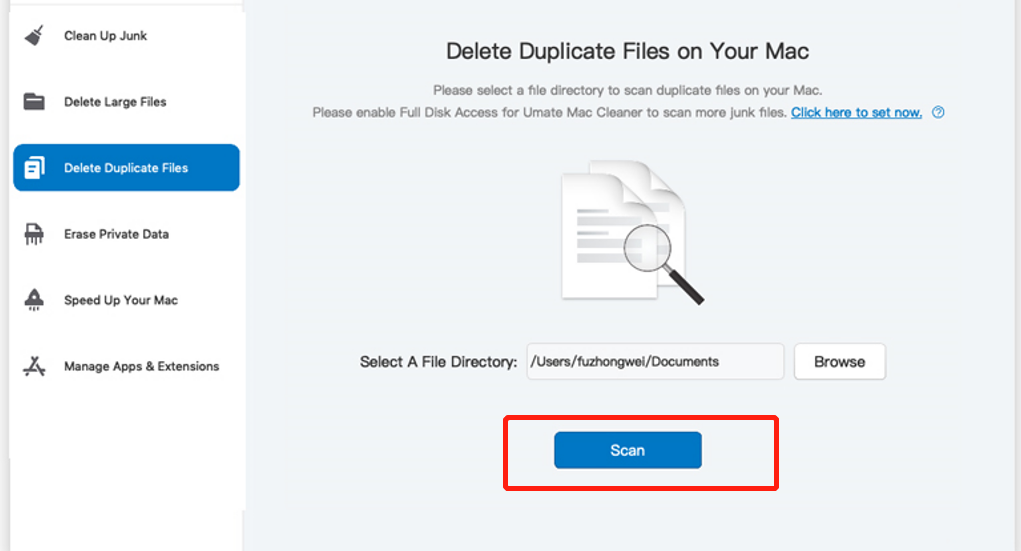
In this step, you will need to scan your Mac for the files that you want to delete, depending on the module you have selected. The scanning process will vary from module to module, and here’s what you need to do for each of the three cleaning modules:
- Clean Up Junk: The interface is divided into two sides – Quick Clean on the left and Deep Clean on the right. Quick Clean scans and deletes System Junk, App Junk, Trash Bin, and iTunes Junk. On the other hand, Deep Clean can scan and delete all those file categories as well as Downloads, iOS Junk, and Unused Disk Images. Simply select an option from these two and click the Scan button to start scanning.
- Delete Large Files: Click the Scan button to start scanning.
- Delete Duplicate Files: In the center of the interface, you’ll see the Select a File Directory field, and on its left, you’ll find a Browse button. Click the Browse button, and a popup window will appear, use it to select the folder you want to scan for duplicates. Once you have selected the folder, click the Scan button to start scanning.

Step #4: Select Files for Deletion
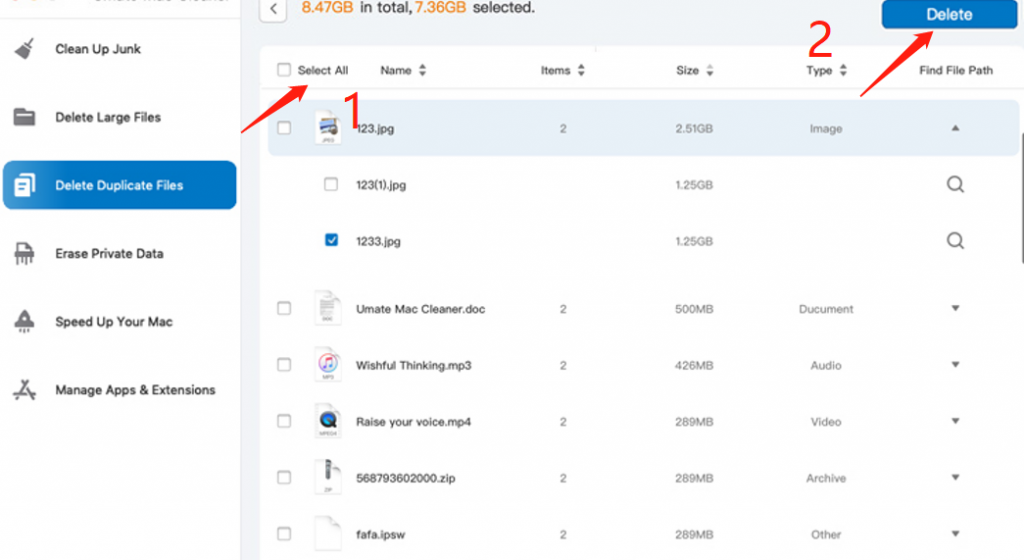
After the scan is complete, you will be directed to a page containing a list of files. To proceed with the next step, you need to choose which files you want to delete from the list. The method for doing this will vary depending on the module you selected. For the Delete Large Files and Delete Duplicate Files modules, simply click on the checkboxes corresponding to the files you want to select. You can also select all items in the list by clicking Select All.
For the Clean Up Junk module, start by selecting a file category from the list on the left-hand side of the interface. This will open up a new list of files on the right-hand side, from which you can select the files you wish to delete.

Step #5: Delete the File/s
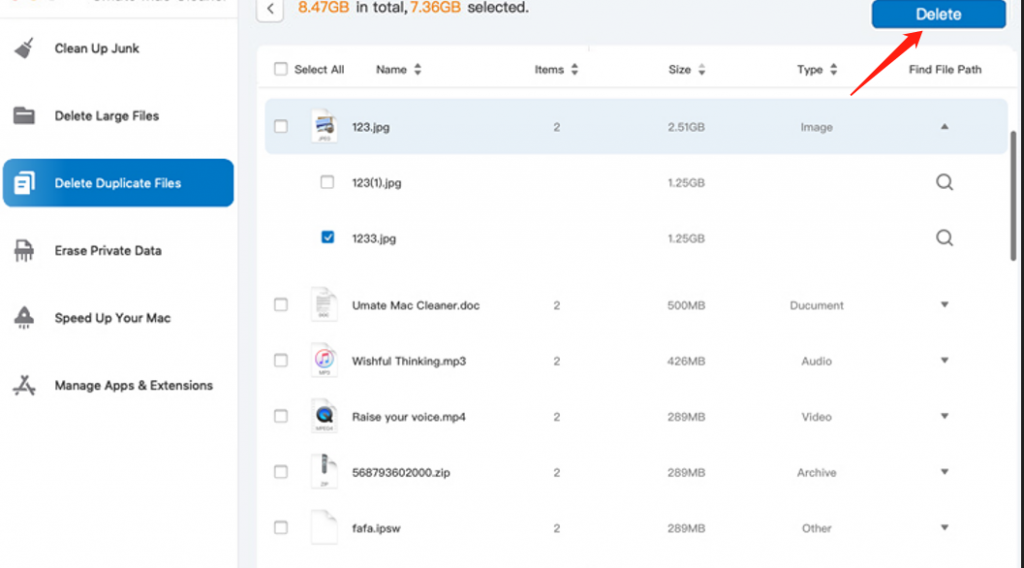
To finish the process, simply click on the blue button located in the top-right corner of the window. The button may either say Clean or Delete, but it will ultimately finalize the process. Note that it may take a few minutes for the software to remove the selected files. Because of its simple and intuitive design, Mac Cleaner is an ideal choice for beginners who are new to this type of software. Its straightforward interface makes it easy to use, and each button is clearly labeled so that you can understand its function.

Wrapping up
By following the steps mentioned above, you can easily view hidden files and folders on your Mac. However, it’s important to note that these files are hidden for a reason, and messing with them could cause problems. If you want to keep your Mac clean and organized without having to deal with hidden files, try using Mac Cleaner.
It can remove unnecessary files and add-ons, broken login items, and other clutter that could be slowing down your Mac. With Mac Cleaner, you won’t have to worry about searching for hidden files.
Latest Articles