

In the world of computing, screenshots have become an essential way to capture and share information. Whether you’re a content creator, a developer, a student, or just an everyday user, the ability to capture a snapshot of your screen can be incredibly useful. While Windows users are well-acquainted with the built-in Snipping Tool, Mac users often wonder about their options. In this blog post, we’ll explore the concept of a “Snipping Tool” for Mac and introduce you to some powerful alternatives.

Part 1: Is Snipping Tool Available on Mac?
No, the Snipping Tool is not available on Mac. The Snipping Tool is a screenshot utility developed by Microsoft for Windows operating systems. It allows users to capture screenshots of their screens, windows, or specific areas and provides basic annotation features. Mac users do not have direct access to the Snipping Tool.
Top Snipping Tool Alternatives for Mac:
Snagit: Snagit is a premium screen capture and image editing software for Mac. It goes beyond basic screenshot capabilities, offering features like capturing scrolling web pages, creating GIFs, adding annotations, and even recording videos. Its user-friendly interface makes it a popular choice for professionals and educators.
Skitch: Developed by Evernote, Skitch focuses on simplicity and ease of use. It allows you to capture screenshots, annotate them with arrows, shapes, and text, and then easily share them. Skitch is a great choice if you’re looking for quick and straightforward annotation features.
Lightshot: Lightshot is a lightweight and free screen capture tool available for both Mac and Windows. It lets you capture a specific area, a window, or the entire screen. After capturing, you can quickly annotate the image and share it. Lightshot is known for its speed and simplicity.

Monosnap: Monosnap offers a blend of screenshot capturing and basic editing tools. It allows you to capture screenshots, record screencasts, and then add annotations. Additionally, it provides cloud storage for your captures, making it easy to access them across devices.
CloudApp: CloudApp is a versatile tool that goes beyond simple screenshot capture. It allows you to capture images and videos, annotate them, and instantly share them through links. Its focus on collaboration makes it a great choice for teams and remote work environments.

Part 2: Built-in Mac Screenshot Tools:
While exploring third-party alternatives is great, it’s important not to overlook the built-in tools that macOS provides. The default screenshot shortcuts (Shift + Command + 3 for full screen, Shift + Command + 4 for selection) are handy and can cover many basic use cases. Additionally, with macOS Mojave and later versions, you can utilize the built-in screenshot markup tools that allow you to add annotations and basic edits to your screenshots.
Choosing the Right Tool:
When deciding on the perfect snipping tool alternative for your Mac, consider your specific needs. Are you looking for advanced annotation features, video recording, or just a simple tool for quick screenshots? Your workflow and preferences will determine which tool aligns best with your requirements.
In conclusion, while macOS offers its own powerful screenshot capabilities, third-party alternatives can provide additional features and flexibility for various use cases. Whether you’re a professional needing advanced editing or a casual user looking for simplicity, the Mac app ecosystem has a variety of snipping tool alternatives to suit your needs. Remember to explore your options and choose the tool that enhances your productivity and creativity.
The best snipping tool for you depends on your specific requirements and preferences. If you’re looking for a robust set of features and are willing to invest, Snagit might be your top choice. On the other hand, if you need a simple and quick tool for basic screenshot and annotation tasks, Skitch or Lightshot might be more suitable.
Part 3: How to Find Screenshots on Mac?
Finding screenshots on a Mac is quite straightforward, as macOS automatically saves screenshots to a specific location by default. Here’s how you can locate your screenshots:
- Using Finder:
Recent Screenshots: The most recent screenshots you’ve taken are usually displayed as thumbnails at the bottom-right corner of your screen. Click on the thumbnail to open it in the Preview app.
Screenshots Folder: All your screenshots are saved in the “Screenshots” folder within your “Pictures” directory. To access it: Open a new Finder window. Click on “Pictures” in the left sidebar. Look for the “Screenshots” folder. Your screenshots are stored here in chronological order.
- Using Terminal:
If you’re comfortable with the Terminal, you can use commands to navigate to your screenshots folder: Open Terminal (you can find it in the Utilities folder within Applications). Use the cd command to navigate to your Screenshots folder: cd ~/Pictures/Screenshots
Once you’re in the folder, you can list the contents with the ls command: ls
- Using Spotlight Search:
You can use the Spotlight Search feature to quickly locate your screenshots: Press Command + Space to open Spotlight Search. Type “Screenshots” or the name of a specific screenshot if you remember it. macOS will display relevant results, including the Screenshots folder.
Remember that the naming convention for screenshots is usually “Screen Shot [Date] at [Time].png.” If you’re having trouble finding a particular screenshot, you can also search for it using its name or date.
Keep in mind that the default save location might differ if you’ve changed your settings. To confirm or modify the default save location for screenshots, you can adjust the settings in the “Screenshots” section of the “Keyboard” preferences pane. Finding your screenshots on a Mac is usually hassle-free, thanks to macOS’s organized file management system.
Part 4: How to Locate Screenshots on Mac Using Mac Cleaner
When it comes to locating screenshots on your Mac through the assistance of the Mac Cleaner application, the process can vary depending on the specific tool you’ve chosen for the task. Each cleaner tool may have its own unique interface and set of features that contribute to the process. To shed light on this, let’s break down the steps involved in finding your screenshots using Mac Cleaner:
1. Opening the Mac Cleaner Application:
To embark on your screenshot-finding journey, start by launching the Mac cleaner application that you’ve previously installed on your system. Take note of whether the cleaner tool has been designed with features tailored for efficient file organization and management.
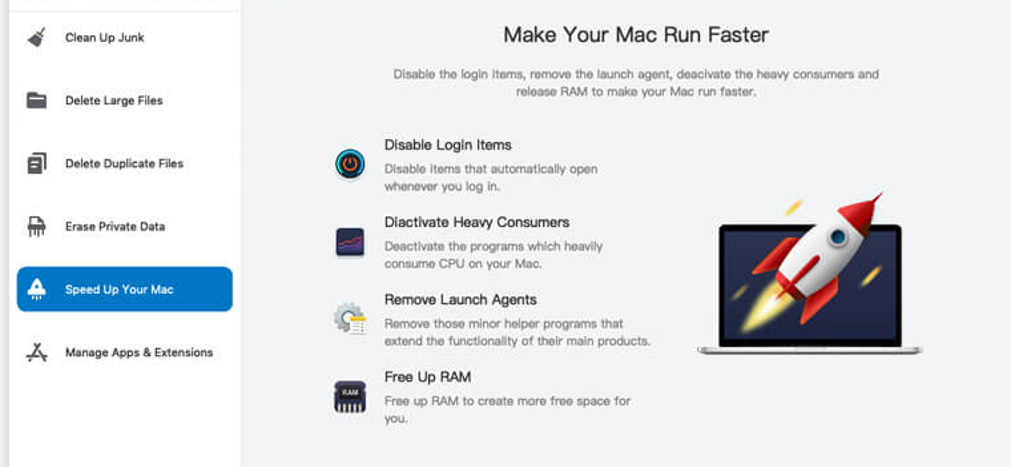
2. Navigating the Interface:
Once inside the application, make your way around the interface to locate the options that are associated with finding and managing screenshots. If the cleaner tool offers features that delve into file organization, pay particular attention to these sections.
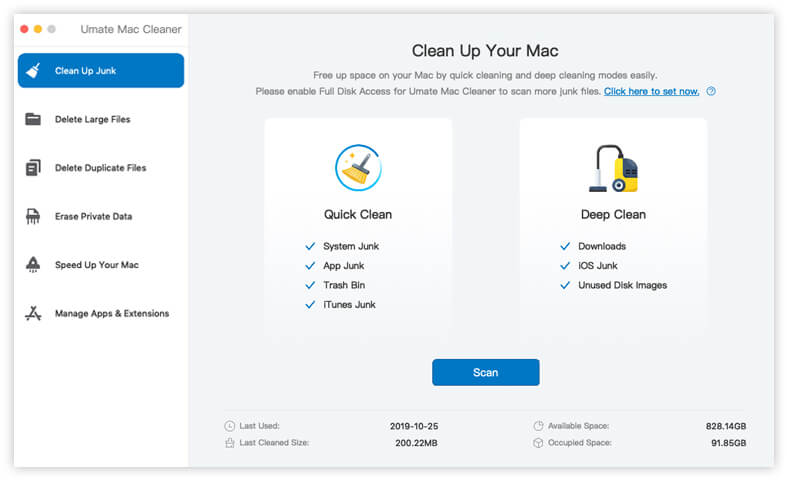
3. Scanning for Files:
A number of Mac cleaner applications are equipped with features that enable system-wide scans for a variety of file types, screenshots included. As you navigate the interface, be on the lookout for buttons labeled “Scan” or “Clean,” which are likely to initiate the search for your screenshots.
4. Selecting File Types:
Some cleaner tools grant you the ability to refine your scan by selecting the specific types of files you’re interested in. This is where your quest for screenshots comes into play. Look for options that mention media files, images, or even screenshots themselves, as this will help streamline your search.
5. Initiating the Scan Process:
With your preferences set, initiate the scan process. The cleaner tool will systematically sift through the directories of your Mac, employing criteria such as file types and other markers to identify the screenshots scattered across your system.
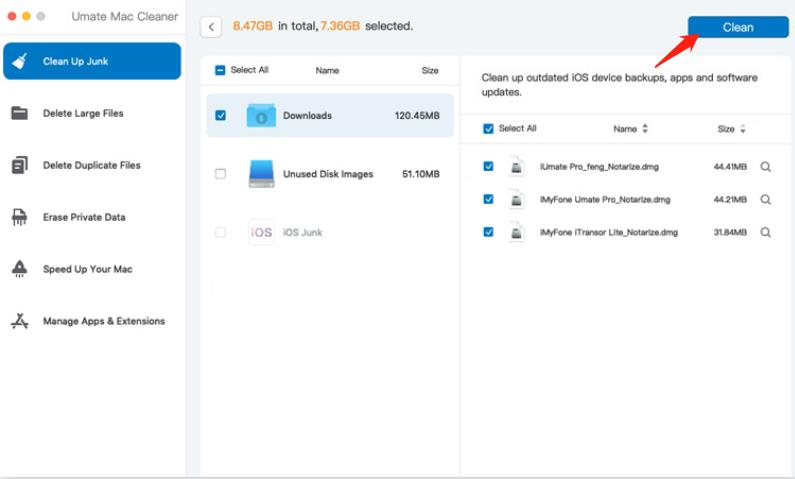
6. Reviewing the Scan Results:
Upon the completion of the scan, the cleaner tool will present you with a curated list of files that it has successfully identified as screenshots. This list is likely to furnish you with previews of the files, along with pertinent information such as file names and their respective locations.

7. Preview and Selection:
Before proceeding, it’s wise to meticulously review the scan results to ensure that the suggested files are indeed screenshots. Most cleaner applications extend the courtesy of allowing you to preview the files before executing any actions. With your validation, proceed to select the screenshots that you wish to manage or potentially delete.
8. Taking Relevant Actions:
The final step in this process involves acting upon your selections. Depending on the range of capabilities of the cleaner tool, you may have an array of options at your disposal. These could encompass discarding unnecessary screenshots, reorganizing them, or even relocating them to a different directory for improved accessibility.
The quest to find and manage screenshots on your Mac through the aid of a Mac Cleaner application is characterized by a series of deliberate steps. By navigating the application’s interface, employing scan features, refining your search parameters, and subsequently reviewing and selecting files, you can efficiently control and optimize your collection of screenshots.
Conclusion
In conclusion, while macOS offers its own powerful screenshot capabilities, third-party alternatives can provide additional features and flexibility for various use cases. Whether you’re a professional needing advanced editing or a casual user looking for simplicity, the Mac app ecosystem has a variety of snipping tool alternatives to suit your needs. Remember to explore your options and choose the tool that enhances your productivity and creativity.
Latest Articles