

iMovie is a built-in video editing tool for macOS computers. It’s automatically installed and you can uninstall it if you want, though not many people do so since it’s actually a rather useful app. However, while it may not be as comprehensive as Adobe After Effects, iMovie still has a tendency to slow down when you’re currently editing a project that’s already relatively long. There are other reasons why the app may slow down, but the point is, at some point, you’ll need to know how to speed up iMovie.
Thankfully, there are a couple of ways to do that, and every method works for different cases, so it would require you to know why it’s slowing down in the first place. With that in mind, here’s a look at the possible reasons why iMovie is slowing down.
Part 1: Why is iMovie So Slow?
iMovie is an inherently intensive app, but that doesn’t mean it’s supposed to be slow. It’s normally rather fast, even faster than Adobe After Effects, so it wouldn’t make sense for iMovie to be slow. With that said, here are the possible explanations:
- The battery is low: If you’re using a MacBook or any macOS device that requires charging, then you might need to check your battery. The way macOS devices work is that when it’s low on battery, it’ll reduce the power consumption as much as possible to prolong the battery life. That means the resources that were originally being used by iMovie will be lowered, hence resulting in much slower performance as it can now only use a limited amount of power.
- You have insufficient disk space: It’s a general rule of thumb to have at least 20GB to 30GB of disk space when using the iMovie app. That’s so it can have space to work with if it ever needs to generate its own files. If your remaining available disk space is lower than 20GB, there’s a good chance iMovie won’t be able to perform as well as it could.
- There are too many assets: Every project has its own folder in the iMovie directory. It’s where you’ll find all its assets, and more often than not, a project has assets worth 1GB. The collective size of these assets is normally high, but if it’s too large, it may cause problems for the iMovie app. The worst-case scenario is it’ll crash and you’ll lose progress.
- You’re using too many programs: A macOS computer has a limited amount of RAM, CPU, and GPU. It’s what determines whether the computer is fast or slow. You want the available RAM, CPU, and GPU to be as high as possible so iMovie can use more of the resources. That way, it’ll perform well, but that’s often difficult if you’re using too many programs. That’s because every program consumes RAM and CPU, so if there are too many programs open, chances are there will only be a small amount left over for the iMovie app to use, hence the slow performance.
The solution will depend on the reason, so it’s important to know the possible causes of the slow performance of iMovie. That being said, let’s take a look at the solution for when the cause of the issue is that your battery is low.

Part 2: Speed up iMovie by Charging
This is arguably the simplest solution to this problem. You simply charge the computer so it has more battery. That way, it doesn’t have to enter low power mode and make the computer perform slowly. But if you’re using a device that doesn’t require charging, this couldn’t possibly be the cause of iMovie slowing down, so you can proceed to the next solution.

Part 3: Speed up iMovie by Freeing up Space
If the cause of the issue is that your computer has a limited amount of disk space left (lower than 20GB), the best solution would be to free up space, and you can do that in many ways. Here’s a look at some examples of those methods:
- Empty the Trash
- Delete unnecessary files from Downloads
- Uninstall unused apps
- Remove browser extensions
- Clear your app and system cache
This method may take hours, so it’s best to use tools like Mac Cleaner. But if you have over 50GB remaining disk space, then there’s a good chance this isn’t the cause of iMovie slowing down. Perhaps it has to do with the currently open programs.

Part 4: Speed up iMovie by Closing Unnecessary Programs
Lastly, if you’re used to running several programs at once, we advise that you take it easy and close unnecessary programs since they might be hogging all the RAM and CPU that iMovie would have had access to. That should speed up iMovie considerably.
To do this, you simply need to click the close button on unnecessary apps.

BONUS: Speed up iMovie With Mac Cleaner [RECOMMENDED]
While you can use the aforementioned methods to speed up iMovie, the problem is that they’re too demanding. You must be diligent so as to use only a minimal number of apps. You must have free time to spend on getting rid of unnecessary elements on your computer. And you must know your way around the iMovie app so as to disable the features it doesn’t need. If that seems too much for your liking, you can instead use an easier and simpler method, and it involves Mac Cleaner.
Mac Cleaner is an app that specializes in deleting unnecessary files from your computer. But more importantly, it has an optimization module that you can use to disable unnecessary apps and reduce RAM and CPU usage with just a few clicks.
Below is a guide on how to speed up iMovie with Mac Cleaner:
Step #1: Set up Mac Cleaner on Your Computer/Laptop
The first thing you need to do is click this link. It should take you to the software’s download site, and there, you’ll find a Download Now button. Click that button to download a DMG file—the file extension for installers in macOS computers. Once the download is finished, open the DMG file to start the installation process. Follow the instructions on the installer from that point onward. Mac Cleaner will open automatically once the installation is complete.
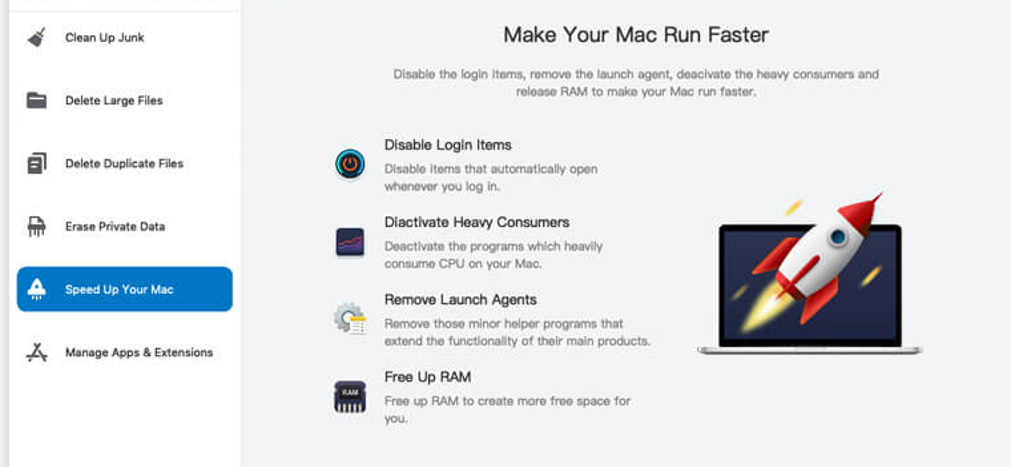
Step #2: Pick the Speed up Your Mac Module
There are currently six modules in Mac Cleaner, and these include (1) Clean Up Junk, (2) Delete Large Files, (3) Delete Duplicate Files, (4) Erase Private Data, (5) Speed Up Your Mac, and (6) Manage Apps & Extensions. Though each module has a useful functionality, for your purposes, you’ll only need to Speed Up Your Mac. It’s the module that allows you to temporarily disable apps and processes that are consuming too much RAM or CPU. In doing so, you’re making it so iMovie has more computing resources to use, which is a way to speed up iMovie. Select the module by clicking on it from the left sidebar.

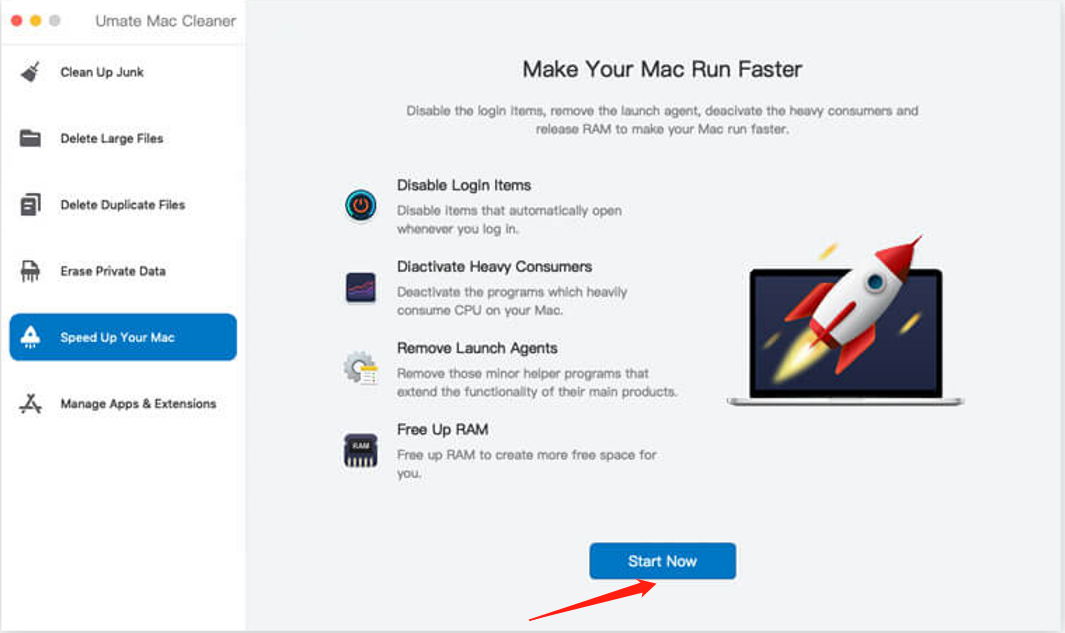
Step #3: Click the Start Now Button
Upon selecting a module, the software will display information about its features. You can read it if you want to learn more about the Speed Up Your Mac module. But to proceed to the next step, you must click the Start Now button.
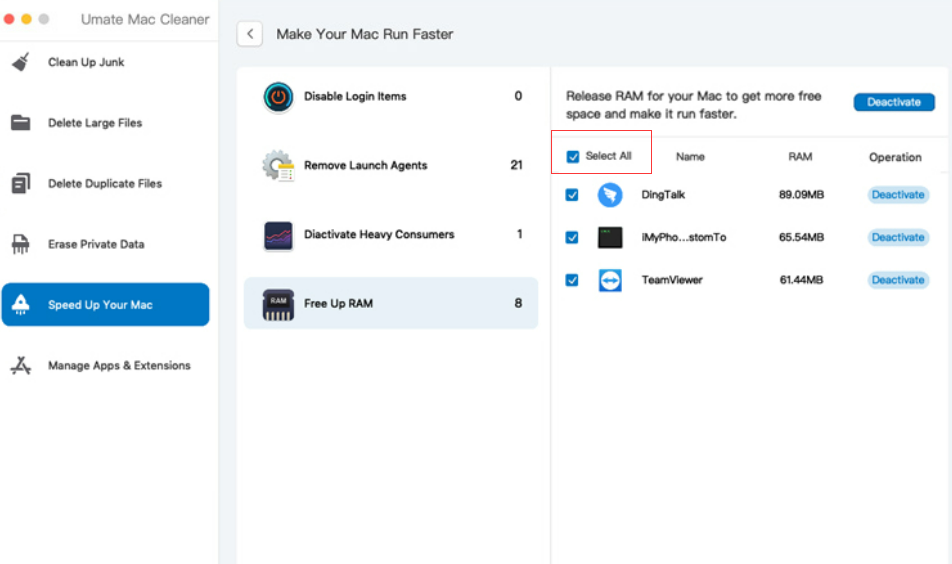
Step #4: Choose an Action
On the next screen, you’ll find a list on the left side of the interface with four different options. These are the actions you can take using the Speed Up Your Mac module, and they determine which apps you can deactivate. Here’s what each action means:
- Disable Login Items looks for apps and processes that open automatically when the computer boots up.
- Deactivate Heavy Consumers scans for programs that consume CPU and GPU excessively.
- Remove Launch Agents finds unnecessary apps and processes that open alongside other more useful programs.
- Free Up RAM locates currently open programs that consume too much RAM or memory.
Select an action from this list. Upon doing so, a new list will appear on the right side of the interface which consists of actual apps and processes. Select the ones you want to deactivate by clicking their checkboxes. Click Select All to include them all.
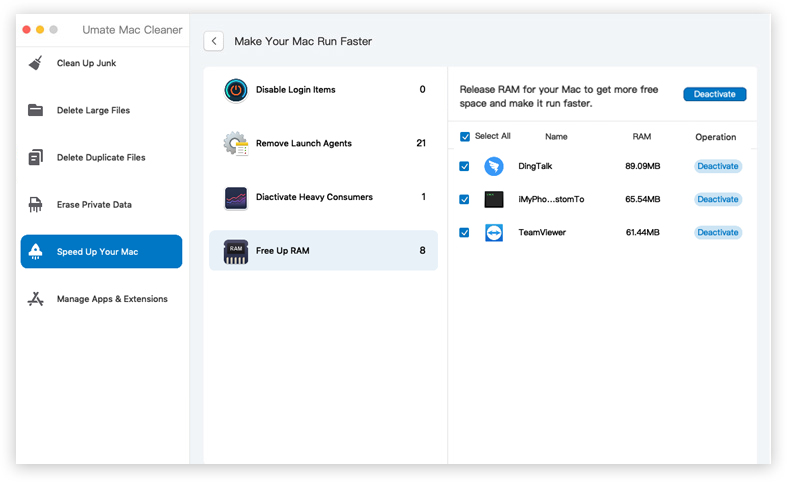
Step #5: Deactivate the App/Process
To finalize the process, you must click the blue button at the upper right corner of the window which should say Deactivate. As the name implies, it deactivates the apps and processes you selected in step 4, and all you have to do after that is wait.
Upon following these five steps, you may notice a significant change in the performance of iMovie. For example, it might no longer lag whenever you’re navigating the project slider. The upload speed may also get faster. If that’s the case, then we suggest using the app regularly to ensure iMovie stays in its best shape, and hopefully, your macOS computer will, too.
Conclusion
iMovie may not look like it, but it’s an inherently intensive software. Therefore, though it’s possible to speed it up if your computer cannot handle it, it’s best if you give up on your attempt. In that case, you’re better off looking for an alternative video editing tool, ideally one that’s more lightweight and has better performance. The good news is there are a ton of alternatives out there. But if you did manage to speed up iMovie, then the effects should be quite noticeable.
Latest Articles