Spotify is a music app that allows you to stream digital music, listen to podcasts, and download songs, among many things. It has several features, much more than your average audio player. It’s available on many devices and is often considered an upgrade of the default audio player of different operating systems, including macOS. Though Spotify is indeed superior in terms of utility, its bountiful features often result in a slower performance as the app requires more computing resources to operate. That’s why you’ll often notice that the app is often slower than the default audio player of the macOS computer.
However, while Spotify is not exactly the most lightweight music app you can find on the market, there are ways to optimize its performance. With that said, this guide will go over the reasons and solutions to the issue pertaining Spotify slow on Mac.
Why Is Spotify Slow on Mac: Possible Reasons
Spotify isn’t inherently slow, so you’ll know that there’s an issue with the app or the computer itself if it’s slowing down. Unfortunately, there are too many possible reasons, so we’ll only look at the most common reasons for Spotify slow on Mac:
- Spotify is not up-to-date: Every time a developer releases an update, it’s usually to fix a bug, solve an issue, or improve the app’s performance. The same applies to Spotify. That’s why if you have been holding off on the updates, it’s only natural that Spotify would be relatively slower than usual. Make sure you update the app regularly.
- Spotify cache is full: The cache refers to files that an app generates whenever it needs the files to perform an operation. Examples of operations that require Spotify to generate cache files include playing a song, creating a playlist, or making a song a favorite. When the operation is complete, the files are no longer needed, but the app cannot delete them automatically. Hence, it can pile up on the cache folder and when it’s full, the app slows down.
- Your internet connection is slow: Spotify requires internet to operate, so if your internet connection is slow, the app will also perform slower. The solution to this is to simply take steps to improve your internet connection.
- Your device is slow: Sometimes, it’s not a matter of Spotify being slow, but rather the device you’re using is slow, and oftentimes, the only solution would be to optimize your device, and there are several ways to do that.
The appropriate solutions would vary according to the reason for Spotify slow on Mac, so it’s important to know about the possible reasons. With that said, let’s take a look at the solution for the first issue, specifically, the one about Spotify updates.

Tips And Tricks #1: Update Spotify
If you think Spotify is currently not up-to-date, then that might be the reason why it’s slow. Here’s how to update Spotify:
- Open the Spotify app.
- Click Spotify from the top menu bar.
- Select About Spotify from the resulting dropdown menu.
- A popup window will appear. It can say one of two things: (1) there’s an update available or (2) Spotify is already up-to-date. If it’s the former, click the Click here to download button. Otherwise, proceed to the next solution.
- Once the download is complete, restart the app.

Tips And Tricks #2: Clear Spotify Cache
If the Spotify cache is full, then you should clear it using these steps:
- Open the Finder app on your computer.
- Click Go from the top menu bar.
- Select Go to Folder… from the dropdown menu.
- A popup window will appear. In the text bar, type in the following: ~/Library/Caches
- Finder will take you to the app cache folder. Find the folder of Spotify and open it.
- Look for the files you think you no longer need, then drag them over to the Trash bin.

Tips And Tricks #3: Restart Your Router
If the problem has to do with the internet connection, then the easiest solution would be to restart your router. It’ll only take a few minutes to do so, but it should go a long way in solving any connection issues if there are any.
Tips And Tricks #4: Restart or Reinstall Spotify
As for other reasons, the best solution would be to either restart or reinstall Spotify. Restart it first since it’s easier. If the app is still slow, you can reinstall it instead. That should solve other issues that might be plaguing the Spotify app on your Mac.
Tips And Tricks #5: Start Mac Cleaner
Most of the time, the reason behind Spotify slow on Mac has to do with the Spotify app itself. Therefore, to solve it, you usually have to go to the app and do some work, like changing some settings, clearing the cache, or resetting the app. But there are times when the problem has nothing to do with the Spotify app, but rather the entirety of your computer. It often happens when your CPU and RAM consumption is off the charts. Thankfully, you can solve it using the Mac Cleaner software.
Mac Cleaner is a cleaning app that can get rid of all sorts of files, from junk files to duplicates. Interestingly, the app also has optimization features that can help speed up certain applications. With that said, here’s how you can use the app:
Step #1: Launch Mac Cleaner on Your Computer
To start with, you need to get the software. To do so, you must click this link. That will take you to the Mac Cleaner download site where you should find a button that says Download Now. Click that button to start the download of a DMG file, which should correspond to the installer. Open the DMG file once it’s downloaded to start the installer, then follow the onscreen instructions from there. The software will open automatically once its installation is complete.
Step #2: Choose Speed up Your Mac
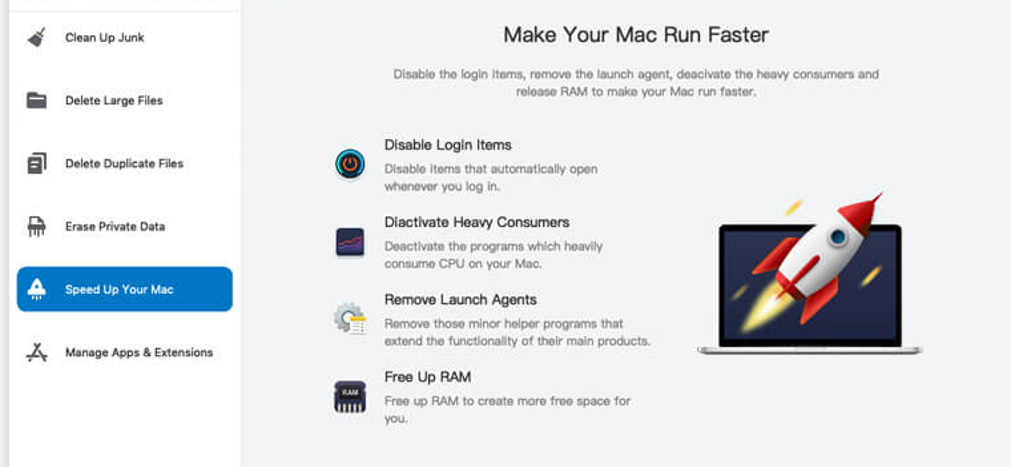
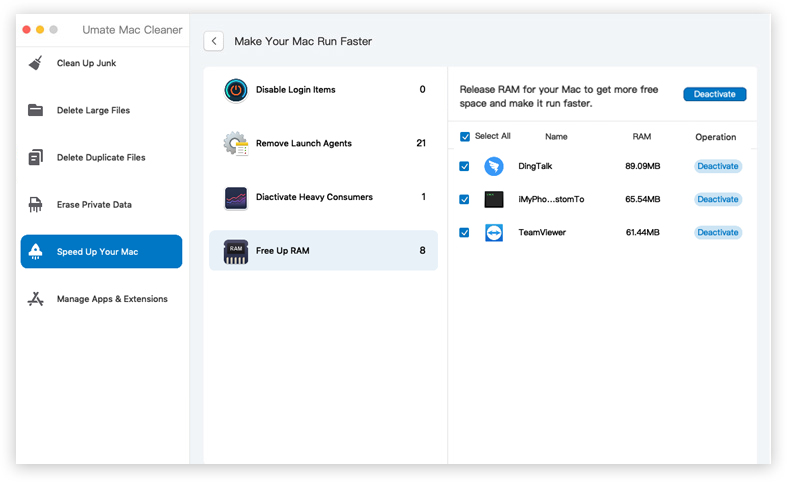
Mac Cleaner has a total of six different modules, namely (1) Clean Up Junk, (2) Delete Large Files, (3) Delete Duplicate Files, (4) Erase Private Data, (5) Speed Up Your Mac, and (6) Manage Apps & Extensions. Since your goal is to solve the issue pertaining to Spotify slow on Mac, you’ll need the Speed Up Your Mac module. The module allows you to perform various tasks, mostly deactivating certain apps, to reduce CPU and RAM usage. That should help plenty when optimizing Spotify as it makes it so the app has more CPU and RAM to work with. To select the module, click on it from the left side of the interface.
Step #3: Click Start Now
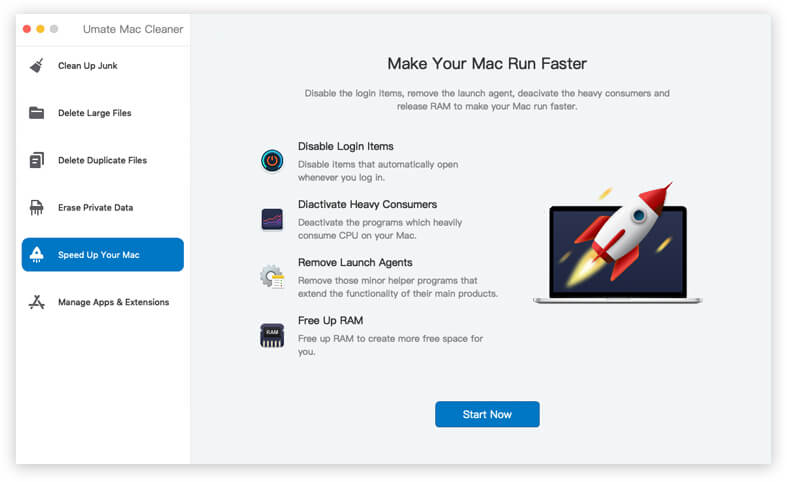
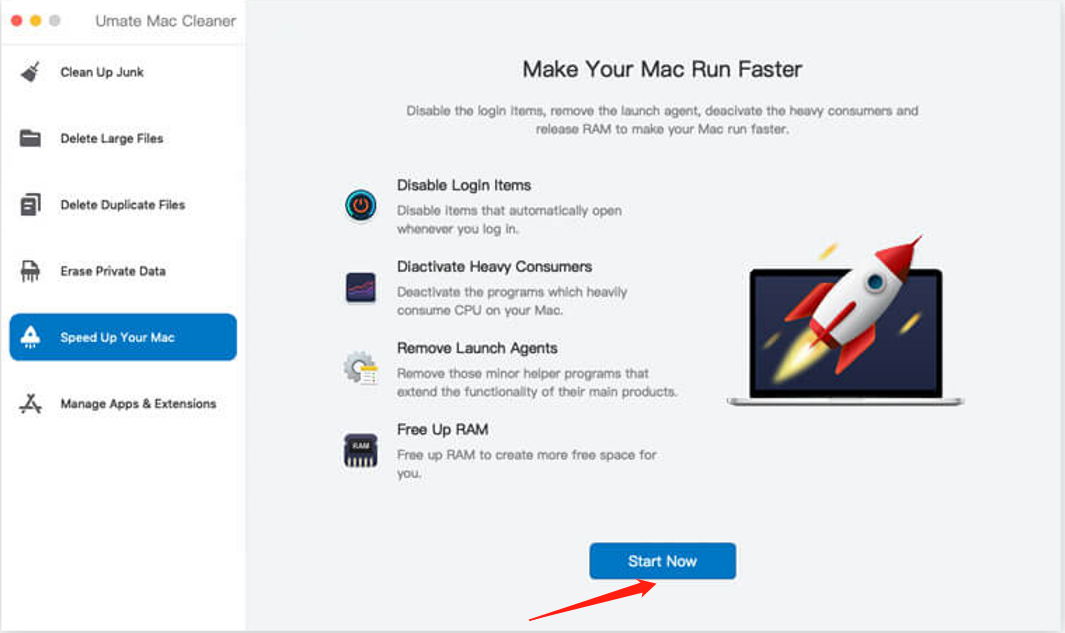
Upon selecting a module, the software will display the information pertaining to the module’s features. In the case of Speed Up Your Mac, it’ll explain how each of its features works. You can read it if you want, but to proceed, you must click Start Now.
Step #4: Select a Feature
The next step is to select the action you want to take using Speed Up Your Mac. As stated earlier, the module has four different features, and though all of them involve deactivating certain apps and processes, their criteria for determining which to deactivate varies. With that said, here’s a look at each of its features and how they can help with your objective:
- Disable Login Items temporarily closes the programs that automatically open upon the computer’s startup.
- Deactivate Heavy Consumers disables the apps and processes that consume too much CPU and GPU.
- Remove Launch Agents deactivates the programs that open alongside other apps and processes.
- Free Up RAM temporarily quits the apps and processes that consume too much RAM.
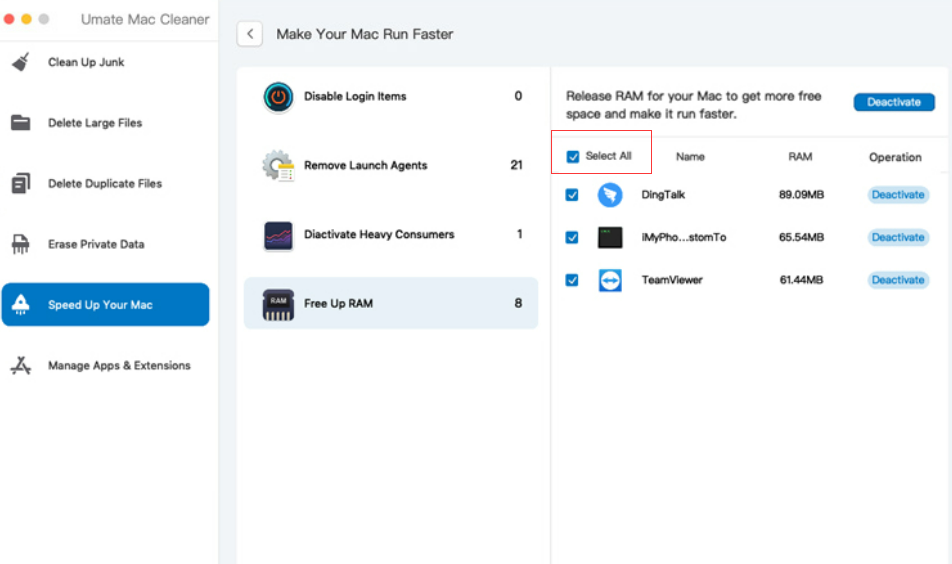
You’ll find these items in the list on the left side of the interface. Select a feature from this list. Upon doing so, a new list will appear on the right side of the interface, and it consists of apps and processes that you can deactivate. Select the ones you want to disable by clicking their corresponding checkboxes. Click the Select All checkbox if you want to deactivate all the apps.
Step #5: Deactivate the App/Process
Once you select all the apps you want to deactivate, click the blue button located at the top right corner of the window which should say Deactivate. That will finalize the process, though you may have to wait for a few minutes for it to do its job.
The thing about apps is that it requires RAM, CPU, and GPU. If your computer doesn’t have enough of these resources, naturally, your apps will slow down. That applies to all apps, including Spotify. For that reason, Spotify slow on Mac might be the cause of insufficient computing power, but with this software and this guide, you should be able to optimize CPU, GPU, and RAM usage.
Closing Thoughts
Spotify is an excellent app mainly because it has a huge collection of songs and podcasts. But another advantage to using the app is that it has many features, too many, in fact, that it’s not unusual to see Spotify slow on Mac. There’s a limit to how much your computer can handle, and apparently, Spotify seems to cause your computer to hit that limit quickly. The good news is you can optimize the CPU and RAM consumption of Spotify so it doesn’t have that large of an impact on your computer’s performance. Not to mention you now have a way to clean up the Spotify folder in case it becomes full of unnecessary files.
Latest Articles