

Every now and then, you may stumble upon folders or directories that you must remove no matter what. Perhaps that folder contains corrupted files, viruses, or malware. Maybe the directory consumes a ton of storage space from your Mac. Either way, your first line of thought is most likely to select the folder and press the Delete button. Unfortunately, though it’s quite rare, these folders or directories have the tendency to save themselves from deletion via conventional means. Hence, simply selecting the file and pressing the Delete button or dragging the directory into the Trash may not be effective.
If these are issues you’re encountering right now, your best bet would be to use the Terminal remove directory function, which is essentially a method of deleting a directory using the Terminal. Read on for more information about this topic.
Part 1: What Is Terminal?
Terminal is the Mac counterpart of Command Prompt from Windows PCs. It allows you to give commands to your computer by typing in lines of code. Though most of the commands you can give using Terminal are accessible in other ways, Terminal has the benefit of bypassing restrictions. For instance, when you cannot delete a directory due to folder restrictions, you can delete using Terminal. It might be a bit more complex than when you use conventional methods, but this benefit alone makes it worthwhile. However, it’s important to understand that the Terminal can’t do everything.
The Terminal may be powerful, but there are certain tasks it cannot do. Fortunately, removing a directory is not one of them, and you can easily delete a folder with the right code. But first, why should you bother yourself to use Terminal?

Part 2: Why Should You Delete Folders Using Terminal?
Considering it takes a little bit of know-how to efficiently use Terminal, you’d assume that it’s typically used as a last resort by users. However, you’ll find that many users actually use the Terminal remove directory option regularly, and here’s why:
- You may receive error messages when receiving certain files and folders. Unfortunately, you cannot disable these popup messages, which can get annoying if you’re deleting multiple of these directories. The Terminal allows you to delete a batch of folders without receiving these errors, effectively saving you a lot of time and sanity.
- Certain files are invisible in the Finder (the File Explorer or Mac). Therefore, you cannot delete those using conventional means. However, Terminal can detect these hidden files and delete them accordingly.
- You don’t want to bother deleting the directory again from the Trash once you delete it the first time. Terminal allows you to delete files permanently, meaning they won’t go to the Trash bin.
- There are times when you’ll lose access to Finder. The Terminal doesn’t necessarily require the Finder, meaning you can still delete a directory with this issue at hand.
Though the third reason is a bit risky, since you might permanently delete an important file, it’s still a worthwhile benefit since it saves you time. But now that you want to use the Terminal remove directory option, how do you use the feature?
Part 3: How to Delete A Directory Using Terminal
As complex as Terminal can be, the process of deleting a directory is actually rather simple. Plus, it should be completely doable if you’re using a guide such as this. Without further ado, here’s how you can delete a directory using Terminal:
- Open Finder on your Mac via the Dock.
- Select Applications from the sidebar.
- Open the Utilities folder.
- The Utilities folder will contain various utility apps. Simply find and double-click the Terminal from this folder.
- Note: If you don’t have access to Finder, simply press Command + Space Bar to open the Run window. Then, type in the name of the app you want to run, which should be “Terminal.”
- Now go back to Finder and navigate to the directory you wish to delete or remove.
- Once you’re in the directory, check its name and commit it to memory.
- Now on your Terminal, type in “rm –r” followed by a space and the directory’s name. Again, remove the quotes.
- Press Return and wait for the deletion process to finish.
Alternatively, if you only want to delete a certain file, you can type “cd ~/” followed by the folder path of the directory that contains the file. This will take you and the Terminal to that directory. Once you’re there, type in “rm” followed by a space and the file’s name. With this, you can delete the file that contains that name in that specific folder. Again, it bypasses any file restrictions, meaning you can avoid any annoying error messages and it won’t go to the Trash folder.

Part 4: Remove Files Safely Without Terminal Using Mac Cleaner
As useful as Terminal remove directory feature is, you’re actually risking your files when you use this feature. After all, you can’t see the files you’re deleting when you’re typing in the command on Terminal as you can only see the code.
Moreover, when you delete via this method unless you modify the command, any file you delete will be permanently gone. You can’t find it in the Trash, nor can you retrieve it in other ways. Before you use the feature, we suggest you use Mac Cleaner first. Mac Cleaner essentially does the same as Terminal in that it can delete files while bypassing file restrictions, though Terminal is still more powerful. However, the software only deletes unnecessary data, unlike the Terminal app. In other words, Mac Cleaner is safer to use than Terminal. Here’s how you can use the software.
Step #1: Download, Install, and Start Mac Cleaner
On your Mac, open any browser and navigate to the Mac Cleaner website. There, click Download Now to download the installer. You must then use the downloaded file to install. After installation, open the Mac Cleaner software.
Step #2: Select a Module
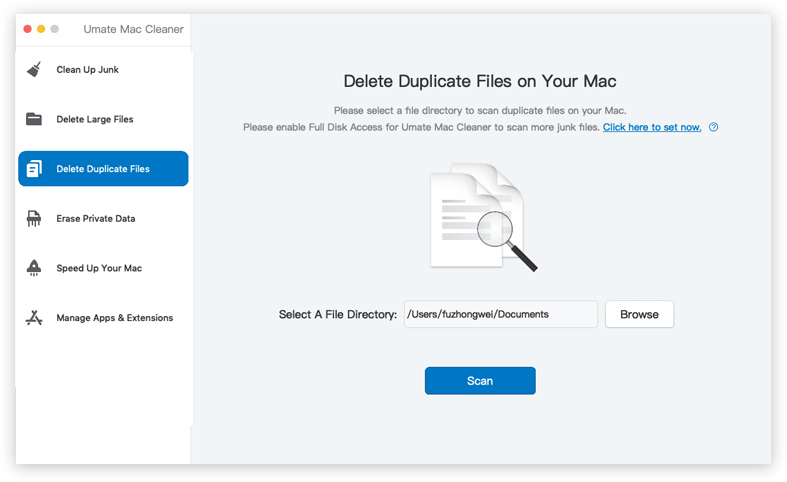
When you look at the left side of the software, you’ll find several options, six, to be exact. These are the modules that make up Mac Cleaner. Each of these six modules has different functionalities, though only four of them can actually help remove files safely without the Terminal app. Here’s a look at these four modules and what they can do:
- Clean Up Junk can find junk files on your computer, which are essentially unnecessary files. It can be System Junk, App Junk, Trash Bin Junk, iOS Junk, Downloads, or iTunes Junk. Its main goal is to free up space on Mac.
- Delete Large Files can detect files larger than 50MB. It can be of any file type, be it video, audio, photo, or document. The module only detects unnecessary files. Similar to Clean Up Junk, it aims to free up disk space.
- Delete Duplicate Files scans your computer for any file that has more than one copy in the same device, regardless of its file type. It also doesn’t matter if the file is necessary or not. Again, its purpose is to free up space on Mac.
- Erase Private Data aims to erase files that may compromise your privacy, such as chat data, mail attachments, browser history, or cache. Unlike the first three modules, the aim of this module is to prevent cyberattacks.
For this step, you simply have to choose between these four modules. Don’t worry since you can always use other modules once you’re done with your first choice. To select a module, simply click on the option from the left sidebar.
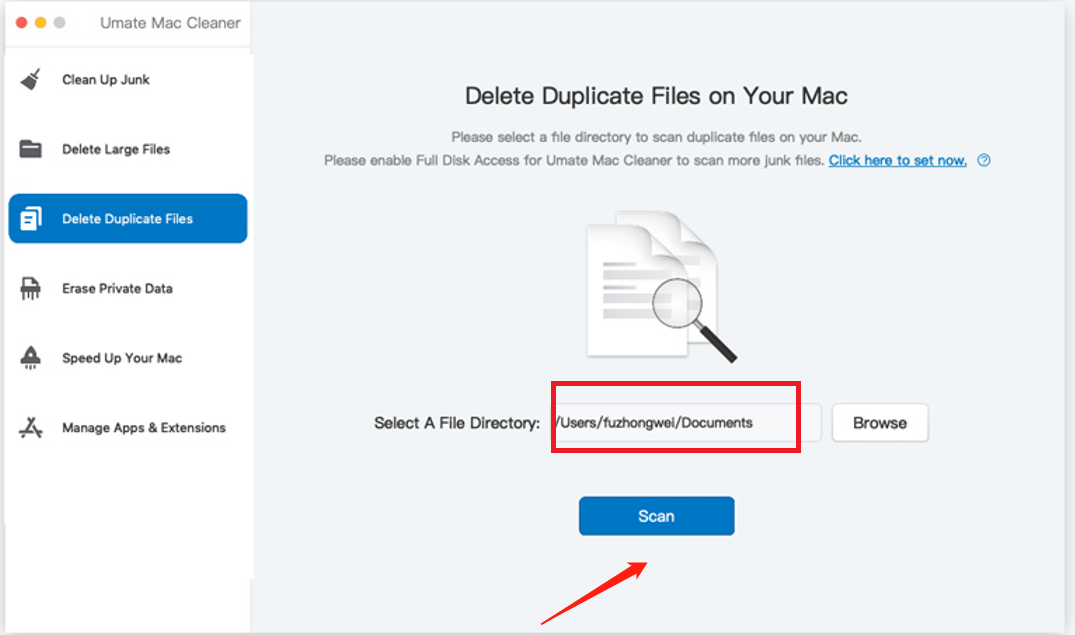
Step #3: Scan Computer for Files
Upon selecting an option, the interface will display information about that particular module. You can learn about the module you chose through the interface. But after that, you must click the Scan button at the bottom of the interface.
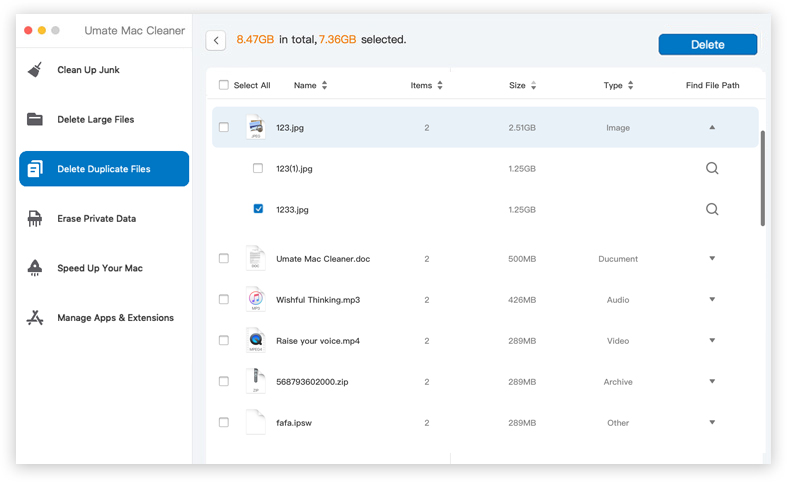
Step #4: Select a File/s
The software will then initiate a scan. Once the scan is complete, the interface will display a list of items. These are the items that fit the criteria set by the software. They’re also mostly unnecessary files. Simply select the ones you wish to delete by clicking on their corresponding checkboxes. You can also choose to click the Select All checkbox to include all items.
Step #5: Delete/Erase/Clean the File/s
Once you’ve selected all the files you wish to remove, click the button at the top-right corner of the window. The caption will vary depending on the module, though it should one of the following: (1) Clean, (2) Delete, and (3) Erase.
Using Mac Cleaner, you can delete files on your Mac computer that you normally can’t remove as the software bypasses file restrictions. Moreover, you can safely delete the files since the software mainly detects unnecessary files.
Takeaways
The Terminal remove directory is a Mac feature that allows you to delete files easily that you’d otherwise remove. Though it’s useful functionality, you must only ever use it if the situation calls for it. After all, it may permanently delete files that you actually need. Moreover, it requires the use of Terminal on Mac, which not many people know how to use. If you wish to delete files, then it’s best if you use software like Mac Cleaner. Not only are these programs easy to use, but they’re also programmed to avoid deleting potentially useful data. In short, it’s a much better alternative to Terminal remove directory.
Latest Articles