Disk space cleanups have always been an essential part of computer maintenance. It brings numerous benefits to the computer, including better performance and more space for files. However, one must keep in mind that the disk space isn’t the only part of a computer that needs cleaning. In fact, you may notice that your computer is still slowing down despite your massive disk space. This is because you must also clean up the system itself, particularly, its registry.
Unfortunately, there’s only a handful of software that performs well when it comes to system cleaning. CCleaner is one such software. What is CCleaner?If you wish to learn more about CCleaner, read on as we discuss everything you need to know about the program.
Part 1:A Brief Overview of CCleaner
What is CCleaner?CCleaner is a utility tool from Piriform that specializes in eliminating unwanted files from a computer. It’s best known for being freeware, short for free software. Because of this, it has a rather large user base. It’s fairly easy to get yourself a copy of the software. You simply have to go to the developer’s (Piriform) website and download it from there. However, you may notice that there are actually two versions of the software, the Basic and the Premium. As you may have already guessed, the Basic is the freeware, while the Premium is a paid version of the Basic CCleaner. There’s not much difference aside from that.
In fact, the only benefit you can get by paying for the Premium version is customer support, which is rarely useful since CCleaner itself isn’t prone to issues. However, it’s a way to support the developers and the development of the product.

Part 2:How to Get CCleaner for Your Computer
If you wish to install CCleaner on your computer, you will have to followthese steps carefully:
- On your computer, open a browser.
- Navigate to the developer’s website.
- Click Download Free Version.
- The browser will automatically scroll down. Simply select Free Download under the CCleaner Free Plan.
- Upon download completion, open the file to install the software.
- Select Run.
- Click OK > Next > I Agree > Install > Finish.
At this point, you’d have successfully installed CCleaner on your computer.

Part 3:An In-Depth Guide on CCleaner
Upon opening the CCleaner software, you may get overwhelmed with the rather unfamiliar interface. Unlike modern software, it’s not interactive and the design is rather old-fashioned. However, its functionality is much simpler than you may think. Let’s start by looking at its three main modules: (1) the Cleaner, (2) the Registry, and (3) the Tools.
- Cleaner: In the Cleaner section, you’ll find a list of applications currently on your computer. It allows you to specify which applications you wish to include for your next scan. You can include/exclude an item by checking/unchecking its corresponding checkboxes. You can then start the cleanup process by clicking Run Cleaner. The Analyze button is for checking the size of each item in the list and the number of files they contain.
- Registry: The Registry is where you can scan your Windows Registry for issues. It also gives you the option to solve the issues if you so desire. Keep in mind, however, that this only applies to Windows and not Mac.
- Tools: The Tools module consists of four different functions, (1) Uninstall, (2) Startup, (3) System Restore, and (4) Drive Wiper.
- Uninstall allows you to uninstall programs from your computer.
- Startup allows you to disable the background process that starts during the startup process of your computer, hence the name.
- System Restore restores your computer to a specified restore point. This only works on Windows PCs.
- Drive Wiper gives CCleaner the permission to reformat your hard drives.
Yes, it has a rather versatile toolkit. That’s exactly why many people refer to CCleaner as an all-in-one cleaner.

Part 4:FAQs on CCleaner
Does it update automatically?
Unfortunately, CCleaner doesn’t offer an automatic update feature. You must update the software manually yourself by uninstalling your current CCleaner, downloading the newer version, and installing it on your computer. On the bright side, you’ll receive an email whenever an update is released, though this only applies if you provided them with your email address.
Is CCleaner a virus?
Many people think of that CCleaner virus, but that’s not true. To be precise, there was a virus that was named CCleaner, but it was simply a scheme. Since CCleaner is a trusted software, hackers believed it was wise to use the name to trick users into disclosing their email addresses and bank details through the app. CCleaner itself is not a virus.
Does CCleaner work on Mac?
As great as CCleaner is, it was primarily designed for Windows users. Though there is a beta version for Mac users, it’s still in development, so chances are it’s not as intuitive as its original version or its competitors.
Part 5:CCleaner Alternative: Mac Cleaner
Every program and application has a specialty. Storage cleaners, for example, specialize in cleaning the storage of various devices. However, every so often, you’ll find specific software that has a rather niche or specific specialty.
CCleaner is one such software, as it specializes in cleaning storage, specifically, in clearing files from the system storage, like the registry and cache. Since that’s the case, it’s not as effective when it comes to other cleaning operations. That’s why it’s best if you use CCleaner in combination with another cleaner storage. That way, you can clean the system storage as well as the rest of the storage of your Mac. If you intend to do just that, we recommend using Mac Cleaner.
Mac Cleaner is a cleaner tool that specializes in Mac storage systems. It’s capable of clearing unnecessary files outside of the system storage. Below is a guide on how to use Mac Cleaner to keep your computer to its peak potential:
Step #1: Start Mac Cleaner on the Computer
Open a browser on your computer, then head towards the Mac Cleaner through this link. On the site, click the Download Now button. This should download the installer. Simply run the downloaded file to install the software on your computer. Finally, open the newly-installed Mac Cleaner.
Step #2: Pick from Six (6) Different Modules
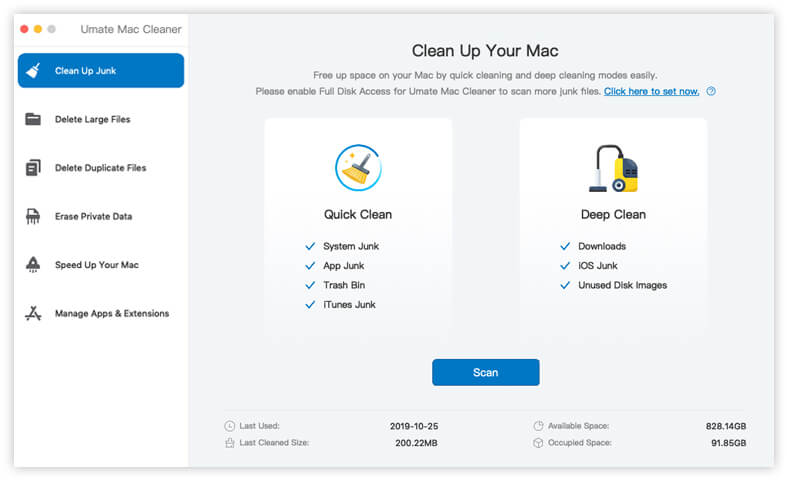
Right away, you’ll be greeted with an interface consisting of all kinds of information. Look at the left side and you’ll find six different options. These are the modules that would allow you to perform different kinds of cleanups.
Below is a list of these modules and what each of them does:
- Clean Up Junk searches for junk files on your Mac storage and gives you the option to delete them. Examples of junk files it can find include iTunes Junk, System Junk, App Junk, Trash Bin Junk, and many more.
- Delete Large Files looks for files that are “large,” and by large, we mean 50MB large. Just like the previous module, it also gives you the option to delete these files. Keep in mind that it only displays unnecessary and large files.
- Delete Duplicate Files, as the name suggests, scans for files that have an extra copy within the same computer. It detects all files, regardless of their importance. Therefore, you must be cautious when using this module since you might accidentally delete a copy of the file that you intentionally created.
- Erase Private Data searches for files that can be characterized as private data. These include chat data, emails, online traces, and the likes. Its main purpose is to reduce the likelihood of cyber security attacks.
- Speed Up Your Mac performs various actions that can boost the computer’s performance.
- Manage Apps & Extensions allows you to remove extensions or uninstall applications.
For the purpose of this guide, we’ll only look at how you can use the first four modules since the other two types don’t have much to do with storage cleaning. In that regard, simply select a module by clicking it from the sidebar.

Step #3: Click Scan
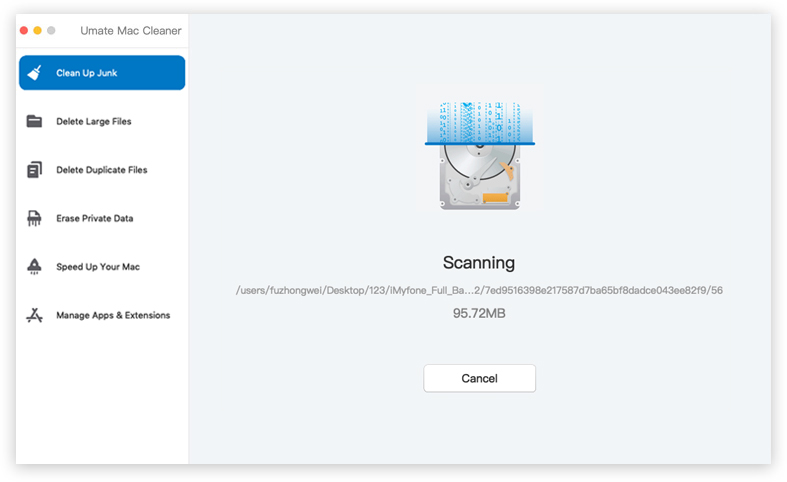
Upon selecting a module, the interface will show information about that module’s functions. You can read them if you want to learn more about each module. But once you’re done, click the Scan button at the center of the interface.

Step #4: Select a File/s
Once the scan is complete, the interface will display a list of items on the left side of the software. These are the files that fit the criterion set by the selected module. Simply select the files you wish to delete from your Mac storage.

Step #5: Delete the Selected Files
After selecting all the files you want to delete, click the blue, rectangular button at the top-right corner of the interface. It should say Clean, Erase, or Delete, depending on the module you chose in step #2. This should finalize the cleanup process.
With this, you’ve successfully performed a cleanup on your Mac computer. The best part about this is that, unlike CCleaner, Mac Cleaner can target specific files, such as private data and large files. This is what makes the software unique.

Final Words
Though there are several reasons why a computer may encounter issues, the lack of storage space is one of the most common culprits. Unfortunately, not many people understand this and often ignore their full storage disks. However, you’re not one of these individuals. You know the importance of cleaning the storage, and that’s most likely why you’re looking for information on CCleaner. With this guide, you should now know what is CCleaner, how it works, and how best to use it.
Latest Articles