

An iCloud backup is essentially a copy of certain files and information from your iPod, iPad, iPhone, and other mobile Apple devices. The backup allows you to set up a new device or switch to a different device without having to copy and paste all the files yourself. You can create an iCloud backup by turning the automatic backup feature on or manually creating one. Apple users can store these backups on either a phone or a macOS computer. It depends on where you want to store the backup.
Since these backups are the key to recovering your data if your device ever happens to suffer from data loss, it’s a good idea to always know if you have a recent backup. Otherwise, you might end up with a single backup from one or two years ago.
This is a common problem with iCloud. Unless the automatic backup feature is on, you won’t always have a backup that contains all your recent files. But you also don’t want to keep the feature on since every backup consumes an enormous amount of disk space. Hence, you’re left with no option but to simply monitor your backups and check on them every now and then to ensure you have a recent backup. But that requires you to know where they are. So, where are iCloud backups stored?

Part 1: Where are iCloud Backups Stored?
When asked, “Where are iCloud backups stored?”, the answer can be one of three things. They will depend on what device you’re dealing with, whether it’s a macOS computer, Windows PC, or iOS smartphone. Let’s start with the macOS computer.
- macOS computers: There will be a folder located in this exact file path: ~/Library/Application Support/MobileSync/Backup/. That’s where the iCloud backups are located, though that’s only the default location. If you changed it, for some reason, unintentionally or intentionally, you’ll have to find it in another way.
- Windows PCs: There’s also a folder on your computer with the file path: C:\Users\Your username\AppData\Roaming\Apple Computer\MobileSync\Backup\. Keep in mind that this will only be on your PC if you have either the iCloud or the iTunes desktop app. Otherwise, you won’t find this folder anywhere on your PC.
- iOS smartphones: Unlike computers, in an iOS smartphone, you cannot find the folder that contains the backup. That’s because the backups are typically not actually in your phone. But you can find it by going to Settings > Apple ID > iCloud > iCloud Backup. There, you’ll find the backups in iCloud, and you can do what you want with them.
Yes, for every device, there’s usually only one answer to the question, “Where are iCloud backups stored?” However, that doesn’t mean going to those folders or places is the only way to access the iCloud backups. There are also other methods.
Part 2: How Can I Access iCloud Backups on My Device?
Again, the ideal method will depend on your device, but here’s a look at your available options:
Method #1: Use Spotlight/File Explorer
Spotlight is the search feature of a macOS computer. It allows you to go to a folder as long as you give it the file path. File Explorer, on the other hand, is the file management program for Windows PCs. It’s not a search feature like Spotlight, but to access the search bar of Windows PCs, you need to use File Explorer. To access the iCloud backups on your macOS computer, simply click the Spotlight search bar which is on the home page of your device. There, type in the following text: ~/Library/Application Support/MobileSync/Backup/. That will take you to the iCloud backup directory of the macOS.
If you’re using a Windows PC, open a session of File Explorer. You’ll find a search bar in the upper right corner of the window. On that search bar, type in C:\Users\Your username\AppData\Roaming\Apple Computer\MobileSync\Backup\.
Make sure you replace the “Your username” part with your actual username and not the words “Your username.”

Method #2: Utilize the Go to Folder Feature
If for some reason, Spotlight cannot detect the folder and therefore doesn’t show it in its search results, you can use yet another feature of macOS computers called Go to Folder. As the name implies, it allows you to go to a specific folder.
Here’s how you can use that feature:
- Open Finder on your macOS computer.
- Click Go from the top menu bar.
- Select Go to Folder… from the resulting dropdown menu.
- When a popup window appears, type in the following: ~/Library/Application Support/MobileSync/Backup/
- You’ll be taken to a folder. That’s where you’ll find the iCloud backups
Keep in mind that this feature is only available to macOS computers, so you won’t be able to use this on your Windows PC.

Method #3: Go to System Preferences
Though it’s not necessarily a feature in macOS computers, the System Preferences is where you’ll find and access different parts of a Mac. These may include your storage, Photos, Movies, iTunes, and most importantly, iCloud. Once you gain access to the iCloud settings, finding and accessing your iCloud backups is only a matter of time. Here’s what you need to do to pull this off:
- Click the Apple logo at the top-left corner of your screen.
- Select System Preferences from the dropdown menu.
- Click on your name or Apple ID.
- Find and click iCloud from the left sidebar.
- Click the Manage… button located at the bottom-right corner of the window.
- Select Backups.
You can now see all the backups you have on your macOS computer. If there isn’t anything in the list, that means there are currently no iCloud backups on your computer.

Method #4: Open the iCloud for Windows App
If you’re using the iCloud for Windows app on your Windows PC to manually or automatically create the iCloud backups, then you’ll have to use the app itself to access the backups. The process here is fairly simple. Below are the steps you must follow:
- Open the iCloud for Windows app.
- Click Storage from the bottom right side of the window.
- In the next window, select Backup.
You’ll find a list of your iCloud backups. Again, you may not find anything in the list if there isn’t any iCloud backup on your PC.

Method #5: Navigate to Your Phone’s iCloud Settings
If you’re using a smartphone or mobile device, the steps to access the iCloud backups are pretty much already mentioned in the previous section. Simply go to Settings > Your Name > iCloud > Manage Storage > Backups. Navigate to these places in succession and you’ll end up finding a list of backups on your device. You can do what you want with them through this settings page as well. In addition, you can change certain settings and disable features like iCloud Drive, Mail, and automatic backup.

Part 3: BONUS: Delete iCloud Backups with Mac Cleaner
You now know where are iCloud backups stored, what now? Though your main goal is to monitor them, you may notice that some of these backups are completely useless, especially if they were from when you first bought the phone. That means you’re not really going to recover any useful data using the backup. Therefore, it’d be for the best if you were to delete them instead since they consume a lot of disk space. However, one thing to keep in mind is that iCloud backups often have other files associated with them outside of the default directory. To delete those files, you need tools like Mac Cleaner.
Mac Cleaner is a cleaning app designed to get rid of unnecessary files from your computer. It’s the perfect app for your objective since it also detects backups, though you would be proficient with the software. That said, here’s how to use the app:
Step #1: Launch Mac Cleaner on Your Computer/Laptop
Before anything else, you need to install the software on your computer. For that to happen, you must go to this link. It should take you to the Mac Cleaner download site, where find a button that says Download Now. Click that button to download a DMG file, which is the file extension for installers in macOS computers. Once the download is complete, open it and the installation will start. Follow the onscreen instructions onward. The software will open automatically once it’s installed.
Step #2: Choose Clean up Junk
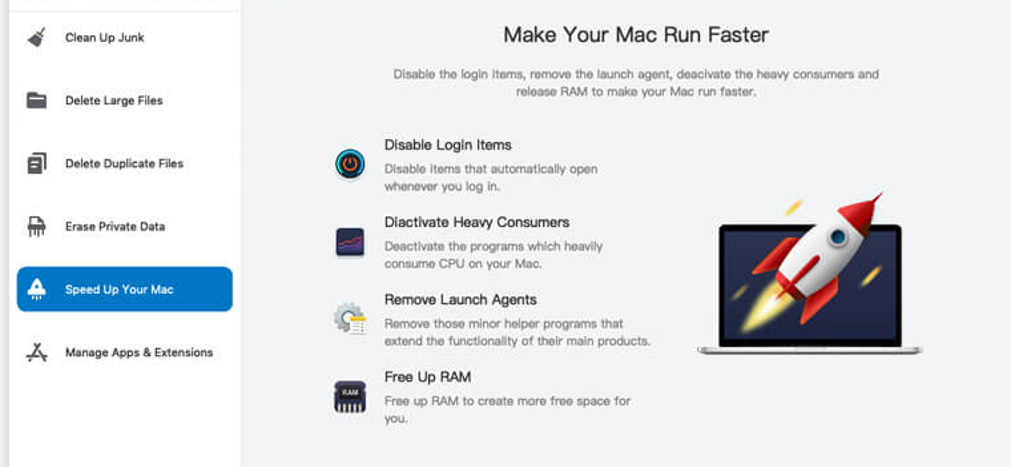
Mac Cleaner has six different modules, namely (1) Clean Up Junk, (2) Delete Large Files, (3) Delete Duplicate Files, (4) Erase Private Data, (5) Speed Up Your Mac, and (6) Manage Apps & Extensions. You can find them on the left side of the interface, where there are six options. For your objective, you need the Clean Up Junk module. It allows you to delete junk files, including System Junk, App Junk, Trash Bin, iOS Junk, iTunes Junk, Unused Disk Images, and Downloads.
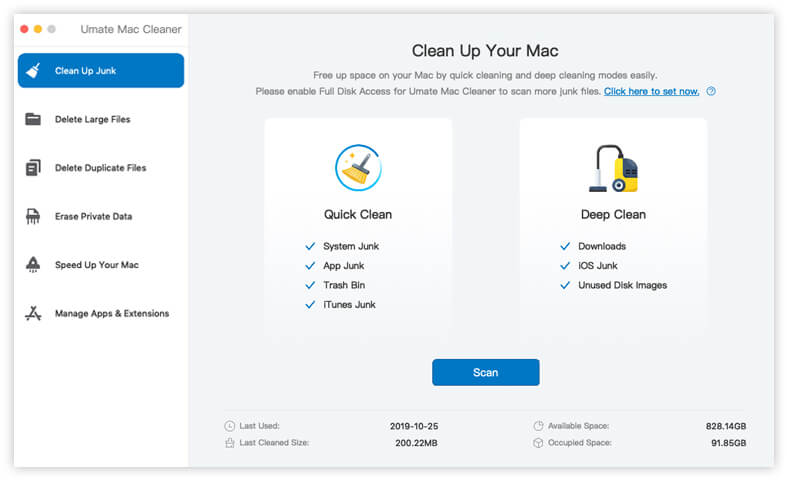
Step #3: Click the Scan Button
There are two scanning options in the software, Quick Clean and Deep Clean. We suggest choosing Deep Clean since there’s really no reason not to. It’s more accurate, and it scans for more files. Once you select Deep Clean, click the Scan button.
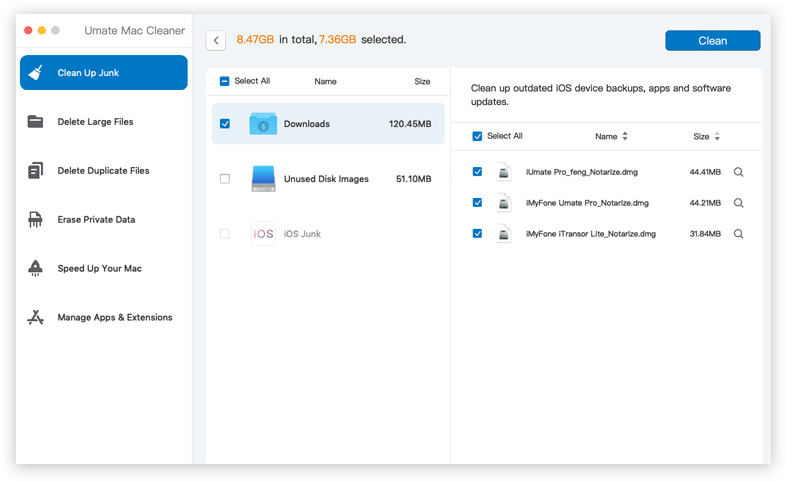
Step #4: Select a File Category and File/s
Once the scan is complete, you’ll find a list of items on the left side of the interface. The list consists of file categories like System Junk, Downloads, Trash Bin, iOS Junk, and more. Select iOS Junk since it like has iCloud backups. Upon selecting a category, a new list will appear on the right side consisting of files belonging to the selected list. Find and select the backups from this list. You can select files by clicking their checkbox. You can also click Select All to select all the items in the list.

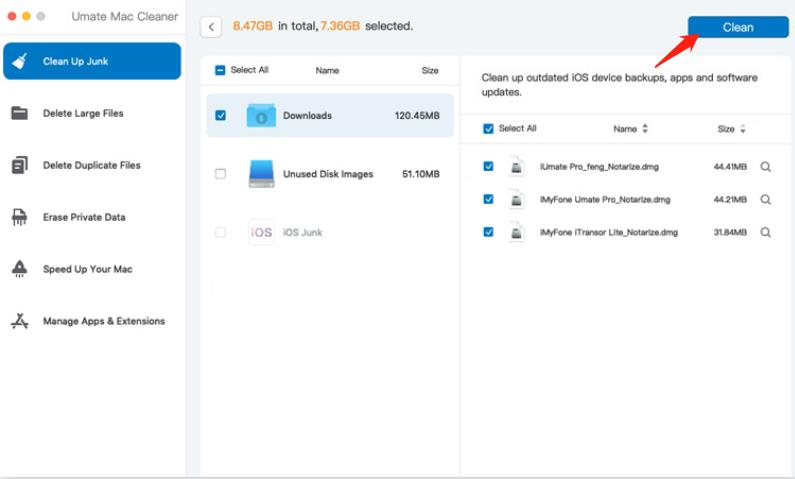
Step #5: Click the Clean Button
To finalize the process, click the Clean button at the top-right corner of the window.
Conclusion
With your question answered, not only can you now monitor your backups and ensure you have a backup that contains your important data, but you can also free up space since you know to delete backups that are unnecessary. Keep in mind, though, that there are rare instances where the aforementioned methods won’t work. In those cases, you must find the directory manually, which may take a lot of work. Nevertheless, it should be worth your trouble.
Latest Articles