

As a Mac user, you may be wondering where photos are stored on Mac. Whether you’re looking to back up your photos or just want to access them, it’s important to know where photos are stored on Mac.
Part 1: How Do Photos Work on Mac?
By default, photos on Mac are stored in the Photos app, which can be found in your Applications folder. The Photos app is a powerful tool that allows you to organize, edit, and share your photos with ease. Photos is a built-in app on Mac that allows users to store, organize, and edit their photos and videos. It was introduced as a replacement for iPhoto and Aperture in 2015 and has since become the go-to app for Mac users to manage their photo libraries.
When you open the Photos app on your Mac, you will see your entire photo library organized by date and time. You can view your photos in different ways, such as by year, month, or day, and you can also create your own albums to organize your photos in a way that makes sense to you.
Photos use facial recognition technology to identify people in your photos, which makes it easy to search for photos of specific people. The app also has a powerful search function that allows you to search for photos based on keywords, locations, and dates.
In addition to organizing your photos, Photos also has a number of editing tools that allow you to enhance your photos. These tools include basic adjustments such as cropping, straightening, and rotating, as well as advanced tools such as color adjustment, exposure control, and noise reduction.

One of the best features of Photos is its integration with iCloud. When you turn on iCloud Photo Library, your photos, and videos are automatically uploaded to the cloud, which allows you to access your entire photo library from any device with iCloud Photo Library enabled. This means that you can take a photo on your iPhone and it will automatically be available on your Mac.
Photos also have a number of sharing options, which makes it easy to share your photos with friends and family. You can share photos directly from the Photos app, or you can create a shared album and invite others to view and add their own photos.
Photos on Mac is a powerful and user-friendly app that allows users to store, organize, and edit their photos and videos. With its facial recognition technology, powerful search function, and integration with iCloud, Photos makes it easy to manage your entire photo library from one place.
Part 2: Where Are the Photos Stored on Mac OS?
Photos on Mac OS stores your photos and videos in a designated library file that is saved on your computer’s hard drive. By default, this library file is located in the Pictures folder on your Mac. To locate your Photos library file on your Mac, follow these steps:

- Open a Finder window.
- Click on the Pictures folder in the left-hand sidebar.
- Look for the file called “Photos Library.photoslibrary.”
- If you have more than one Photos Library file, you’ll see a number next to the file name indicating which library it is (e.g., “Photos Library 2.photoslibrary”).
When you open the Photos app on your Mac, it automatically opens the library file saved in the Pictures folder. However, you can also create additional Photos libraries or move your existing library to a different location if you prefer. To create a new Photos library file, follow these steps:
- Hold down the Option key on your keyboard while opening the Photos app.
- Select “Create New” when prompted.
- Name your new library file and choose where you want it to be saved.
To move your existing Photos library file to a different location, follow these steps:
- Close the Photos app.
- Open the Pictures folder in Finder.
- Click and drag the Photos Library file to the new location where you want to save it.
- Hold down the Option key on your keyboard and open the Photos app.
- When prompted, select “Other Library” and navigate to the location where you moved your Photos Library file.
Your Photos library file is stored in the Pictures folder on your Mac by default, but you can create additional libraries or move your existing library to a different location if needed. Knowing where your Photos library file is stored is important for backing up your photos and managing your photo library.
Part 3: How to Use the Photos App
The Photos app on Mac is a powerful tool for organizing and editing your photos and videos. Here’s a guide on how to use the Photos app:
Import your photos and videos: To start using the Photos app, you need to import your photos and videos into the app. You can do this by connecting your camera or phone to your Mac, or by importing photos from a folder on your computer.
Organize your photos: Once you’ve imported your photos, you can organize them in the Photos app. You can view your photos by date, location, or album. You can also create your own albums and add photos to them. The Photos app also uses facial recognition to automatically identify people in your photos and group them together.
Edit your photos: The Photos app has a range of editing tools that allow you to enhance your photos. You can adjust the brightness, contrast, and color of your photos, as well as crop and straighten them. You can also apply filters to your photos to give them a different look.
Share your photos: Once you’ve organized and edited your photos, you can share them with others. You can share your photos directly from the Photos app by email or by posting them to social media. You can also create a shared album and invite others to view and add their own photos.
Back up your photos: It’s important to back up your photos to prevent the loss of important memories. The Photos app can automatically back up your photos to iCloud, which allows you to access them from any device with iCloud Photo Library enabled. You can also back up your photos to an external hard drive or to another cloud storage service.
The Photos app on Mac is a powerful tool for organizing and editing your photos and videos. By following these steps, you can get the most out of the Photos app and preserve your precious memories for years to come.
Part 4: Utilize Mac Cleaner
Mac Cleaner is a versatile software designed to clean up files and optimize your Mac’s performance. In addition to its file-cleaning modules, it also includes a performance-boosting module. If you’re interested in using this software, follow these steps:
Mac Cleaner is a utility software designed to clean up junk files and optimize your Mac’s performance. While it does not have a specific feature to help you locate the Pictures folder on your Mac, you can use its File Manager feature to search for the folder. Here’s how you can use Mac Cleaner to find the Pictures folder on your Mac:
Step #1: Launch Mac Cleaner on Your Mac
To begin, open a web browser on your Mac and navigate to the Mac Cleaner download page. Click the “Download Now” button to download the DMG file. After the download completes, open the file to run the installer. Once the installation is complete, the software should launch automatically.

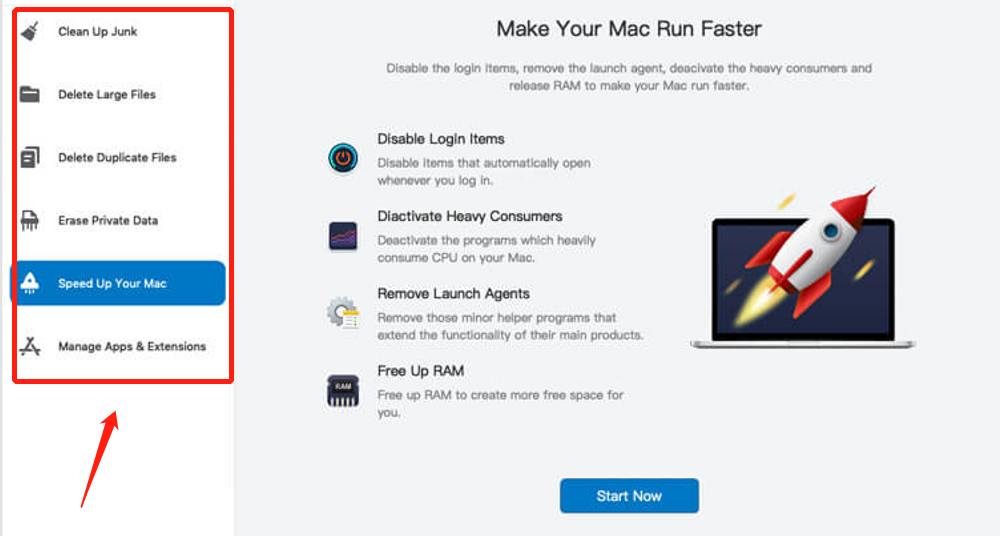
Step #2: Select the Clean Up Junk Module
On the left-hand side of the interface, you’ll see six different modules that Mac Cleaner offers: (1) Clean Up Junk, (2) Delete Large Files, (3) Delete Duplicate Files, (4) Erase Private Data, (5) Speed Up Your Mac, and (6) Manage Apps & Extensions. To remove language files, you’ll need the Clean Up Junk module, which targets System Junk, App Junk, Trash Bin, iOS Junk, iTunes Junk, and Downloads.
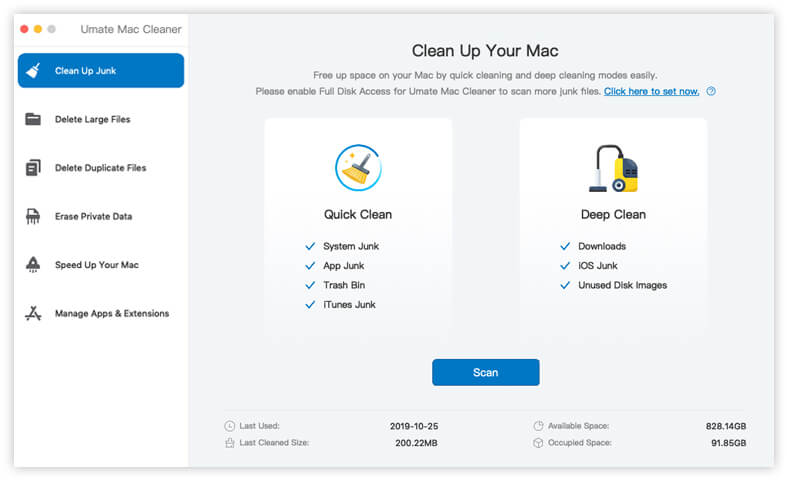
Step #3: Initiate the Scan
After selecting the Clean Up Junk module, the software will split into two sections: Quick Clean and Deep Clean. Quick Clean will detect and eliminate System Junk, App Junk, Trash Bin, and iTunes Junk, whereas Deep Clean goes a step further by also detecting Downloads, iOS Junk, and Unused Disk Images. You can select either option, but we recommend using Deep Clean to ensure a thorough cleanup. Once you’ve chosen your preferred option, click on the Scan button located below the choices.
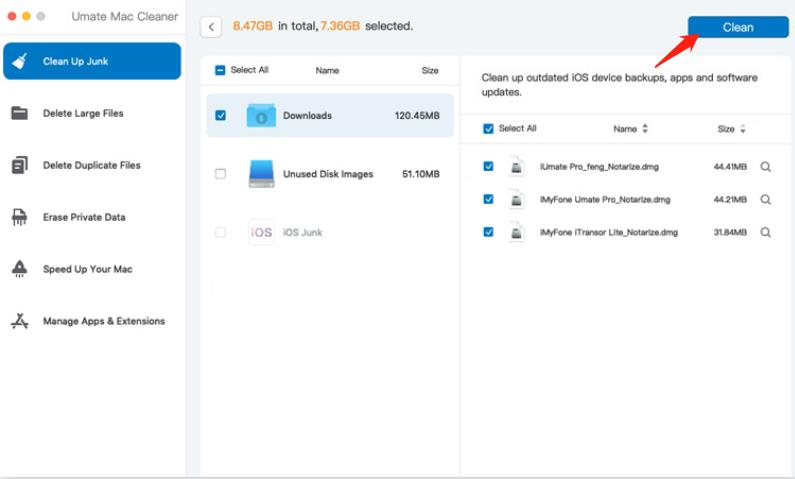
Step #4: Choose a File Category and Select Files
On the following page, you’ll see a list of file categories on the left side of the interface, such as System Junk, Downloads, Trash Bin, and Unused Disk Images. To remove language files, select the System Junk category. This will display a list of files on the right side of the window that belong to that category. Locate the language files in the list and mark their corresponding checkboxes. If you’re unsure which files to select, you can click the “Select All” option.

Step #5: Initiate the Deletion Process
To complete the process, click the blue “Clean” button located at the upper right corner of the window. The software will begin the deletion process, and you simply need to wait for it to finish.
Closing Thoughts
Your photos on a Mac are primarily stored in the Photos app and the iCloud Photo Library. However, they may also be stored in other applications or folders on your computer. Knowing where your photos are stored is important for organizing, accessing, and backing up your cherished memories.
Latest Articles