

If you’re wondering where is usr folder mac, it’s worth noting that Macs have an excellent filing system that makes use of the Linux file structure. However, some folders may be difficult to find, making it hard to free up purgeable space by cleaning unnecessary files. One such folder that’s tricky to locate is the usr folder. While it’s not advisable to dig deep into your Mac to find it, it’s still worth knowing where it is.
By learning how to access the usr folder on your Mac, you’ll gain a better understanding of how the file structure works. Keep reading this article to learn how to locate and find the hidden usr folder on your Mac. Additionally, it’s recommended that you read until the end of the article to discover a program that can clean your usr folder and help your Mac run smoothly. Unlock the secrets of your Mac’s file structure! Discover where is usr folder Mac and optimize your storage with ease.
Part 1: Where is Usr Folder Mac
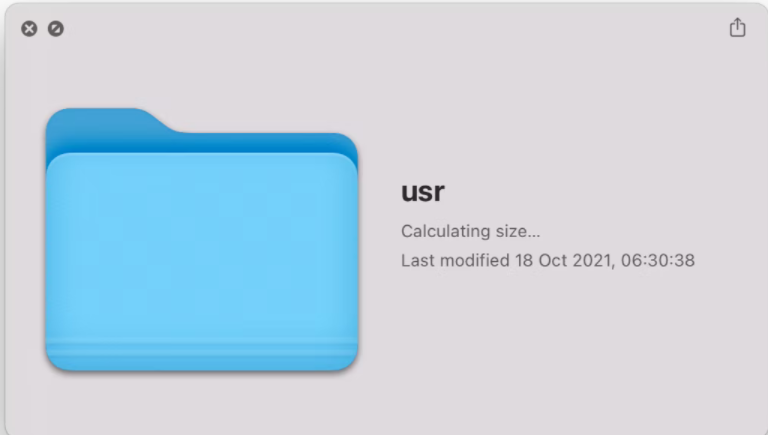
The usr folder (short for “Unix System Resources“) is a standard directory in Unix and Unix-like operating systems, such as Linux. It contains files and directories that are used by the system and its applications, such as executable programs, libraries, documentation, and configuration files.
The usr directory is typically located at the root level of the file system, alongside other system directories such as bin, etc, home, lib, and var. The structure of the usr directory is organized into subdirectories, such as bin, lib, share, and local, each of which has a specific purpose:
- bin contains executable programs that are commonly used by system users.
- lib: contains libraries that are required by programs in the bin directory, as well as system-wide libraries used by various applications.
- Share: contains data files and documentation that are used by various applications, such as icons, images, and help files.
- local: contains programs, libraries, and data files that are installed locally by system administrators or users, rather than being provided by the system itself.
In summary, the usr folder is a crucial part of the file system in Unix and Unix-like operating systems, containing essential resources that are required for the system and its applications to function properly.
Part 2: Make Your Mac Runs Better using Mac Cleaner
If you’re wondering where is the usr folder on Mac, you can find it by navigating to the root level of your file system. To ensure that your Mac is running smoothly, you can also download a Mac performance improvement app like Mac Cleaner, which can help you identify files and directories that are taking up too much space on your hard drive.
Mac Cleaner can quickly analyze your files, including those hidden from view, and recommend items for deletion so you can regain the space you need for optimal performance.
Step #1: Download, Install, and Launch Mac Cleaner
If you’re running out of space on your Mac, Mac Cleaner can help. This handy software allows you to quickly and easily delete unnecessary files, freeing up valuable storage space. Here’s a step-by-step guide on how to use Mac Cleaner to optimize your Mac’s performance.

Step #2: Select a Module
You can choose a module that suits your needs by selecting from the six options listed on the left sidebar of the Mac Cleaner interface. For freeing up space on your storage drives, the first three modules – Clean Up Junk, Delete Large Files, and Delete Duplicate Files – are recommended. Simply click on the module you want to use to get started.
Step #3: Scan for Files
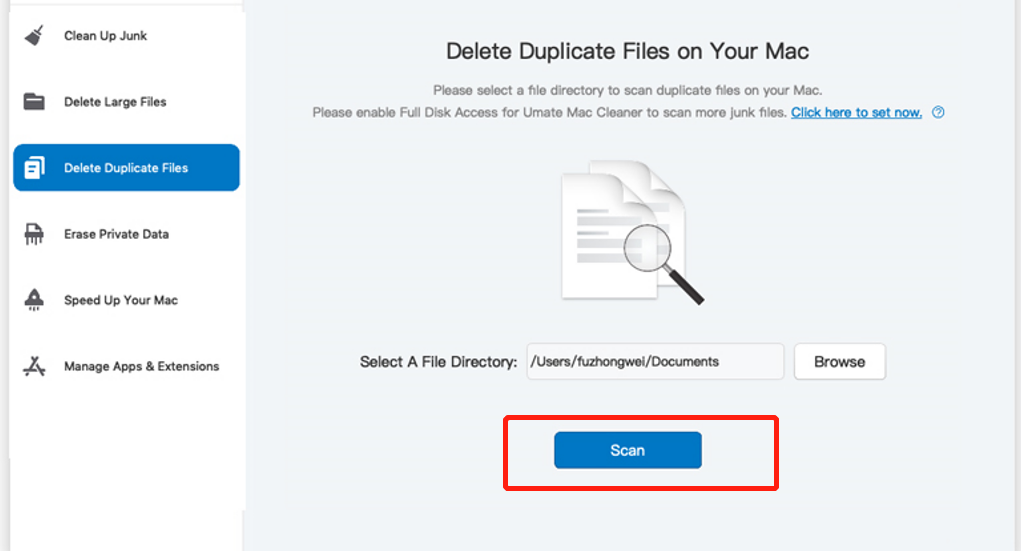
To get started with Mac Cleaner, after selecting a module, the next step is to scan for files. Depending on the module you choose, there are different scanning options. For Clean Up Junk, choose between Quick Clean and Deep Clean and click Scan. For Delete Large Files, simply click Scan. For Delete Duplicate Files, select a directory by clicking Browse and navigating to the desired folder, then click Scan. With Mac Cleaner, freeing up space on your storage drives has never been easier.
Step #4: Choose/Select/Pick an Item/File
- Clean Up Junk: To delete unnecessary files, select a file category (e.g., System Junk, Downloads, Trash Bin, Unused Disk Images, etc.) from the list on the left sidebar. Then, select the files you want to delete from the items listed on the right. Click “Select All” to choose all items.
- Delete Large Files: Simply select an item (e.g., file, folder, disk image, archives, etc.) from the list and delete it.
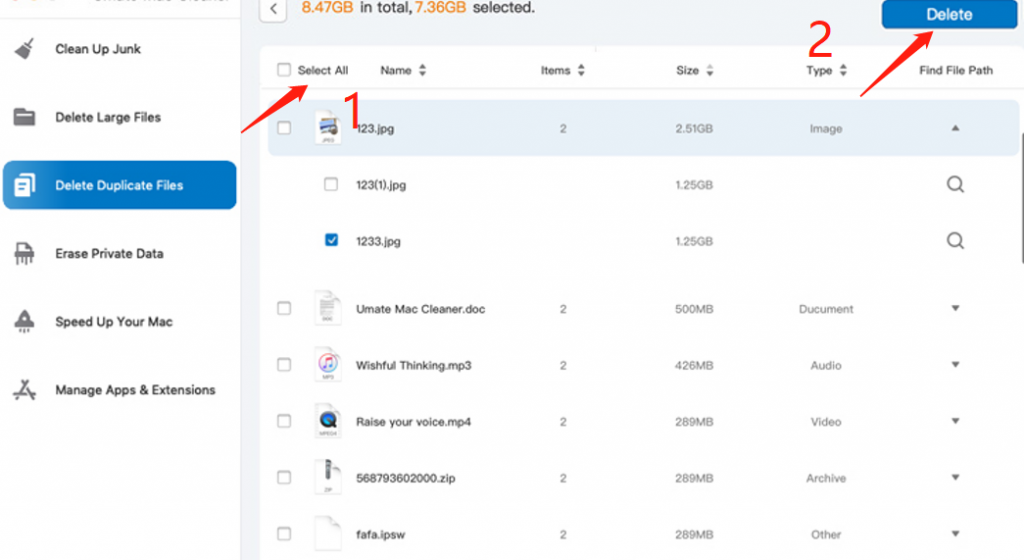
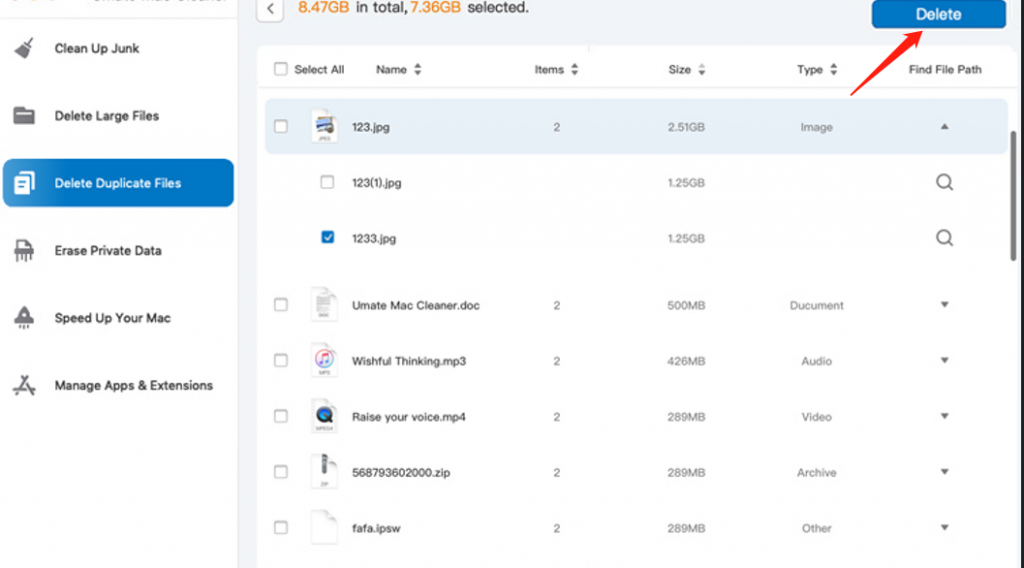
- Delete Duplicate Files: Select an item from the list (e.g., image, document, audio, video, etc.) and delete it.
- Erase Private Data: Select a category (e.g., Online Traces, Usage Traces, Chat Data, Photo Junk, Mail Attachment) to delete private data. You’ll find a list of items on the right side of the interface. Choose the data you want to delete from this list, and click “Select All” to include all items.
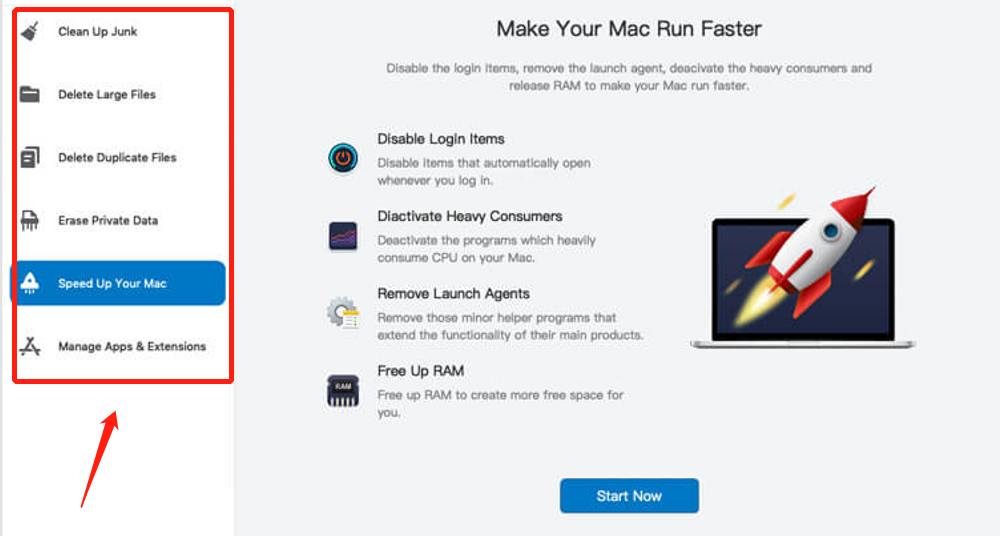
- Speed Up Your Mac: Select a category (e.g., Disable Login Items, Deactivate Heavy Consumers, Remove Launch Agents, Free Up RAM) to optimize your Mac’s performance. Depending on the category you choose, you’ll find a list of items on the right side of the interface. Select the items you want to deactivate and click “Select All” to choose all items.
- Manage Apps & Extensions: The software will give you a list of applications or extensions, depending on the option you chose. To uninstall an application, select it from the list. If you chose to remove extensions, select a browser to get a list of extensions installed on that specific browser. On the left side of the software, you’ll find a list of extensions. Select the ones you want to remove by clicking on their checkboxes and click “Select All” to include all items.
Step #5: Delete the Files
Once you have selected all the files you want to delete, click the Clean or Delete button located at the top-right corner of the interface. This will initiate the deletion process, which may take a few minutes. Make sure to confirm the deletion when prompted. With the right tools, optimizing your physical storage is easy and straightforward. Make it a habit to clean up your computer regularly to avoid storage issues in the future.
Part 3: How to Access the Usr Folder
There are multiple ways to access the usr folder on a Mac. Here’s one method:
- Using Finder
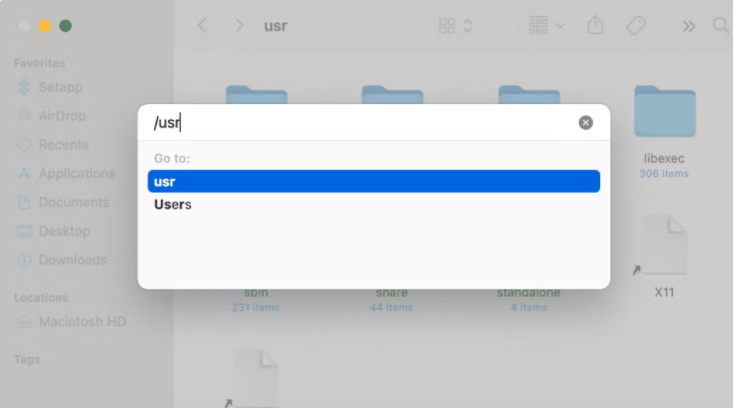
- Open Finder.
- Click “Go” in the menu bar.
- Select “Go to Folder“.
- Type in /usr or /usr/discreet and click “Go“. This will take you to the usr folder.
- To make accessing the usr folder easier in the future, you can drag the usr folder to the Finder favorites bar.
By following these steps, you can manually access the usr folder on a Mac and make it more accessible for future use.
Part 4: How to Finding Usr in Terminal
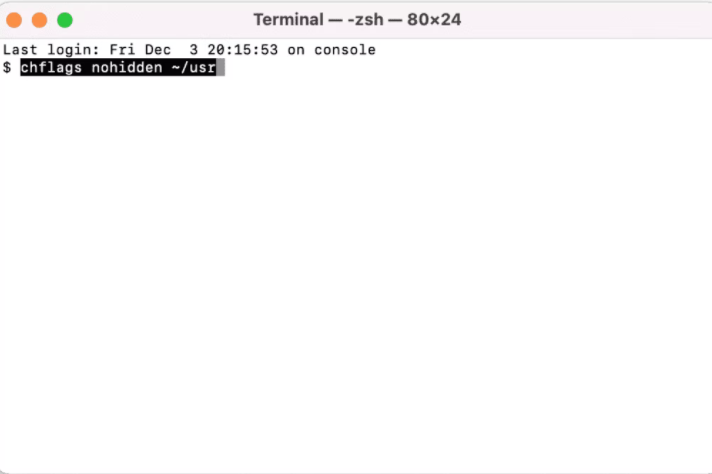
- Open Terminal, which you can find in /Applications/Utilities
- Enter the command chflags nohidden ~/usr in Terminal.
- If the usr folder is not found using this command, try using /Library as an alternative.
- Click Return and ensure that the command is executed.
- Quit Terminal.
- The usr folder should now be visible in the Finder.
- If you want to restore the usr folder to its previous state, enter the command chflags hidden ~/usr in Terminal.
- Press Return to execute the command, and the usr folder should be hidden once again.
Wrapping up
If you’re wondering where the usr folder is located on your Mac, accessing it may only be necessary if you want to improve your Mac’s performance or speed. Fortunately, there’s an easier way to do this. By downloading Mac Cleaner, you can quickly and safely solve many problems without the risk of causing accidental damage.
Mac Cleaner can identify files that are taking up too much space or duplicates of files, folders, or apps. It does an excellent job of identifying what’s causing space issues on your Mac. Try it out for yourself!
Latest Articles