

This is a complete guide on how to free up space on Mac.
With a thousand dollars, you can already afford a top-of-the-line Windows PC or laptop. Unfortunately, that isn’t the case for the Mac brand since a decent Mac laptop would cost around $2,000. For that reason alone, you probably don’t intend to buy another one anytime soon unless, of course, your existing Mac laptop is showing several signs of deterioration.
Perhaps it’s becoming too slow for your purposes. Maybe you’re encountering more and more crashes, and you can no longer put up with it. Either way, at this rate, you might end up spending a huge portion of your savings to buy another one.
Before you proceed with that decision, you might want to first try speeding up your Mac, and what better way to do so than to free up space on the device. But how do I go about doing so? you may ask. How to free up space on Mac?
Is It Advisable to Free up Space on Mac?
Some macOS users argue that freeing up space on a Mac device is risky. Not only are you taking the risk of possibly deleting files you need permanently, but the space you can free up also might not be enough to actually have an impact on the device’s speed.
However, unless you’re doing it wrong, you rarely have to worry about these two issues. macOS devices have features that allow you to free up space safely. In addition, any freed-up space, even if it’s only a few hundred MB in size, will most definitely have a considerable impact on your laptop or computer’s performance. So, yes, it is indeed advisable to free up space on your Mac. But to avoid data loss, you must first create a backup of your files.

How to Create A Backup on Mac
Since data loss is a serious issue, you must do your best to avoid it as much as possible, and what better way to do that than by creating a backup of your files before freeing up space on the device. You have two options. You can either use the Time Machine or store your files on your iCloud. Let’s take a look at the first method.
Create A Backup With Time Machine
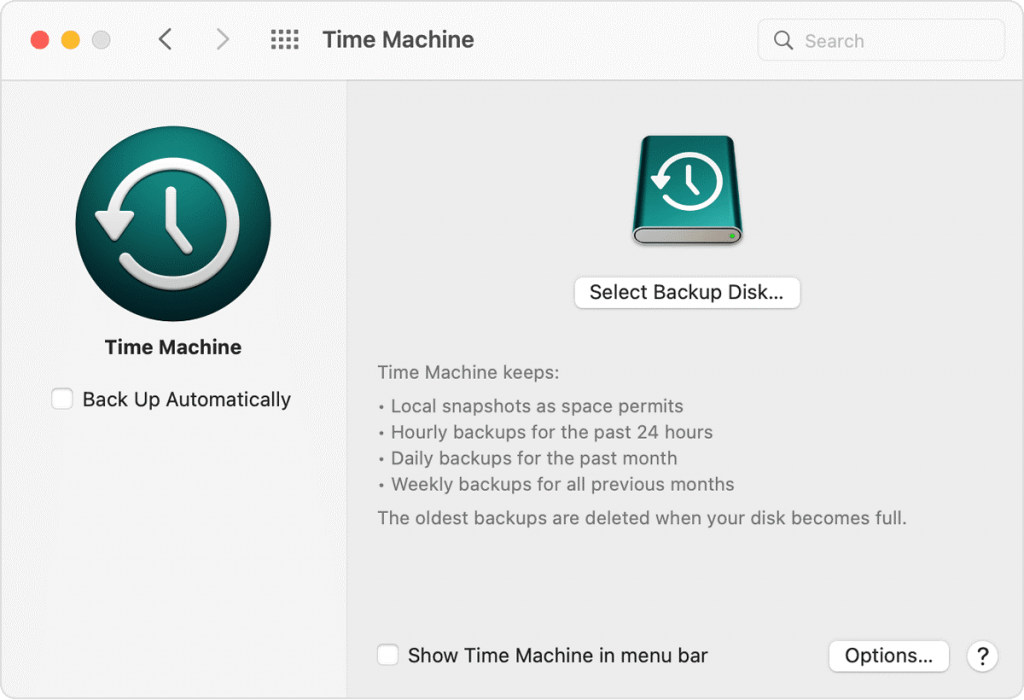
The Time Machine is a feature in macOS devices that essentially allows you to revert all the changes you’ve made on your laptop/computer, essentially turning back time, hence the name. You can think of the Time Machine as the macOS counterpart of the System Restore feature of Windows PCs. Here’s how you can create a Time Machine backup:
Connect an external storage drive to the Mac computer/laptop. This is where the Time Machine backup will go once you’ve successfully created it.
- On your desktop, click the Apple icon from the top bar menu.
- Select System Preferences from the resulting dropdown menu.
- Click Time Machine.
- On the Time Machine window, click the Select Backup Disk… button.
Note: You can tick the box for Back Up Automatically to automate this process.
- Select the name of the external storage drive you plugged into the computer/laptop.
- Click Use Disk.
- Wait for Time Machine to create a backup on the selected disk. It may take a couple of minutes or even hours, depending on the used storage capacity of your Mac.
This method will create a copy of your files in a physical storage location.
Store Your Files on iCloud
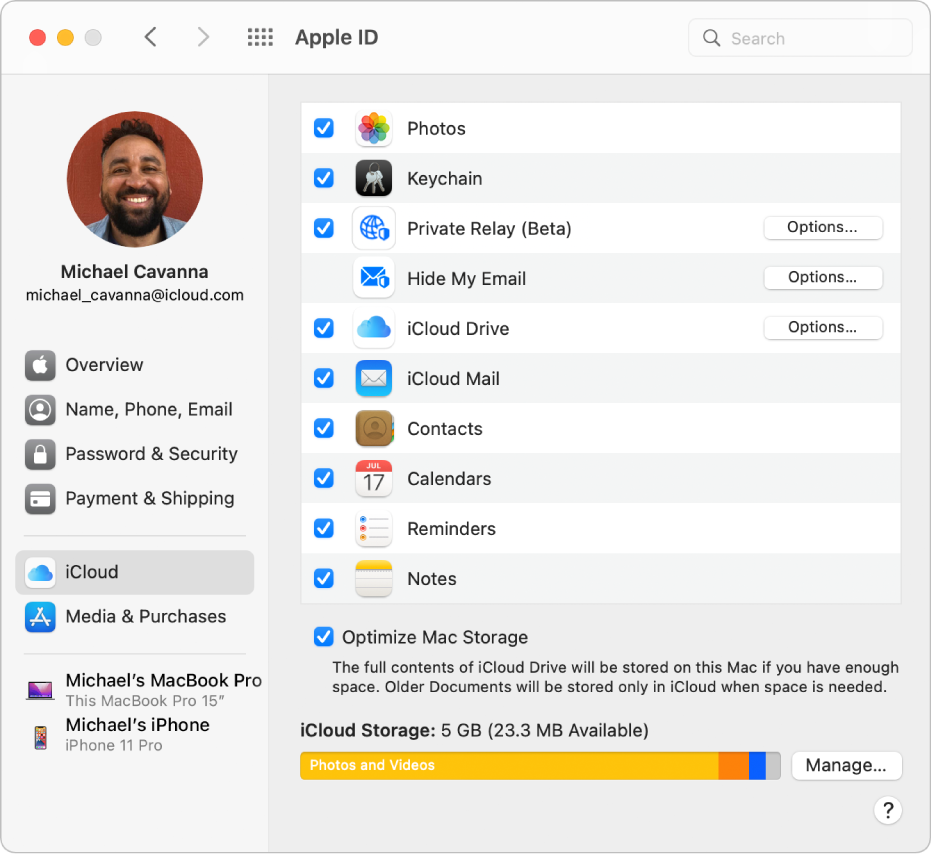
Consequently, you can create a copy of your files in a digital storage location by using iCloud. For your information, the iCloud is the cloud storage solution of Apple. Any file you store here can be retrieved even if all your copies on your physical storage are deleted. Here’s how you can store your files on the iCloud database:
- Click the Apple icon on the Mac screen.
- Select System Preferences.
- Click the Apple ID.
- On the Apple ID menu, click iCloud from the left sidebar.
- Check the boxes of the file types you wish to store on iCloud.
- Close the window.
The best part about this is that even if your Mac computer/laptop becomes dysfunctional, you still have a copy of your files somewhere in the iCloud database. Perhaps the only issue here is that you can only store up to 5GB of files, though you can always upgrade your plan to increase this capacity. Anyway, with this, you should now be ready to learn how to free up space on Mac without worrying about data loss. But first, you must know what data types are suitable for deletion.
What Kinds of Data Should You Delete to Free up Space?
As one might imagine, you cannot recklessly delete files on your Mac. Certain data are necessary to the operation of your computer/laptop. Therefore, if you wish to learn how to free up space on Mac, you must first figure out what kinds of data you can afford to delete. In that regard, here’s a list of data types that should have no impact on your system when deleted:
- Unused Apps
- Cache
- Trash Bin
- Duplicate Files
- iOS Junk
- iTunes Junk
- System Junk
- Unused Disk Images
These are the kinds of files that shouldn’t have a negative impact, or any impact whatsoever, on your operating system when deleted. Without further ado, let’s discuss the steps on how to free up space on Mac by deleting these kinds of data. Let’s start with the first one on our list, unused apps.
Method #1: Uninstall Unused Apps
Though applications are generally useful, not all of them are. Moreover, even if an app does indeed offer useful features, if you have no use for such features, then the app is no different from useless junk. In that case, it’s best to uninstall these apps so as to free up space on your Mac computer/laptop. Here’s how you can do this:
- On your Mac, open Launchpad.
Note: Launchpad is the application manager and launcher of macOS devices.
- On the Launchpad screen, you’ll see a list of apps. Simply press and hold the Option key on your keyboard. This should change the mode of the Launchpad, and each uninstall-able app will display an X icon.
- Find any unused apps on this screen and click the X icon to uninstall.
- Click the Delete button on the popup menu to confirm the action.
That’s pretty much how you uninstall unused apps on your Mac. Keep in mind that there are certain applications that don’t come from the App Store. These apps will most likely not be in the Launchpad. To uninstall these apps, open Finder, navigate to the Applications folder, then delete the folders of these apps accordingly. You must also look into the apps you installed via Launchpad since their remains may still be in your Mac and aren’t fully deleted.

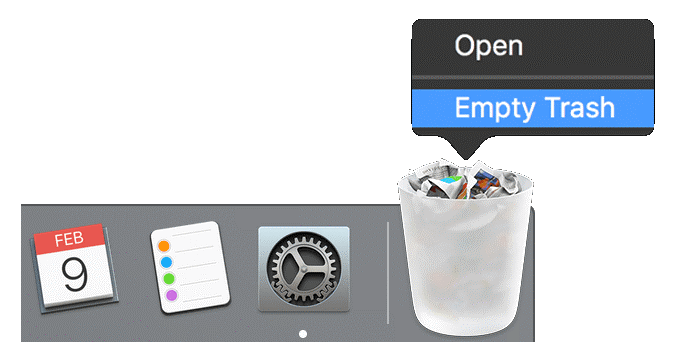
Method #2: Empty The Trash
Every file you delete on your Mac will go automatically to the Trash folder. Here, you can recover these files if you ever need them again. Unfortunately, while they are indeed already trashed or deleted, the files in the Trash bin still take up space on your Mac computer. Therefore, it’s advisable to empty the trash of your Mac regularly, much like how you free up space in your house by emptying the trash bins in the area. To empty the Trash, you simply have to right-click the Trash icon from the Dock and select Empty Trash. The Dock is the macOS counterpart of the Task Bar in Windows PCs.
If you don’t want to delete all its contents, you can open the trash instead and select the items you wish to delete. Then, press Delete on your keyboard. You can also allow the Trash folder to automatically delete its contents with the following steps:
- Click the Apple icon from the top bar menu of the Mac screen.
- Select About This Mac.
- On the window, navigate to the Storage tab.
- Click Manage.
- Click the Turn On… button to the right of the Empty Trash Automatically area.
Of course, there are risks to emptying the trash since you’re effectively permanently deleting your files. That’s why you must first check whether you accidentally deleted a file you need before clicking the Empty button.
Method #3: Clear Your Cache
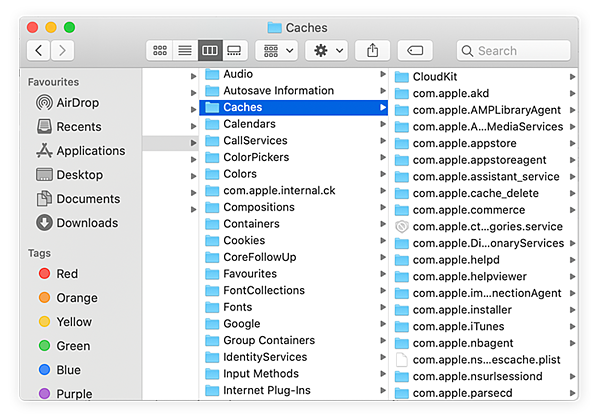
When you boot up your Mac, it automatically creates a data type called cache. The cache contains all the files that your system thinks it’ll need anytime soon. It uses these files to boot up faster for the succeeding sessions. Unfortunately, the cache can pile up and take up a huge portion of your storage capacity. On the bright side, you can clear your cache with these steps:
- Open the Finder app on your Mac.
- Click Go from the top bar menu.
- Select the Go to Folder… option. This will open a popup menu on your screen.
- Copy and paste the following text to the popup menu: ~/Library/Caches.
- Click Go to open that file directory.
- On the resulting window, open the Cache folder.
- Find and delete the files in the cache that you think you no longer need.
You can also clear the cache of your browser, but the steps will vary from browser to browser, so it’s best if you look up the instructions yourself. If you’re interested, here’s a link to a guide for Safari, Google Chrome, and Firefox.
How to Free Up Space on Mac The Easy Way With Mac Cleaner
As you may have realized, it takes several steps to delete a single file type on your Mac. If you intend to delete all files that you no longer need, of course, it’ll take several hours or even days. If you wish to streamline this process, you can use Mac Cleaner—a handy tool that can scan for files that no longer serve a purpose to your Mac.
It also allows you to delete these files accordingly. The best part about this is that it automatically scans for files, so you don’t have to do it yourself. Here’s how to free up space on Mac using Mac Cleaner:
Step 1. Launch The Mac Cleaner Software
Download Mac Cleaner from its official website. With the executable file, install the software on your computer and open it afterward.
Step 2. Select A Module
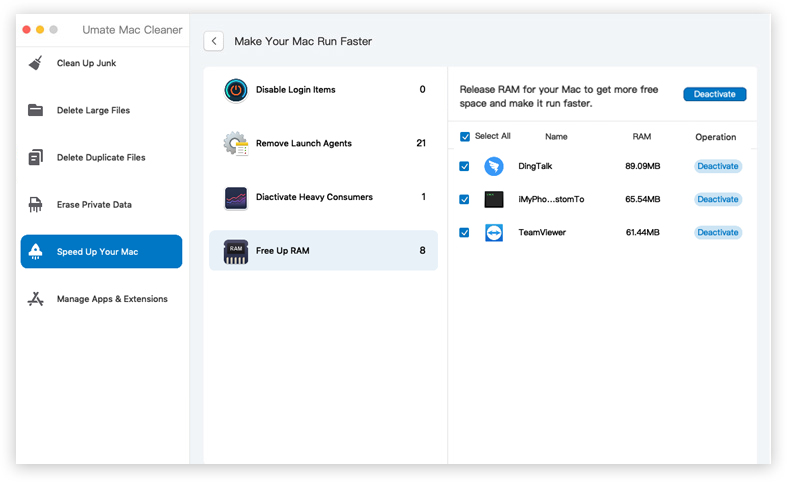
On the left sidebar of the software, you’ll find six different options, including (1) Clean Up Junk, (2) Delete Large Files, (3) Delete Duplicate Files, (4) Erase Private Data, (5) Speed Up Your Mac, and (6) Manage Apps & Extensions. We suggest selecting the Speed Up Your Mac module since it focuses on clearing up space on your Mac to improve its performance. You can also choose to select each module to fully leverage the software.

Step 3. Scan for Files
When you select a module, the screen on the right side of the software changes accordingly and displays information on that specific module. This may include the files it can scan and delete and other pieces of information. Once you’ve read all the details on the screen, click the blue Scan button if you chose Clean Up Junk, Delete Large Files, and Erase Private Data. If you chose Delete Duplicate Files, you must first specify a directory or file path before clicking Scan. As for the Speed Up Your Mac module, you must click Start Now.
Step 4. Select And Delete The Files
For the first four modules, you’ll get a list of files you can delete. Simply select the ones you wish to delete and click the Delete or Erase button on the top-right corner of the screen. In the case of the Speed Up your Mac module, the screen will display several options, such as Disable Login Items, Free Up RAM, and the likes. Simply select one item at a time, then click whatever button appears at the top-right corner. This can be anywhere from Deactivate, Delete, Remove, etc.
Mac Cleaner basically performs the methods we’ve discussed but in a more smooth manner. And since the interface is rather user-friendly, you won’t struggle to navigate the tool. Overall, it’s a time-efficient way of freeing up space on Mac.
Wrapping up
While it does take a considerable amount of time, freeing up space on your Mac computer/laptop has a lot of merits. It speeds up the device, improves its overall performance, and gives you more space to store other files. With this guide, you should be able to do all these without much of a hassle, especially if you use the Mac Cleaner. With this software, a process that normally takes hours should be accomplished within a few minutes.
Latest Articles