

Want to know how to find large files on Mac? Then you better start reading this article to learn how to do it using different ways.
Every computer has a set storage space. Once the space runs out, naturally, you can no longer fit any more files. Moreover, if the storage runs out of available space, the computer often slows down considerably. That’s why experts advise Mac users to regularly find and delete unnecessary files on their computers, but that’s easier said than done. After all, most of the files on Mac are relatively small, with sizes ranging from 1MB to 50MB. Considering how the maximum disk space of computers is around 258GB, it’d take you several hours to free up space on your Mac if you were to focus on only the small files.
With that in mind, rather than focusing on small files, you must prioritize large files, with sizes ranging from 50MB to 500MB. That way, you only have to find and delete a handful of files to free up space on your Mac significantly. But can you search specifically for large files in the first place? Fortunately, yes you can, and here are four ways to do it.
Perhaps the simplest way to find large files on Mac is by arranging your files by size. By doing so, the Finder app would automatically arrange files by order of largest to smallest, or vice versa. Therefore, if you simply open a directory or folder, you’ll find that the folders at the top (or bottom) would be the largest files in that specific folder, basically allowing you to find large files on Mac. If you wish to use this method, here’s what you need to do:
- Open Finder on your Mac.
- From the left sidebar, click All My Files.
- At the top of the Finder window, you’ll find a menu bar. Simply click the icon at the center of the menu bar, which should roughly look like six squares with two horizontal lines. It should also have a downwards arrow to the left.
- Upon clicking the icon, a dropdown menu will appear. Select Size from the resulting options.
- At the bottom area, click the menu that says From 1 GB to 10 GB and choose the size of files you want to see.
- Now, go back to the Finder app and you’ll see that files are now arranged based on which is largest.
You can also find large applications and other data types on your computer by entering their corresponding folders or directories. For instance, if you want to find large applications, you can go to the Applications folder instead of All My Files. Perhaps the only downside to this is that you have to go to the directories yourself rather than just waiting for the system to tell you where the files are. Fortunately, there’s yet another method that automatically fetches files for you.

Method #2: Find Large Files on Mac With Finder
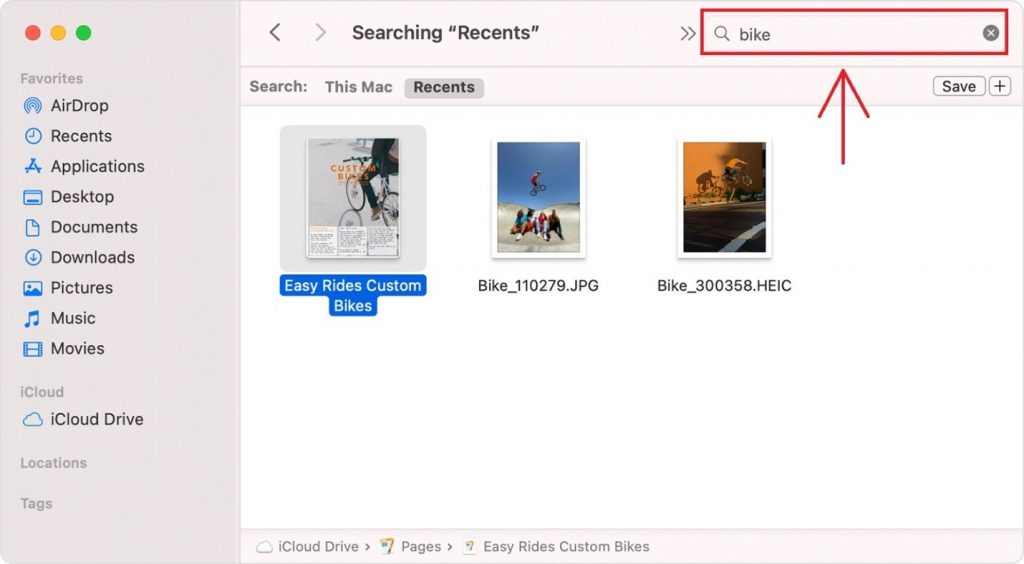
Finder allows you to search for files and folders by typing in specific keywords. For instance, if you’re searching for a file named “finaloutput,” you can very easily do so by typing in that exact name in the search bar. However, that’s not the only way you can search for specific files. You can also search based on file size. The process is pretty much the same as when you use Finder to search for files using keywords, but with a few differences in steps. Here’s how you can find large files on Mac using Finder:
- Open the Finder app.
- From the left sidebar, you’ll find a section that says Devices. Simply select the device you want to search in.
- Once you select a device, press Command + F to activate the search feature. You can also click on it manually by clicking the search bar at the top-right corner of the Finder window.
- At the top of the files list, you’ll find a menu bar with three fields. Make sure the first says File Size by clicking on it and selecting the File Size option accordingly.
- Choose is greater than on thesecond bar to specify that you want to find files larger than a specified size.
- Finally, change the third bar to whatever size you want the file to be greater than. Choosing 1 GB will search for files that exceed 1 GB. You get how it works.
Unlike the first method, this will fetch the files automatically for you without requiring you to go to different directories. Of course, there’s also a downside to such a method, and that is the fact that it only searches for files and not folders. But for our purposes, that should be plenty enough.
Method #3: Utilize The Reduce Clutter Feature
If you’re not aware, Mac computers often have the Reduce Clutter feature that basically allows you to delete files that the system thinks are no longer necessary. As it turns out, the Reduce Clutter can also detect large files automatically, and these large files typically have a size ranging from 100MB to 10GB. With that in mind, here’s how you can utilize the Reduce Clutter feature to find large files on Mac:
- On your computer, click the Apple icon at the top-left corner of your screen.
- Select About This Mac from the resulting dropdown menu.
- This will open a new window. On the menu bar of this window, navigate to the Storage tab.
- Select Manage.
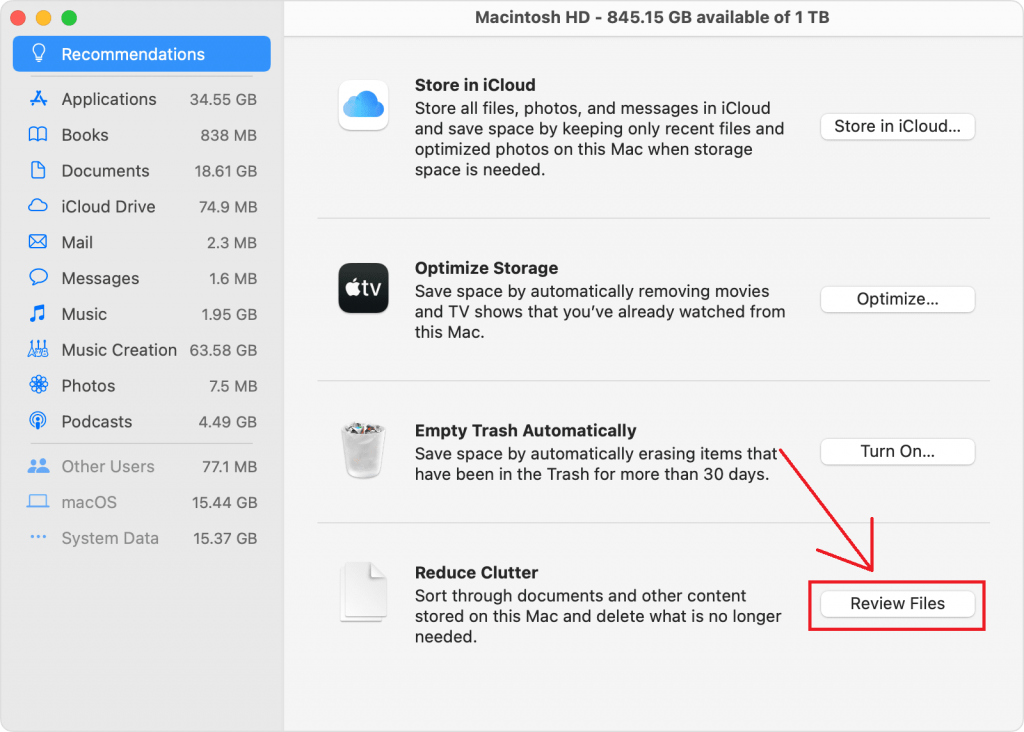
- Click Recommendations from the left sidebar of the Manage Storage window.
- You’ll find the Reduce Clutter option here. Simply click the Review Files button to its right.
- Click Documents from the left sidebar of the window.
- Select the Large Files tab from the menu bar at the top.
With this, you should be able to see different files that make up a huge portion of your storage. If you hover over a specific file, two icons will pop up on the right side of the file name. There would be an X icon and a magnifying glass icon. The X icon allows you to delete the file, while the magnifying glass icon will take you to where that file is located.
Method #4: Use Mac Cleaner [RECOMMENDED]
While it’s true that the Finder app as well as other built-in Mac features have advanced to some extent, it’s not enough to completely do what you need them to do. In particular, though you can find large files on Mac using Finder, there’s a limit to how well you can find them. In most cases, you might miss a couple of files, especially if they have a rather unfamiliar file extension or if they’re in hidden folders. If you truly wish to find all large files, we suggest using Mac Cleaner.
Mac Cleaner is a cleaning software comprised of several modules. One of its modules is dedicated to finding and deleting large files on Mac, making it the ideal software for our purposes. Below is a guide on how to use the software:
Step #1: Download, Install, and Start Mac Cleaner
On your computer, open a browser and navigate to the official website of Mac Cleaner. Then, click Download Now to download the installer, and then use the downloaded file to install the tool on your computer. Finally, open the software.
Step #2: Select the Delete Large Files Module
Mac Cleaner consists of a total of six modules, namely (1) Clean Up Junk, (2) Delete Large Files, (3) Delete Duplicate Files, (4) Erase Private Data, (5) Speed Up Your Mac, and (6) Manage Apps & Extensions. Since our goal is to find large files on Mac and delete them accordingly, you should select the second module, Delete Large Files Delete. As the name suggests, it detects only the files that exceed 50MB in size on your computer. It then allows you to delete those files if you want. To select the module, simply click on it from the left sidebar of the software.
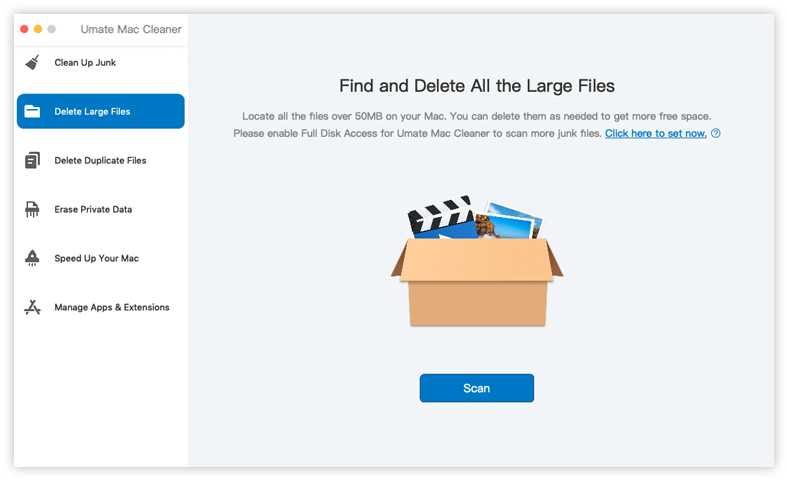
Step #3: Scan Your Computer for Large Files
Upon selecting the Delete Large Files module, the software will display information about the module’s features. You can read it if you wish to learn more about that particular module. Afterward, click the Scan button at the bottom of the software.
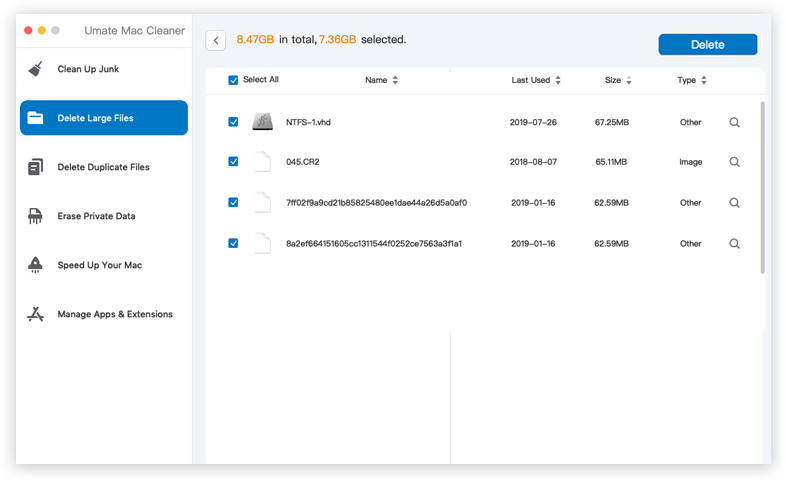
Step #4: Select the Files
The scan will finish after a while. Once it’s done, the software will redirect you to a new screen where you can find a list of items. These are the large file that the software has detected. Simply select the files you wish to delete by clicking on their corresponding checkboxes. You can also click the checkbox for Select All to include all files in the list.
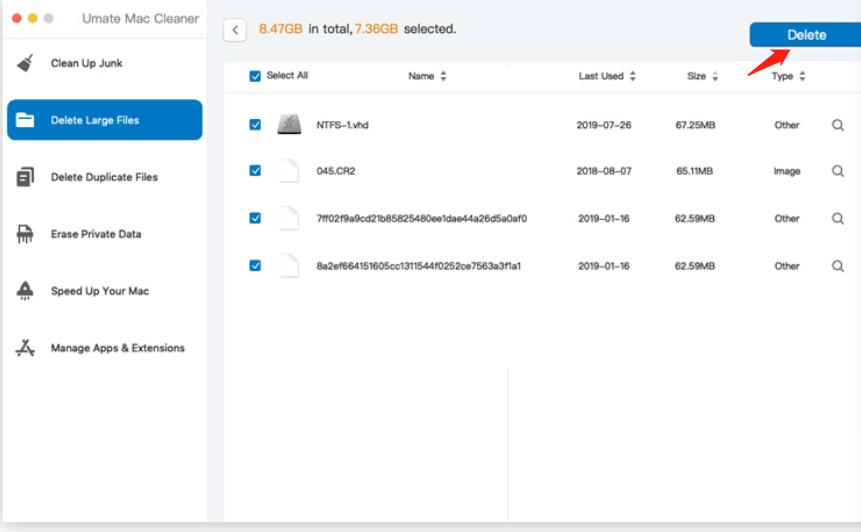
Step #5: Delete the Files
Once you’re done selecting all the files you wish to delete, click the Delete button at the top-right corner of the window. This should finalize the process.
With this, you can very easily find large files on Mac and delete them accordingly. It’s much easier than the aforementioned methods since it doesn’t require you to find the large files manually. Instead, Mac Cleaner does it automatically.
Wrapping Up
Several years ago, it may have been extremely difficult to find large files on Mac. After all, file manager apps weren’t as comprehensive as they were now, and they certainly didn’t have a filter for file size. But as you may have guessed, that’s no longer the case today. File manager apps, including Mac’s Finder, are now capable of searching for files based on size, and it’s incredibly convenient, especially since you can easily find unnecessary files that take up a huge portion of your storage space. Now that you know how to find large files on Mac, freeing up storage space should be a piece of cake.
Latest Articles