

Every time you do something on your computer, the operating system automatically generates files. These typically file the system needs to perform tasks, but they’re not needed all the time. Once the task is complete, those files are usually no longer needed. The problem is the operating system tends to ignore these files once they’re generated, meaning it doesn’t delete them automatically. For that reason, these files tend to pile up on your system library and there may even come a point where they take up the majority of your storage capacity. These files and folders are what experts call junk files.
Naturally, since you wouldn’t want the junk files to fill up your entire storage, you need to know how to get rid of them. With that in mind, below are five ways on how to remove junk files from Mac. Let’s start with perhaps the easiest method there is.
Method #1: Empty The Trash
Before we get to the specifics of this method, it’s important to keep in mind that if you’re relying solely on the built-in features of your computer, you cannot remove all the junk files from your computer all at once. There are different types of junk files, and you usually have to use a separate method to remove each type. In this method, we’ll be deleting Trash files, which as you might imagine, are considered junk files. They’re basically files inside the Trash. The reason they’re considered junk is that while they cannot be opened or used, they still take up disk space, so they’re basically smooching off of the space.
With that in mind, here’s how to remove junk files from Mac from the Trash folder:
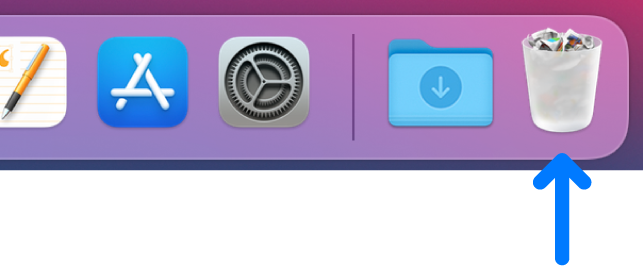
- Find the Trash icon on your Dock. If you aren’t aware, the Dock is your taskbar, which is located at the bottom-most part of the screen. The Trash icon should look like a trash bin.
- Click the Trash icon while holding your Ctrl key.
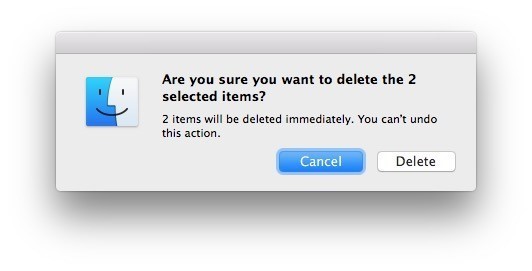
- A dropdown menu will appear. Select Empty Trash from the menu.
- If a confirmation window appears, simply confirm your action.
With this, you can very easily delete all the files inside the Trash, also known as the Trash junk files.
Method #2: Clear System Cache
Another type of junk file is system junk. It’s basically all the files the system has generated which are now useless, also known as the system cache. Thankfully, you can remove the system cache, as long as you follow the steps below:
- Open the Finder app on your computer.
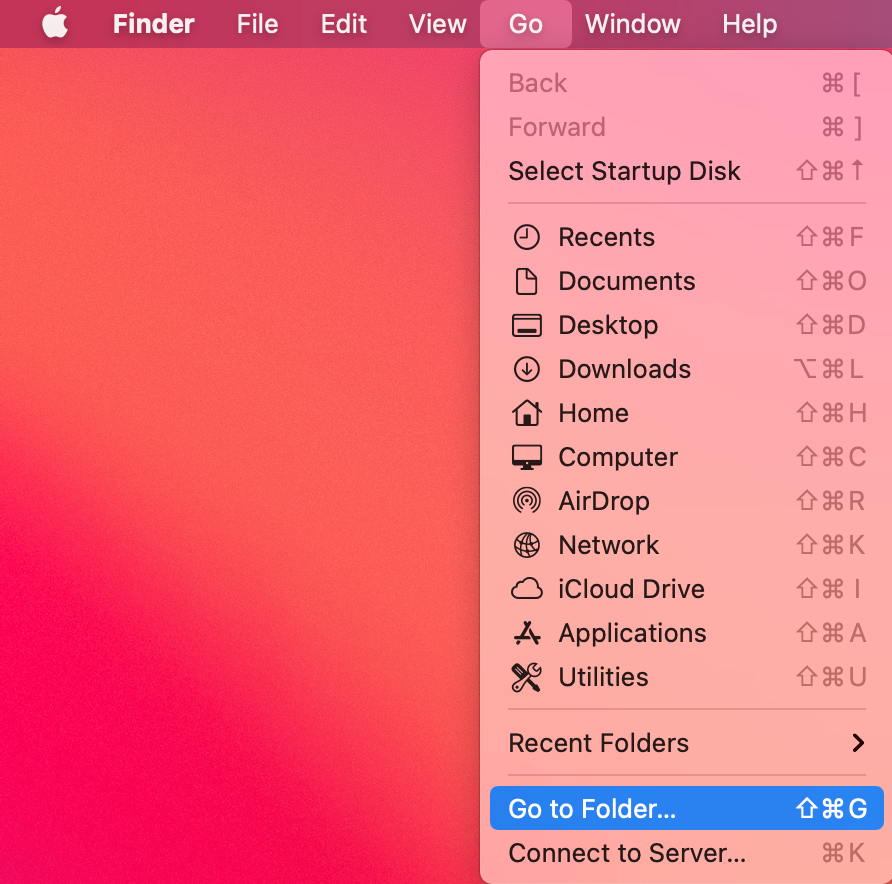
- Click Go from the top menu bar.
- Select Go to Folder… from the dropdown menu.
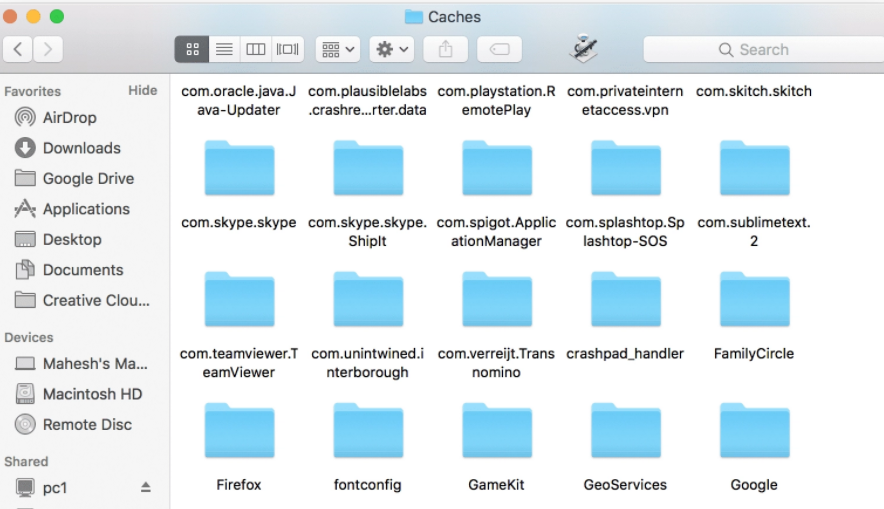
- A popup window will appear. Type in the following text: ~/Library/Caches
- Click Go.
- Finder should take you to the directory you specified. On the Caches folder, find the files you want to delete, then simply drag them into the Trash from the Dock. That should delete those system cache files.
After you delete all the cache files you want to delete, make sure you empty the Trash so they don’t take up space.

Method #3: Clear App Cache
In addition to system cache, there are also cache files that are inside the folders of apps. You can also delete them if you want since they’re no longer necessary, just like the system cache. Interestingly, the way to do this is similar. Just follow steps 1 to 5 from the previous method. Then, make sure you look for the folders that have the names of the apps you want to clear the cache of rather than just deleting files inside the Caches folder. Open the app folders, then inside, delete the cache files. Again, make sure you empty the Trash to make sure the files you just deleted are completely and permanently gone.
Method #4: Delete Files in Downloads
Usually, when you use a browser, you have the option to automatically put all your downloads into one directory. That directory is the Downloads folder. Though you might need some of the files there, there’s also a good chance you don’t need the majority of them. Perhaps you download them and forgot to delete them after a while. Here’s how you can delete these files:
- Open the Finder app on your computer.
- Select Downloads from the sidebar on the left.
- Find and delete the files you no longer need.
Make sure you empty the Trash after doing this.
Method #5: Remove Junk Files from Mac using Mac Cleaner
The previous methods might work, but they typically take too long. If you want to remove junk files regularly, then it’d take hours if you were to rely on those methods alone. Moreover, they don’t even guarantee that you’ll be able to get rid of all your junk files, which can be annoying. In most cases, even after performing the aforementioned methods, you’ll still find a handful of junk files lying around. If you want an easy and sure way of removing junk files, we suggest Mac Cleaner.
Mac Cleaner is a cleaning app that can delete all kinds of unnecessary files from your computer. Junk files happen to be one of its possible targets, hence why it’s suitable for this job. Here’s how to remove junk files from Mac using the app:
Step #1: Launch Mac Cleaner on Your Computer
The first step is to get the software on your computer. To do that, you must open a browser and click this link. That should take you to the Mac Cleaner download site where you must click the Download Now button. Upon doing so, the browser will download a DMG file. Once the download is complete, open it to run the installer. Then, follow the onscreen instructions from that point onwards. The cleaning app will open automatically once the installation is complete.
Step #2: Choose the Clean up Junk Module
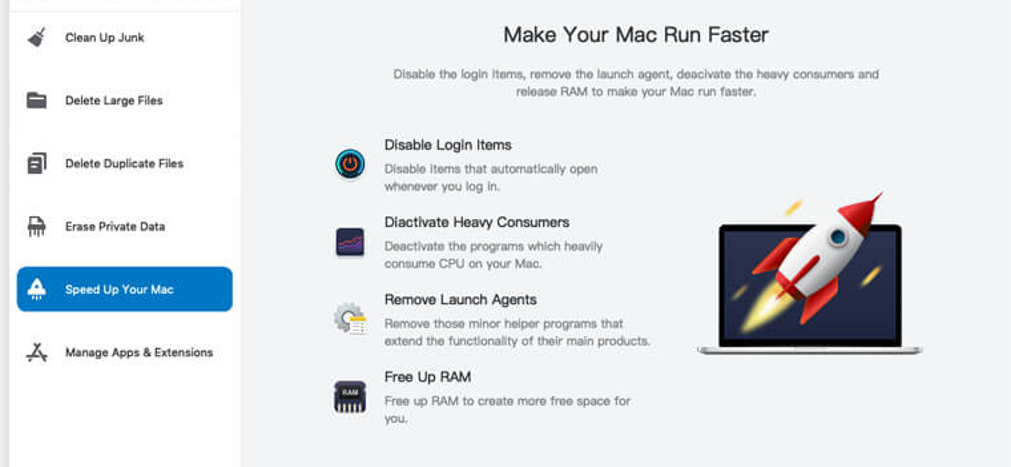
When you first look at the software’s interface, you’ll find a sidebar in the leftmost area of the window. On that sidebar are six options that correspond to each of the modules the software offers. These include (1) Clean Up Junk, (2) Delete Large Files, (3) Delete Duplicate Files, (4) Erase Private Data, (5) Speed Up Your Mac, and (6) Manage Apps & Extensions.
Each module has different functionalities, but if you want to learn how to remove junk files from Mac, you’ll mostly need the Clean Up Junk module which allows you to delete all kinds of junk files like System Junk, App Junk, Trash Bin, etc.
You can select the module by clicking on it from the left side of the window.
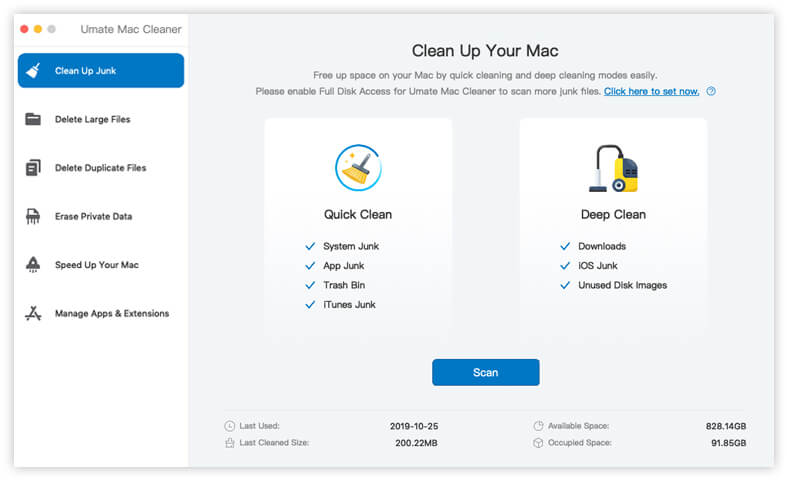
Step #3: Click the Scan Button
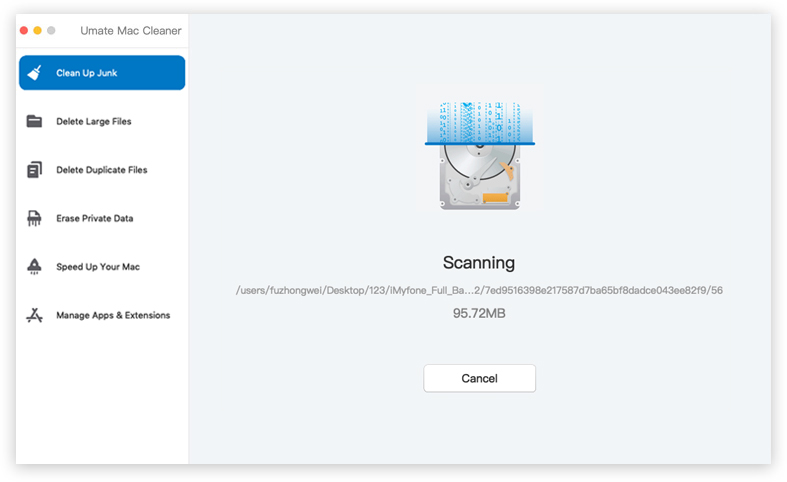
Upon selecting a module, the center of the interface will change, and you’ll find information about the selected module. It’ll show you how the module works, what it does, and more. In the case of Clean Up Junk, there will be two sides. One side says Quick Clean while the other says Deep Clean. Quick Clean allows you to scan and delete System Junk, App Junk, Trash Bin, and iTunes Junk. Meanwhile, Deep Clean can detect and delete Downloads, iOS Junk, and Unused Disk Images. Simply select between these two. Once you select an option, click the Scan button at the bottom-center area of the interface.
Step #4: Select a File Category and File/s
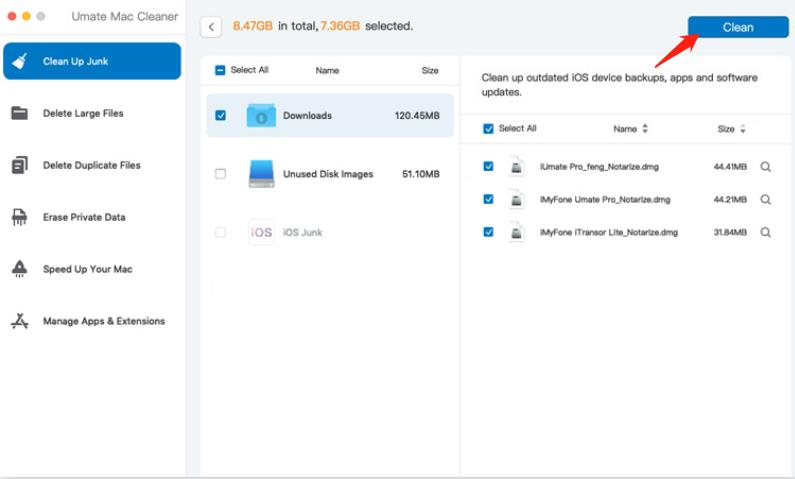
The software will take a few minutes to scan. Once it’s done, you’ll find a list of items on the interface. The list on the left will consist of file categories like System Junk, Downloads, Trash Bin, Unused Disk Images, and more. Simply select the category you want to start with. Upon selecting a category, a new list will appear on the right side of the window. From there, you can find actual files that belong to the selected category. Select the junk files you want to delete by clicking on their corresponding checkboxes. If you want to include all items in the list, you can instead click the Select All checkbox for a faster selection.

Step #5: Delete the File/s
Once you’ve selected all the junk files you want to remove, you can finally click the Clean button at the top-right corner of the window. Clicking this button will initiate the deletion process. It’ll take a while, but that’s the last thing you need to do.
It may take a few hours to remove junk files from Mac using traditional methods, but you can very easily cram it into a few minutes of work if you use tools like Mac Cleaner. But keep in mind that not all cleaning apps will have the same capabilities as this one. Some are a bit difficult to use, while others scan and delete files slowly. Hence, it’s best to stick to an app that you think can perform well, in terms of cleaning.
Going Forward
Junk files are exactly what the name suggests, they are junk. That basically means they’re meant to be thrown away after they’ve served their purposes. That’s why it’s much easier to delete junk files from a macOS computer than to remove temp files from the system library. Since you know with 100 percent certainty that they’re no longer, you don’t have to hold back your urges of deleting them. After all, doing so doesn’t pose any risk of data loss. Furthermore, you can use tools like Mac Cleaner to automatically detect the junk files that you can and must delete, so you shouldn’t have much of an issue.
Latest Articles