

The standard storage capacity of macOS computers is 128GB. Once you reach that limit, you either have to buy a new storage disk or delete unnecessary files that are taking up space needlessly. Though the former is indeed tempting, since you can store more files if you plug in an additional storage drive, it costs money. Meanwhile, the second option is completely free, but the problem is it takes a long time. The good news is you can speed up the cleanup process by using a file shredder, which may or may not be free, depending on which you choose. It can turn a 5-hour task into a 5-minute task.
So, what would be the best file shredder on Mac if you intend to use it for cleanup purposes? Read on as this article goes over the five best file shredder on macOS computers nowadays and what each of them offers. Let’s start with the first entry.
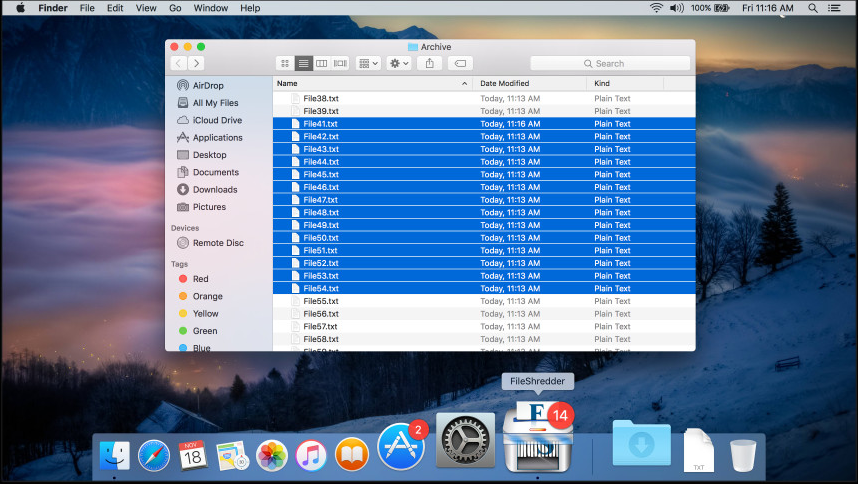
Part 1: File Shredder on Mac: FileShredder
It’s a bit ironic that our first entry for the best file shredder on Mac would have the name FileShredder. The app is rather simple and has only a few features, but all of them are quite effective. There are four features, though it’s best to call them modes. Each mode has different advantages. For example, one is very fast with shredding files, while another is very thorough. There’s a mode for various preferences, and it’s what makes the FileShredder app decent despite the lack of additional features. Perhaps the only issue with File Shredder is the fact that you cannot undo the files you’ve deleted.
That means if you deleted important files unintentionally, you won’t have any way of recovering them unless you use data recovery software. The app is mostly free, but you can pay a small amount if you want to support the developers of the app.
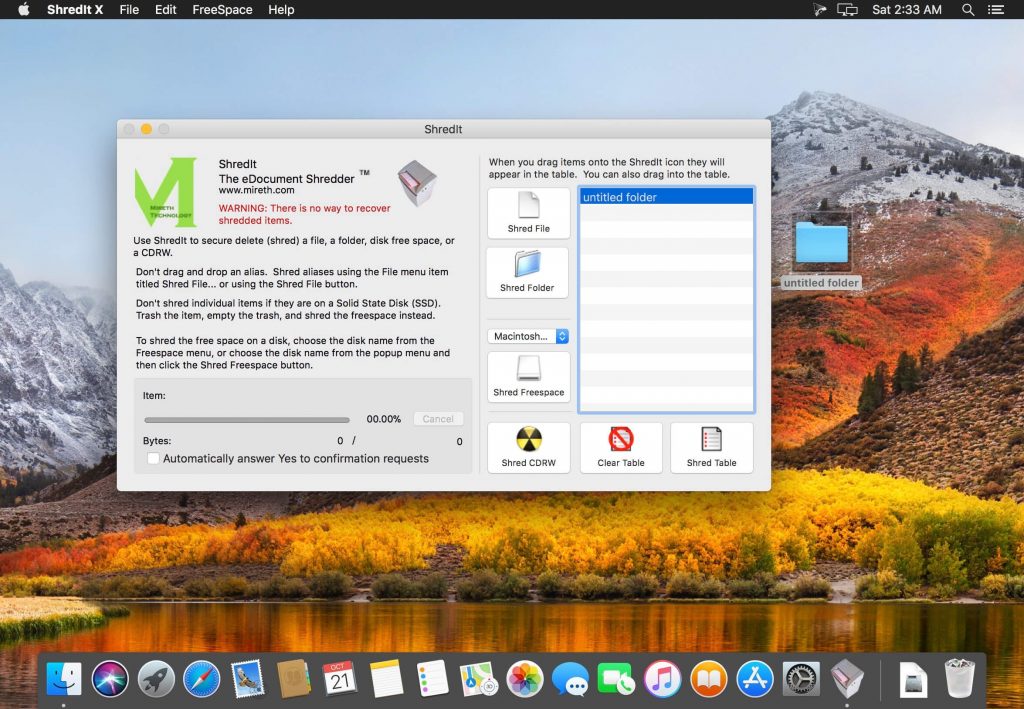
Part 2: File Shredder on Mac: ShredIt X
ShredIt X is a file shredder app developed by Mireth Technology. Its main charm is that it’s available on all platforms, including Windows 7, Windows 10, Windows XP, Vista, and different versions of macOS. Other than that, there’s really not much to say about the software. Perhaps the best thing about it aside from the platform compatibility is the fact that there are numerous ways to shred files. These include dragging and dropping the files, selecting them using a keyboard, and more.
The software comes with a free trial, though you can get the full version for $25. Yes, it’s quite expensive for what it is, and we also believe the price is rather unreasonable considering how it only saves you a couple of seconds of deleting files.
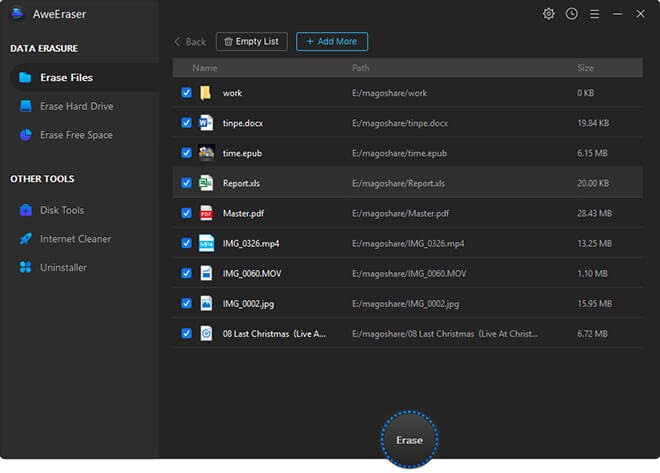
Part 3: File Shredder on Mac: Magoshare AweEraser
Magoshare AweEraser is comprehensive and simple at the same time. It’s a file shredder from Magoshare with a rather intuitive and modern interface. It has six simple features, three of which are extra tools, including Internet Cleaner, Uninstaller, and Disk Tools, all of which have nothing to do with file shredding. However, its three other features are all about file shredding. Unfortunately, we’ve yet to figure out what exactly the difference is between the three features since their names go like this: Erase Files, Erase Hard Drive, and Erase Free Space. In short, there seems to not be much difference.
Part 4: File Shredder on Mac: Permanent Eraser
Our fourth entry is Permanent Eraser from Edenwaith. It’s a rather simple file shredder, but its features are very useful since they’re usually what many people seek. Some of its features include CD/DVD erasing, a file finder, and more. It has similar modules to FileShredder that allow you to thoroughly shred files, leaving no traces to ensure it doesn’t become an entry point for hackers in the future. It also has a simple interface which many people would prefer.
Part 5: Our Recommendation: Mac Cleaner
One problem with file shredders on Mac is that they tend to delete files indiscriminately, even if the file in question is important. For that reason, you’ll often find yourself wondering where your crucial files are after using a file shredder. It’s also quite common for these apps to completely eliminate your browsing data, meaning all the history, cookies, saved passwords and usernames will be gone. Naturally, that can be inconvenient, and that’s why we suggest Mac Cleaner.
Mac Cleaner is an app specializing in deleting only unnecessary files. It doesn’t detect files that are most likely important, so you can delete files without worry. If you want to use the software, here are the steps you need to follow:
Step #1: Set Up Mac Cleaner on Your Computer
To start, you must click this link to proceed to the Mac Cleaner download site. There, you’ll find a Download Now button, which you must click. It’ll prompt the download of a DMG file. Once the download is complete, open the file to start the installer. Follow the onscreen instructions afterward. The software should open automatically once it’s installed.
Step #2: Pick a Cleaner Module
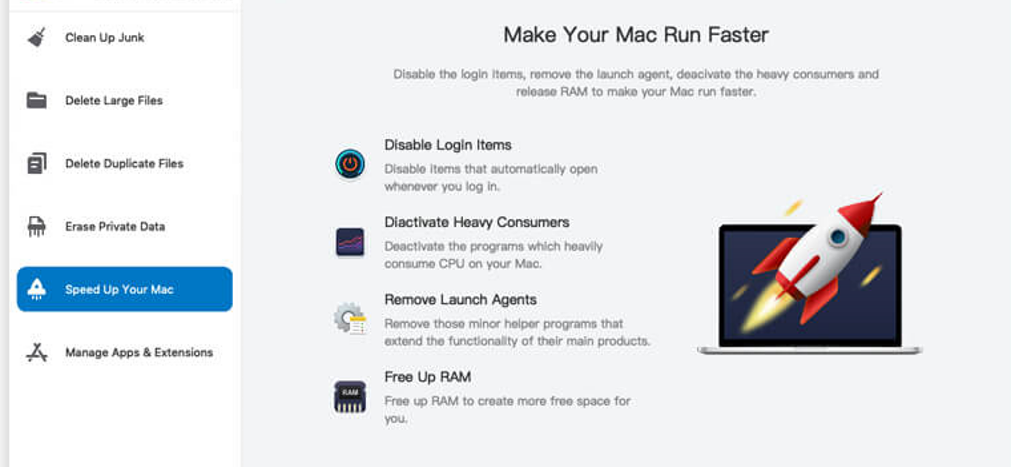
Mac Cleaner currently has six modules, and you’ll find them all on the left side of the interface. These include (1) Clean Up Junk, (2) Delete Large Files, (3) Delete Duplicate Files, (4) Erase Private Data, (5) Speed Up Your Mac, and (6) Manage Apps & Extensions. Since you’re looking for a file shredder, you’ll mostly need the first three modules, which we call the cleaning modules. Here’s a look at what each of these three modules does and how it can help with file shredding:
- Clean Up Junk can get rid of junk files like system junk, app cache, Trash bin files, download files, and more.
- Delete Large Files allows you to take out files with sizes that exceed 50MB. It’s great for freeing up disk space.
- Delete Duplicate Files can detect and delete files that have more than one copy on the computer.
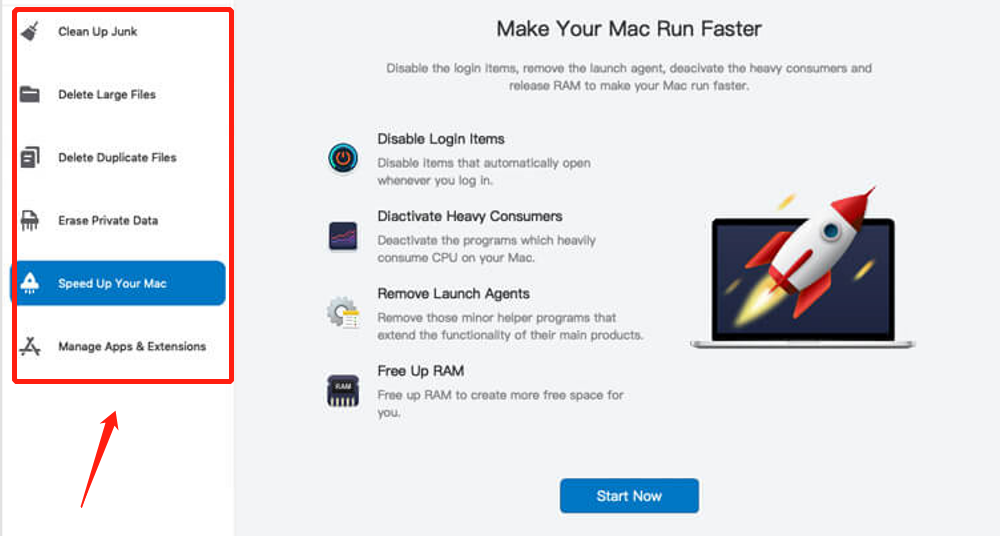
To select a module, you just have to click on it from the left sidebar of the interface.
Step #3: Scan Your Mac for Files
The next step is all about scanning the computer for files. What needs to be done will differ according to the module:
- Clean-Up Junk: The software will consist of two sides. One side says Quick Cleanwhile the other saysDeep Clean. Quick Clean allows you to scan for System Junk, App Junk, Trash Bin, and iTunes Junk, while Deep Clean can detect the same files as Quick Clean, but in addition to three more file categories, including Downloads, iOS Junk, and Unused Disk Images. Select an option between the two, then click the Scan button after selecting.
- Delete Large Files: Click Scan button immediately.
- Delete Duplicate Files: At the center of the interface, you’ll find a field that says Select a File Directory. To its left is a button that says Browse. Click that button. When a popup window appears, use it to navigate to the folder you want to scan for duplicates. Once you’ve specified a folder, simply click the Scan button at the bottom area.

Step #4: Choose a File/s
The idea behind the fourth step is to select the files you’ll be deleting. Again, the steps will differ from one module to another. In the case of Delete Large Files and Delete Duplicate Files, you just have to select a file from the list you’ll see on the next page. The list should consist of files like images, videos, documents, songs, folders, etc. Meanwhile, with Clean Up Junk, there will be a list on the left side that’ll consist not of files, but of file categories, like System Junk, Downloads, and App Junk.
Select a file category first. Upon doing so, a new list will appear on the right side, which would consist of actual files. Select files from that list by clicking on their corresponding checkboxes. To include all items, simply click the Select All checkbox.

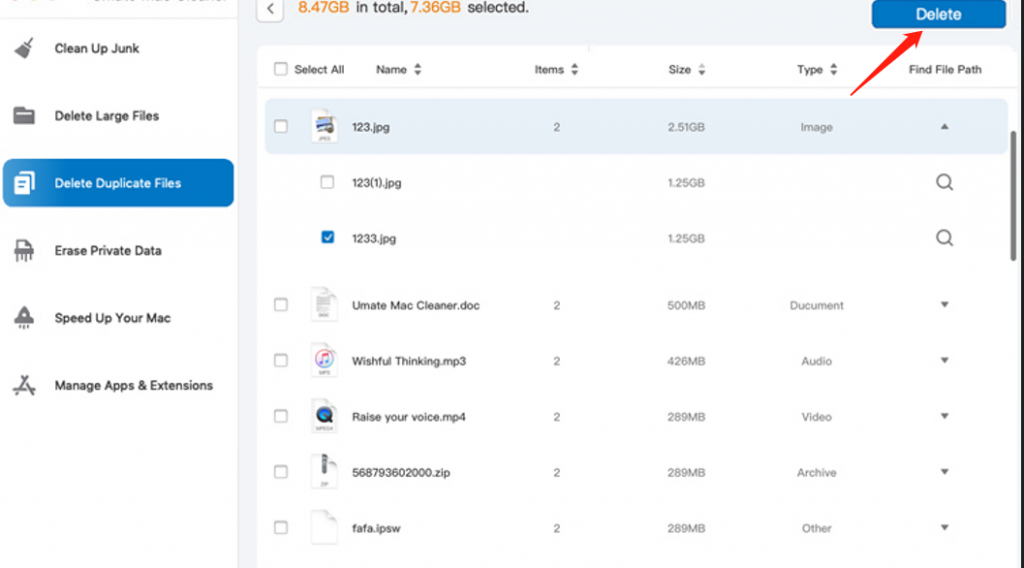
Step #5: Delete the File/s
After you have selected all the files you want to delete from the computer, you simply need to click the blue button at the top-right corner of the window, which should say Clean or Delete depending on the module. That should finalize the process.
At first glance, you’ll find the interface of Mac Cleaner to be a bit flavorless or bland. That’s because it’s designed to be extremely simple and straightforward. There is no fluff, and all the buttons you can find are the ones you can actually use, not like other apps which have a ton of buttons that serve no purpose. That’s the beauty of Mac Cleaner—it’s simple.
Parting Words
File shredders have always been an excellent addition to a macOS computer user’s toolkit. It allows you to delete unnecessary files with ease, which is plenty of help since deleting files on Mac computers typically takes a long time. However, you must also keep in mind that not all file shredders are useful. Some cost more money than their worth, while others are just downright useless. Naturally, you wouldn’t want to waste your money and time on either of these, and that’s precisely why this guide is here. With these x recommendations, you should be able to find the best file shredder on Mac for your purposes.
Latest Articles