

Most Mac users use a handful of apps to accomplish tasks. These apps, particularly the ones with numerous features, often have a considerable amount of storage requirement. Hence, it’s no surprise that applications often take up a huge portion of a computer’s disk space. However, if you have too many apps to count, chances are you no longer use some of them. If you wish to free up storage space, then there’s no better way to do it than to delete a couple of those apps from your computer.
Of course, it’s not going to be as easy as clicking the uninstall button on each app since you must also ensure the app data is completely deleted. With that in mind, this article will discuss how to delete apps on Mac. Let’s start with the first step.
Part 1: How to Delete Apps on Mac
Step #1: Uninstall The App
The first step is to uninstall the app. There are two ways to go about this. One involves using Launchpad, while the other utilizes the Finder app. You can choose any of the two. Let’s start with how you can uninstall the app using Launchpad.
Method #1: Delete Apps Using Launchpad
Launchpad is the app management program for macOS computers. It allows you to manage apps, locate their folders, and most importantly, delete them if necessary. Hence, it’s the perfect solution for your problem, which is to uninstall apps.
Below are the steps on how to delete apps on Mac:
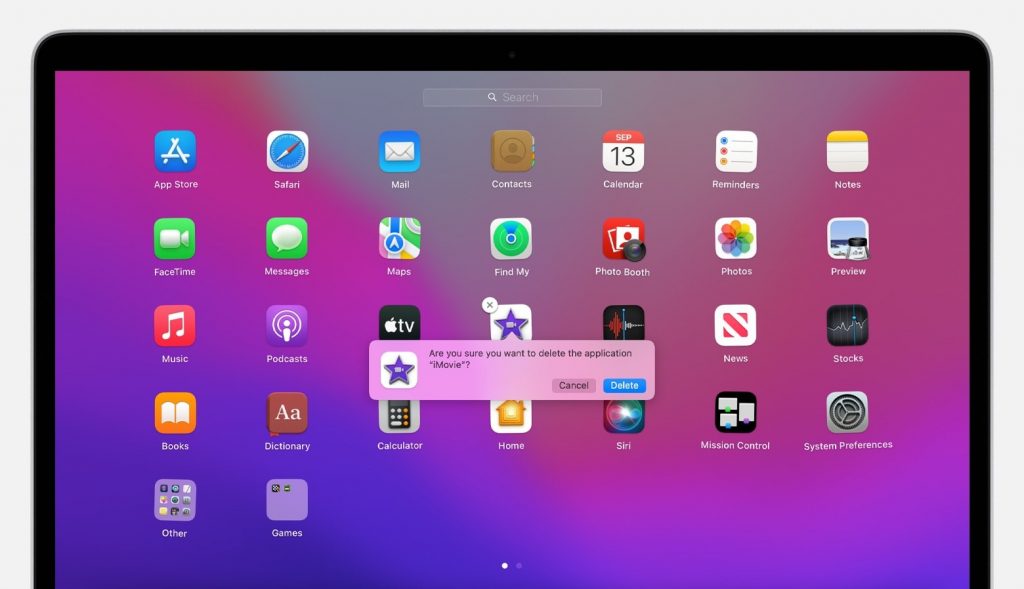
- On your Dock, click the Launchpad icon which should look like a rocket, though in some macOS versions, it’s simply a white box with nine different-colored boxes inside. This will open the app.
- In the Launchpad app, you’ll find a list of all the apps currently installed on your Mac computer. The next step is to enter edit mode so you can delete apps as you wish. To do this, press and hold the Option key on your keyboard.
- Once you’re in edit mode, there will be an X icon on the corners of each app. Find the apps you want to delete and click the X icon on their corners. The X icon is the button to uninstall or delete the application.
- A popup menu should appear. Simply click Delete to confirm the action.
If you cannot find the app that you want to delete, there should be a search bar in the top-middle area of Launchpad. Click that search bar and type in the name of the app you want to delete. Doing so will display that particular application.
Method #2: Delete Apps via Finder
Finder is the file management program for macOS computers. It allows you to navigate through different directories, and it just so happens that your applications are located in a directory. Therefore, it’s also one way to delete apps on Mac.
Here’s what you need to do:
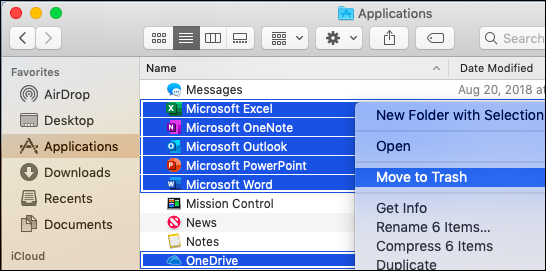
- On your computer, open a session of Finder.
- There should be a left sidebar consisting of different directories. Select Applications from this sidebar.
- Finder will then take you to the Applications folder, from which you’ll find a list of apps currently installed on your computer. Simply click the app you wish to uninstall or delete while holding the Ctrl key on your keyboard.
- Select Move to Trash from the resulting options.
Since you’re technically deleting files rather than uninstalling apps, the files corresponding to those apps will go to the Trash, where they’ll continue to consume storage space from your computer. For that reason, after following these steps, you must also delete the apps on Trash to make sure they don’t take up any storage space.
Step #2: Delete Any Lingering Files
As much as you’d like to believe that those apps are already deleted, they’re not. Chances are the apps you uninstalled in the previous step still have a ton of files lingering on your computer. Of course, you must delete these files if you want to completely erase the apps. You can do this by following these steps:
- Just like earlier, open a session Finder on your computer.
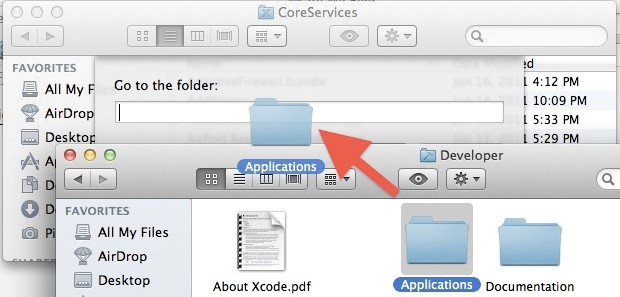
- Click the Go tab which can be found in the top-left corner of Finder.
- Select Go to Folder from the dropdown menu.
Note: Alternatively, you can press Command + Shift + G on your keyboard as a shortcut.
- A popup menu should appear. On the text bar, type in ~/Library.
- Click Go. Doing so will take you to the Library folder.
- There should be a search bar at the top-right corner of the window or at the top center. Click it and type the name of the app you uninstalled on step #1 to locate any lingering files connected o related to that particular app.
- Click on those files while holding the Ctrl key.
- Select Move to Trash from the resulting options.
- Now, repeat steps #6 to #8 on the following folders as well:
- Application Scripts
- Application Support
- Caches
- Containers
- Cookies
- Logs
- Preferences
- Once you’ve deleted all the files in these folders, make sure you go to Trash and delete them again since they’re still going to consume storage space while on the Trash.
Make sure you don’t accidentally delete files from other apps while doing this since that might cause other apps to malfunction. Just look at the file name and you shouldn’t have any issue with this.
Step #3: Get Rid of The App Icon
Even after doing steps #1 and #2, you may notice that the app you uninstalled still has its icon on your Dock. This is because that’s a separate file, and naturally, since the app is no longer on your computer, the icon would only cause confusion.
To avoid that, you must get rid of the app icon, and here’s how you can do it:
- On your taskbar, also known as the Dock, find the icons of the apps you just uninstalled.
- Click the icon while holding the Ctrl key on your keyboard.
- Select Options from the resulting options.
- Click Remove from Dock.
With this, you’ve successfully deleted an app completely
Part 2: How to Delete Apps on Mac With Mac Cleaner [RECOMMENDED]
Although deleting an app’s folder after uninstalling it doesn’t take much effort and time, it can still be a hassle as it adds an extra step to the uninstallation process. Not only does it make the process more time-consuming, but there are also instances where you’ll receive a pop-up error message that says you can’t delete the app folder, making the process even more of a hassle. If that’s been bothering you, worry not, because, with Mac Cleaner, that step will no longer be necessary.
Mac Cleaner is a software with file cleaning capabilities. It can delete all sorts of files and even uninstall apps while erasing all their traces from your computer, meaning it also deletes the app’s folder. Here’s how you can use this software:
Step #1: Download, Install, and Set Up Mac Cleaner
On your computer, open any browser and visit the Mac Cleaner download page. There, click the Download Now button to download a DMG file. Run this DMG file to start the installer, then follow the onscreen instructions to make sure you don’t make a mistake. Once the installation is complete, the Mac Cleaner software should open automatically.
Step #2: Choose Manage Apps & Extensions
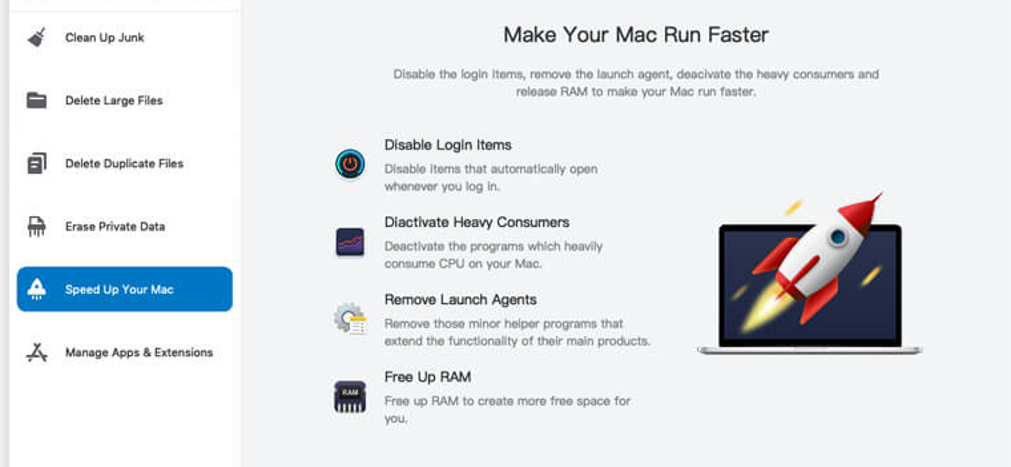
On the left side of the software, you’ll find six different options, namely (1) Clean Up Junk, (2) Delete Large Files, (3) Delete Duplicate Files, (4) Erase Private Data, (5) Speed Up Your Mac, and (6) Manage Apps & Extensions. These correspond to the modules Mac Cleaner has. Each module can perform various tasks, but for your purposes, you must select Manage Apps & Extensions. This module allows you to remove extensions and uninstall apps.
The module uninstalls apps and deletes their data, including their folder on your computer. Hence, it’s the perfect solution for your problem. To select the Manage Apps & Extensions module, simply click on it from the left sidebar with six options.
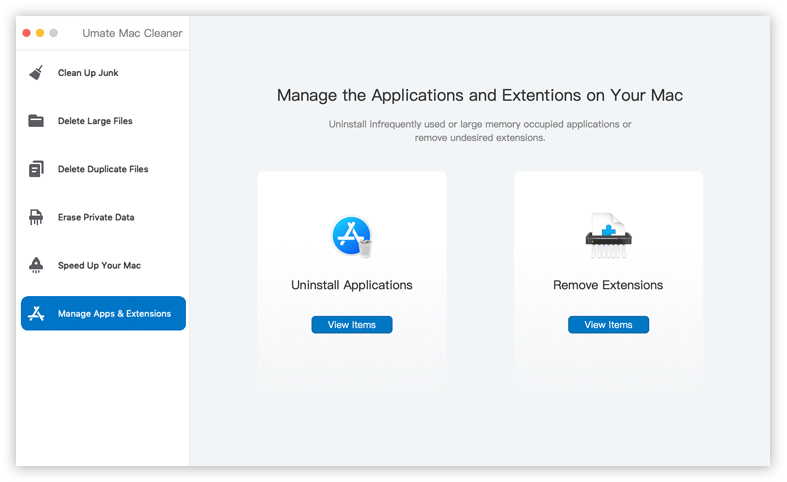
Step #3: Click the View Items Button
Upon selecting Manage Apps & Extensions, texts will pop up on your screen. They’ll explain how the module works and its features. There will alsobe two sides in the interface, one that says Uninstall Applications, and one that says Remove Extensions. Underneath each side is a View Items button. Click the button beneath Uninstall Applications.
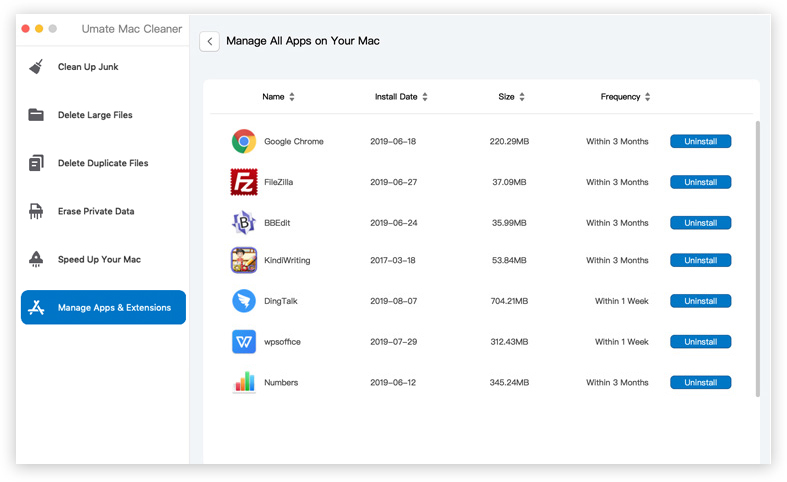
Step #4: Delete the App
After the scan, you’ll get a list of applications that are currently installed on your computer. To delete an app, you simply have to click the Uninstall button to the left of the app you wish to delete. This should finalize the process.
Doing this doesn’t require you to find the app folder yourself. The Mac Cleaner software does it automatically, meaning there will be no traces of that app ever being on your computer. That’s the beauty of this cleaner software.
Part 3: Going Forward
Leaving unused apps alone is almost always a bad idea. Not only do they consume storage space that you would’ve been able to use for more useful stuff, but they can also cause compatibility issues with the software you use. That’s why it’s advisable to regularly check your computer for unused apps and uninstall them accordingly, but as you may have realized, the issue doesn’t end there. When uninstalling an app, their app data might remain on the computer, so it’s not that easy to learn how to delete apps on Mac as you can’t completely uninstall apps with one click. But that shouldn’t be an issue with this guide.
Latest Articles