

If you have just recently transitioned from Windows OS to macOS, you may struggle to accustom yourself to Mac’s interface. After all, while they do have several similarities, these two operating systems have quite a few different mechanics. The interface looks different, the keyboard has different keys, and so on. In fact, if you have yet to touch or see a macOS device before this, you may even struggle with the most basic operations that you can very easily perform on Windows PCs.
In particular, you may find it difficult to select multiple files on a Mac device, which is understandable since all the different things can add to the overwhelming factor. Nevertheless, there are actually several ways to go about this.
Part 1: 4 Ways to Select Multiple Files on Mac
There are different reasons why you might want to select multiple files on Mac. It might be that you wish to move all files into a different folder. Maybe you simply plan to delete a select few in your folder to clear up some space. Depending on your purpose, the ideal method would differ. In that regard, here are four ways to select multiple files on Mac.
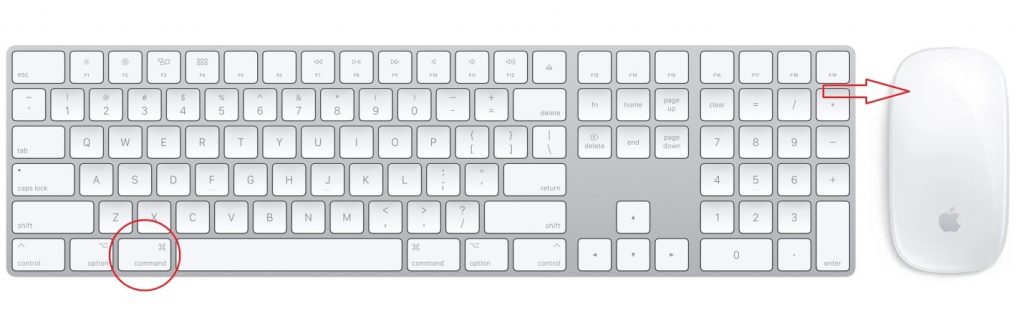
Method #1: Command-Select
If you want to select multiple files but not too many, the Ctrl-Select method should work for you. It involves selecting one item from a folder, holding the Command key on your keyboard, and then selecting the items you wish to add to the selection.
Though it technically allows you to select multiple files on Mac, it’s not a method that enables you to select multiple files at once. It’s only ever useful if there are only a couple of items you wish to select. Furthermore, this method can be quite inconvenient since you might forget to hold down the Command key and select a file. By selecting an item while the Command key isn’t held down, your selection will reset, highlighting only the newest item you selected if there is any.
Note: The Command key is the macOS counterpart of the Ctrl key on Windows PCs.
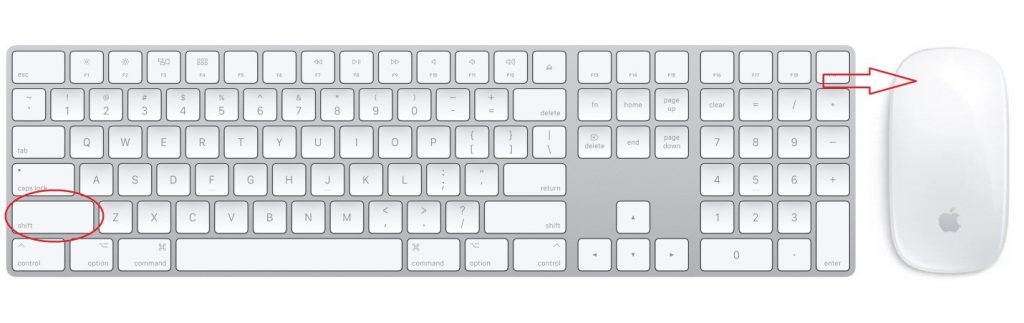
Method #2: Shift-Select
The Shift key allows you to select files on a from-to basis. It requires you to first select an item, hold the Shift key, then select another file from the same folder. By doing this, you can select both files as well as all the items included in between.
For example, if you select the 5th file in the folder, hold the Shift key, then select the 67th file in the folder, you can select both files as well as the 6th to the 66th file. While it may not seem particularly useful, this method would come in handy if your files are arranged in a certain order. Suppose you have a folder consisting of all your photos from your device, and that folder arranges files according to the date created. By using this method, you can basically select files within a specific time range.
Method #3: Clicking And Dragging
If you click on your mouse on an empty space in a folder, nothing happens. However, when you hold down the left-click button and drag it to anywhere, you’ll notice it automatically creates an ever so slightly visible rectangle. Any file or item enclosed within this rectangle will automatically get selected, effectively allowing you to select multiple files at once.
Of course, since the files must be enclosed in the same rectangle, those files must be adjacent to one another. You can’t just select the first item and the last item in the folder without enclosing the items in between within the rectangle.
Basically, it’s a downgraded version of the Shift-Select method. However, the clicking and dragging method becomes incredibly useful if you combine it with Command-Select. Simply click and drag your mouse to select several items from one part of the folder. Then, let go of the mouse and hold the Command instead. By clicking and dragging on another portion of the folder, you can select multiple files from different parts of the directory.
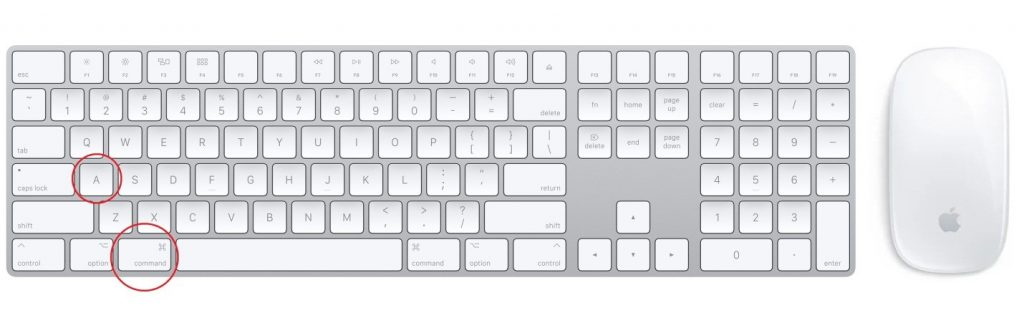
Method #4: Command-A
If you wish to select all files at once rather than just multiple, you can very easily do so by pressing the letter A while holding the Command key. Make sure you’re on the folder from which you want to select all files. Doing so will highlight every item in that particular directory. This is particularly useful if you plan to move or delete the entirety of a folder at once.
You can also use this method if the files you wish to select are higher in number than the files you don’t want to select. For example, if the folder consists of 439 items, and you intend to select 437, with plans to exclude two items.
To do so, simply press Command-A on your keyboard. This will highlight all items. Then, hold the Command key and select each item you wish to exclude. Selecting an already selected file will deselect it, excluding it from the selection.
The Command-A method is also useful if you wish to select files that fit a certain criterion. For example, if you want to select all files with the word “final” in their file name, simply search for that specific file, then on the search results, press Command-A. Similarly, you can select all files with the same category by filtering your search results by Kind. The possibilities are endless.
Part 2: How to Select Multiple Files And Delete Them Accordingly With Mac Cleaner
As stated earlier, there are several reasons to select multiple files on Mac, and that reason will influence the method ideal for your scenario. However, if your goal is to simply clear up some space on your Mac, you might not actually need to select multiple files on your Mac and delete them manually. That takes too much time and is a lot of work. If you wish to streamline the process, you might want to consider using Mac Cleaner—a program that allows you to scan for and delete files that are no longer necessary to your Mac’s operations. Here’s a guide on how to use the software:
Step 1. Launch Mac Cleaner
Download and install Mac Cleaner on your computer. Afterward, launch the software.
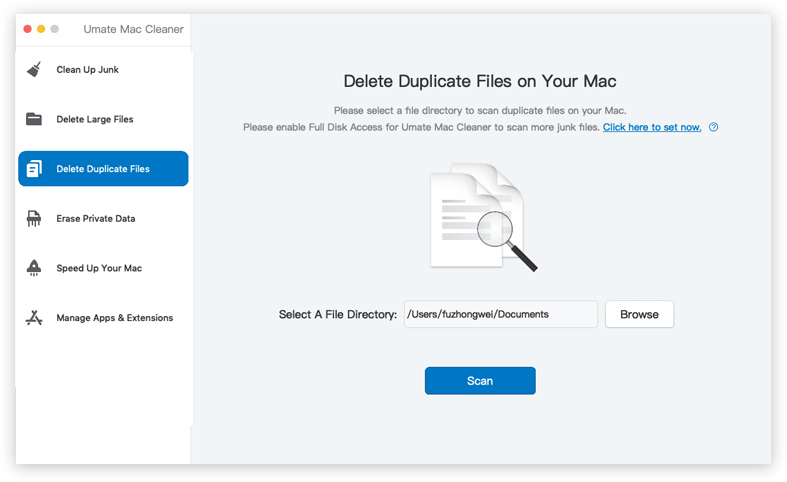
Step 2. Select A Module
The first screen that’ll greet you once you open the program will consist of a left sidebar with several modules as options. Select a module according to your purpose. For your reference, the options include the following:
- Clean Up Junk
- Delete Large Files
- Delete Duplicate Files
- Erase Private Data
- Speed Up Your Mac
- Manage Apps & Extensions
Step 3. Scan for Files
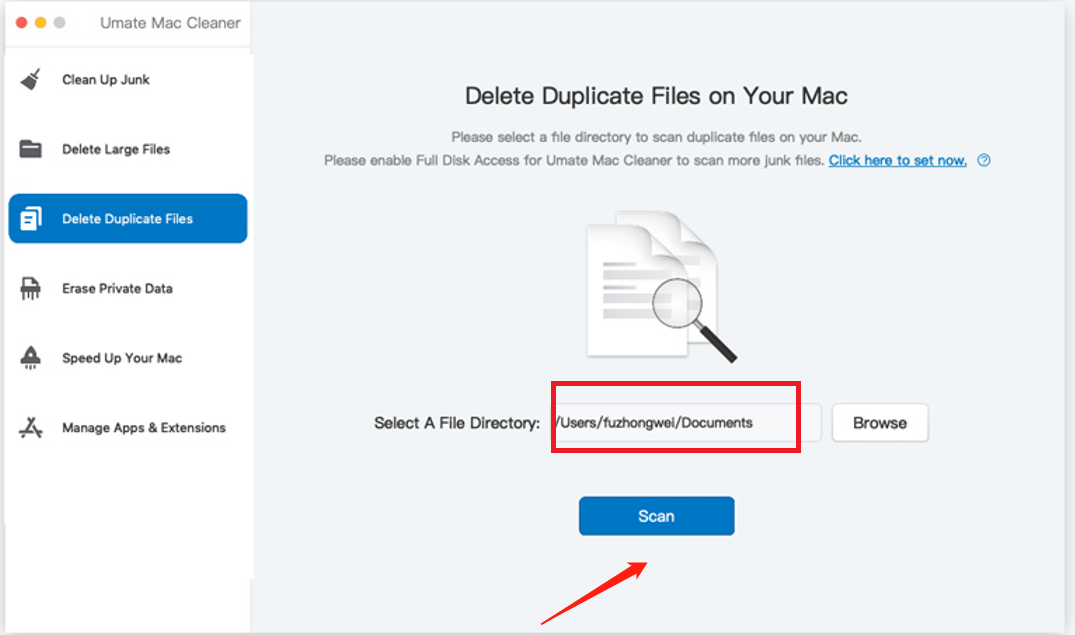
Upon selecting a module, the central screen will display information about that particular module. Read this information to learn more about the option you chose. Then, click Scan to proceed to scan your Mac for files. In the case of Delete Duplicate Files, you must first specify a file directory.
Step 4. Select Files to Delete
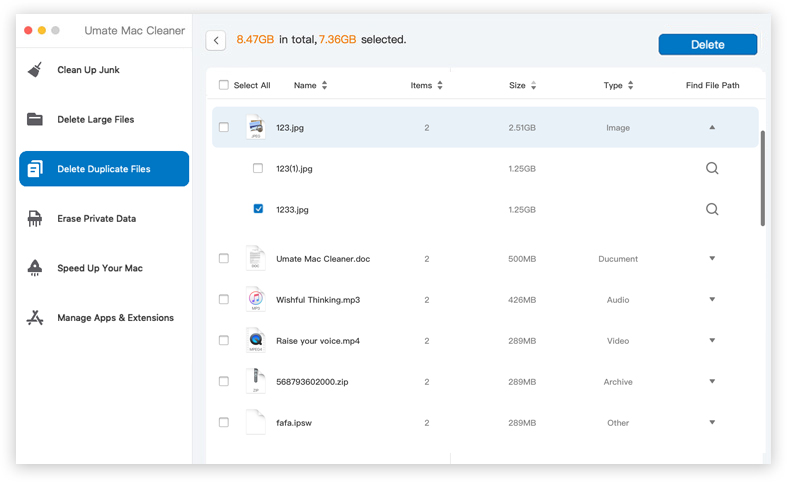
After the scanning process, the software will display a list of items you can delete. Simply tick the corresponding boxes of the files you wish to delete. You may also click the Select All box to select all items.
Step 5. Delete/Erase The Files
Finally, click Delete or Erase to finalize the process.
Part 3: Final Words
Multiple file selection might be one of the most basic operations in a computer, but it’s definitely a useful functionality. It essentially allows you to operate on multiple files at once, like deleting, moving, or copying. However, if you’re a new macOS user, you may struggle to figure out how to perform this action. After all, the interfaces of Windows OS and macOS computers are incredibly different. Nevertheless, with this guide, that shouldn’t be much of an issue.
Latest Articles